


The actuator is spring driven and it sounds worn, so I've decided to replace it with a brand new one. Also might as well put an IPD HD CBV on. These upgrades should help to achieve more accurate boost.
Since I've come this far already, it would be half-assed not to remove the turbo and get a rebuild kit. Now that the car needs new heater hoses, I have to drain the coolant anyway. Tomorrow I'll work on those banjo bolts so I can loosen the oil/coolant lines and (hopefully) get the turbo out. A new banjo bolt kit is only $10. Turbo rebuild kit is $75, actuator is $75, HD CBV is $63. I also plan to have the compressor properly rebalanced by a shop when I'm finished. Wish me luck.
Let's talk turbochargers
This topic is in the MVS Volvo Repair Database »
Let's Talk Turbochargers: New or Rebuild
Here's the compressor removed from the housing. Not an easy feat. There is a giant circlip holding them together. First I tried the so-called heavy duty snap ring pliers from auto zone, but they wouldn't even move the clip at all. Next I tried some larger craftsman ones. I managed to move one side of the clip. Then luckily my neighbor came over, the one who replaced my axles for me. He managed to squeeze both sides of the clip while I jammed a flat head screwdriver between it and the housing. Then somehow he pried them apart and the compressor section popped right out. In order to do that properly you really need a serious professional pair of pliers. I saw some knipex ones on the internet that look much better than what I could find in any store. My neighbor said maybe snap-on or mac tools makes something specialized for that purpose.

Next step is to clean the top of the compressor wheel and mark it. My instructions say to mark the top of the nut, bolt and compressor shaft with a sharpie, which differs from the instructions in the thread that we've been following. So as long as those line up, there should be no need to have the comprsesor rebalanced.

Next step is to clean the top of the compressor wheel and mark it. My instructions say to mark the top of the nut, bolt and compressor shaft with a sharpie, which differs from the instructions in the thread that we've been following. So as long as those line up, there should be no need to have the comprsesor rebalanced.
My instructions say to mark the top of the compressor shaft, nut and wheel like this. I decided to add the marks at the bottom of the wheel and housing myself. I also marked the turbine wheel, heat shield and housing on the other side. Hopefully the sharpie won't wash off. Perhaps I'll gently inscribe these lines. You also want to be careful not to rest the unit on the turbine wheel when setting it on your work table. That's why I carefully place the shop towel underneath. They've included a new nut in the rebuild kit, but with their method of marking I guess you have to use the old one? I'll ask them about that.

As a backup, before I marked anything, I lined up the bottom of a compressor wheel fin with the big letter H on the right there. These pictures are my final safety. Worst case I would have to get the thing rebalanced. I may take it to a nearby turbo shop to torque the nut correctly anyway. The low torque screwdriver I was looking at cost over $170. Of course, if all these marks still line up then the torque driver shouldn't be necessary either.
As a backup, before I marked anything, I lined up the bottom of a compressor wheel fin with the big letter H on the right there. These pictures are my final safety. Worst case I would have to get the thing rebalanced. I may take it to a nearby turbo shop to torque the nut correctly anyway. The low torque screwdriver I was looking at cost over $170.
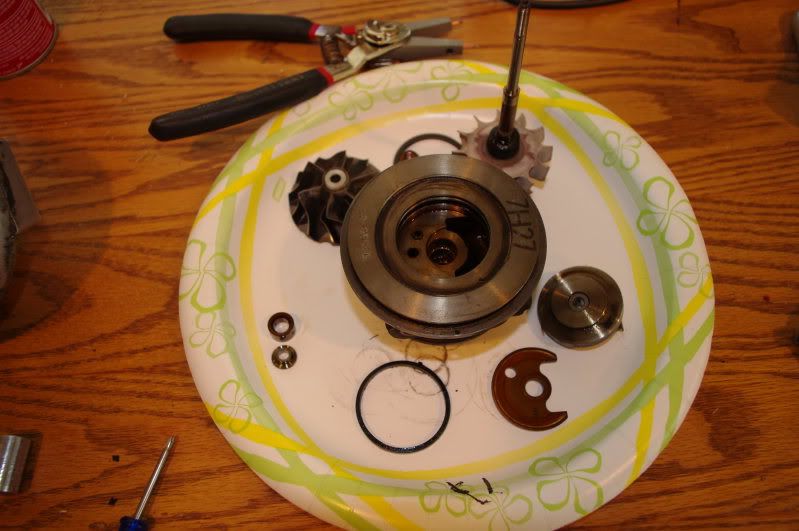
Here it is all broken down.
Pretty yucky in there.

The turbine wheel.

The rebuild kit.
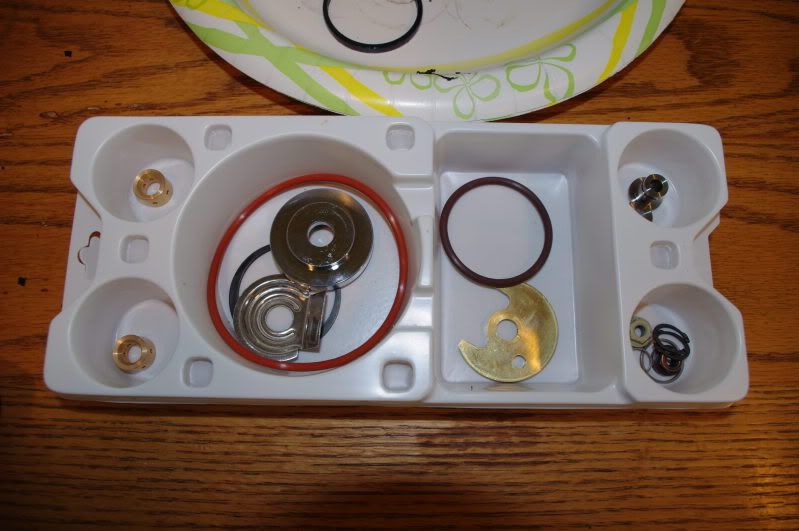
New and old thrust bearings.

Now I must set up the blasting cabinet. I picked up 50 lbs of fine grain glass bead this morning. Oh, I did end up inscribing some markings with a small flat head screwdriver. That way I don't have to worry about blasting the sharpie markings off when I clean everything.
Pretty yucky in there.
The turbine wheel.
The rebuild kit.
New and old thrust bearings.
Now I must set up the blasting cabinet. I picked up 50 lbs of fine grain glass bead this morning. Oh, I did end up inscribing some markings with a small flat head screwdriver. That way I don't have to worry about blasting the sharpie markings off when I clean everything.
Last edited by j_cd on 20 Jul 2010, 10:08, edited 1 time in total.
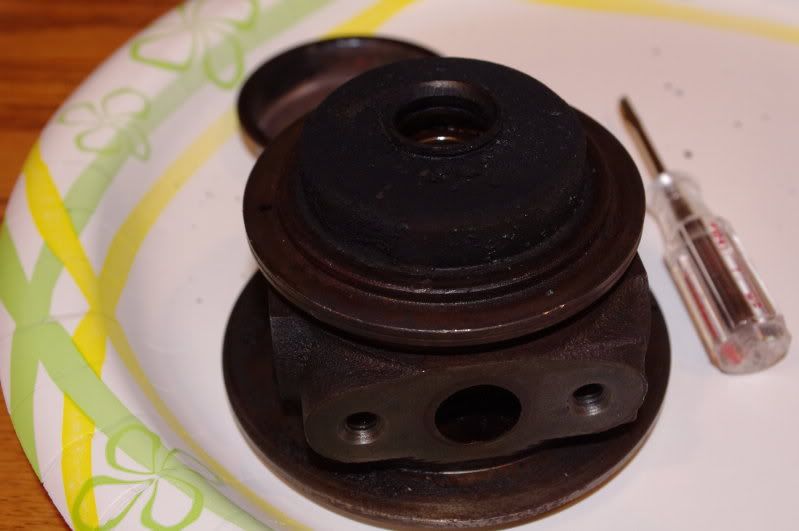
Removing the heat shield cap on the turbine wheel side was difficult. I had to pry it up with a small flat head screwdriver. At first it seemed impossible, but after a second and third try I finally got it. Good thing too, the inside looks like burnt charcoal.
I ordered the Oetiker tool and clamps almost 2 weeks ago. I thought the second email said they had shipped, but I just called and they're apparently on backorder. Not thrilled with that company, so I cancelled the order. I'll just use regular clamps wherever I removed an Oetiker. Too bad.
The glass bead blaster really gets parts clean.

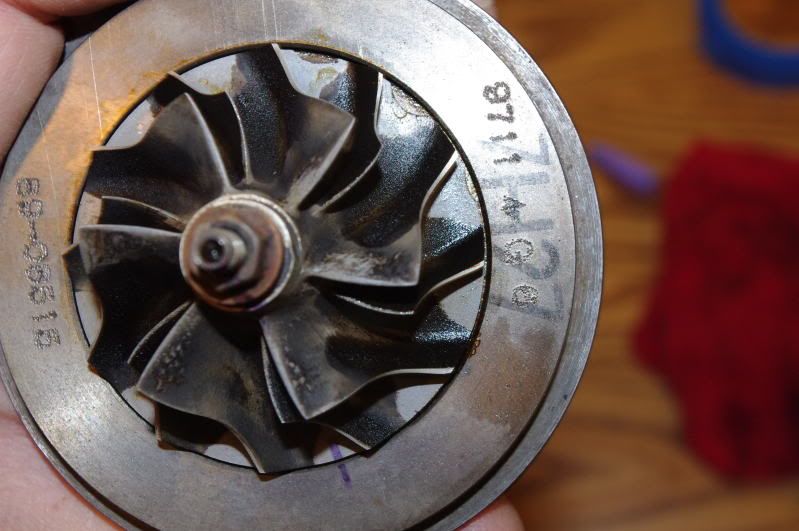
Turbine

Compressor Wheel

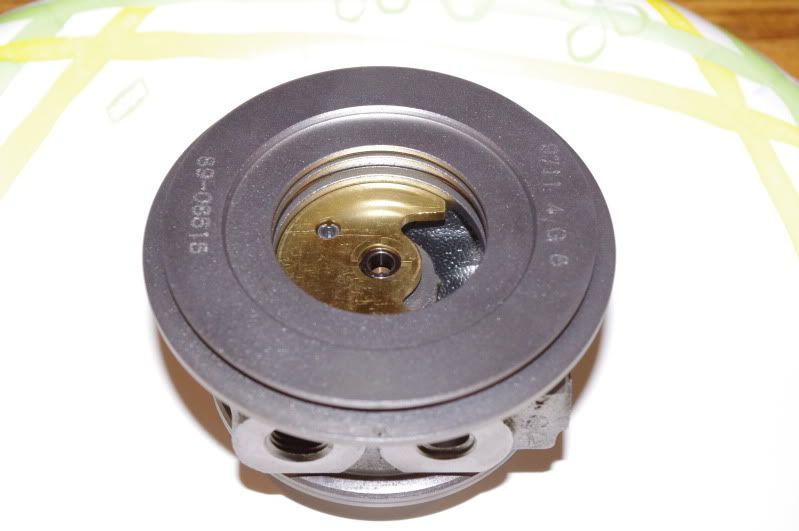
CHRA Compressor Side
CHRA Turbine Side

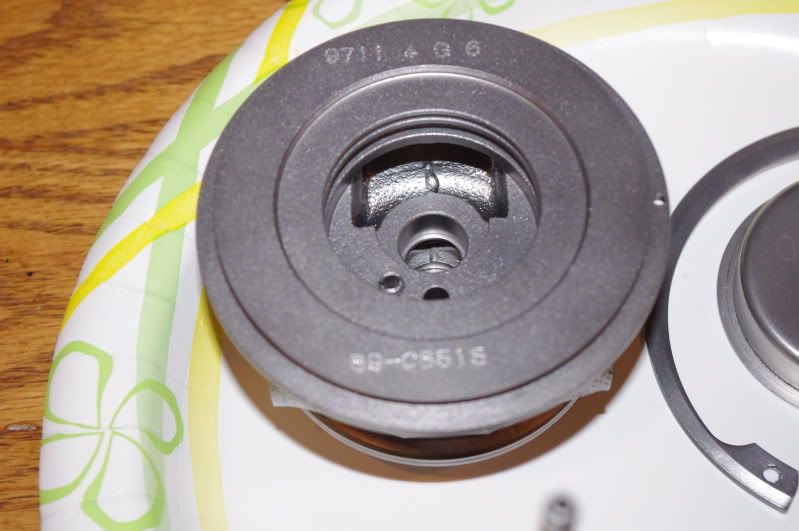
Housing Logo Side

CBV Port
New Thrust Plate Installed
Reassembled (except for the snap ring)

I can't get the small snap ring back in. Some of my markings were etched in carbon deposits, not in the metal, so I'm going to bring it to a turbo shop for rebalancing of the wheel anyway. I'll have them deal with the evil snap rings.
Turbine
Compressor Wheel
CHRA Compressor Side
CHRA Turbine Side
Housing Logo Side
CBV Port
New Thrust Plate Installed
Reassembled (except for the snap ring)
I can't get the small snap ring back in. Some of my markings were etched in carbon deposits, not in the metal, so I'm going to bring it to a turbo shop for rebalancing of the wheel anyway. I'll have them deal with the evil snap rings.
Just got back from the turbo shop. Glad I brought it there. It is incredibly easy to mess up the tiny piston ring that goes on the oil flinger/deflector. I had offset the two sides a bit when I put it together. Apparently if both sides of the piston ring don't line up perfectly it will throw the whole thing out of whack. Luckily this place has drawers full of parts. The new piston ring didn't fit the compressor seal plate that came with my kit, so he said "piece of junk" and tossed my Chinese ebay part aside, installing a new one. I laughed.
He basically re-did my rebuild, making sure to get all the grit out of the CHRA and lubricating everything with oil during installation. He smoothed a few compressor fins with a grinding wheel during the balancing. Then he put the CHRA into the turbo housing and popped that snap ring in like a freakin' Lego. I guess after you've done something thousands of times it gets pretty easy.
All in all I'm very happy to have had my turbo rebuild finsihed off by a professional for $50 out the door. I highly recommend this shop for turbo service and rebuilds. Ask for Mike.
http://turbocharged.com/main.htm
-
vjaneczko
- Posts: 1550
- Joined: 27 March 2006
- Year and Model: 2006 S60R
- Location: San Antonio, TX
- Been thanked: 6 times
Dude, that's sexy clean! If I ever get the huevos to do this job, I'll reference this write-up for sure!j_cd wrote:The glass bead blaster really gets parts clean.
"He attacked everything in life with a mix of extraordinary genius and naive incompetence, and it was often difficult to tell which was which." - Douglas Adams
1997 855 GLT - R.I.P.
2006 S60R - For ME!
1997 855 GLT - R.I.P.
2006 S60R - For ME!
Yes, you too can be a bead blasting artist! Any cheap cabinet will do. Don't mind the little grits of glass in your mouth afterwards. The fine glass is like moondust, it's unavoidable.vjaneczko wrote:Dude, that's sexy clean! If I ever get the huevos to do this job, I'll reference this write-up for sure!j_cd wrote:The glass bead blaster really gets parts clean.
The compressor I got from Harbor Freight didn't even work though. I went on their site and read some reviews. I think the problem is that it's too power hungry... takes 15.5 Amps to start. I'll be returning it.
So I borrowed my neighbor's trusty little Craftsman and got to work. With such a small compressor I would get about 3 blasts and then have to wait for 15 seconds while it charged. It's loud too. I want to blast my intake manifold, but with that compressor it would take forever. I need the 15 gallon De Walt stand up unit for $390.
Only problem I've got now is the heat shield cap underneath the turbine wheel is loose and can touch the fins. I'll have to put a thin layer of locktite or something to keep it in place.
Last edited by j_cd on 27 Jul 2010, 14:28, edited 1 time in total.
-
- Similar Topics
- Replies
- Views
- Last post
-
- 15 Replies
- 3222 Views
-
Last post by precopster
-
- 4 Replies
- 1343 Views
-
Last post by callahanoffroad