


I attempted it and was moderatly successful, but I have also learned a few things that you might find valuable if you want to do something similar. Here a few photos of the positioning, but I would recommend that you read the installation instructions for IPD's kit before referring to the below. it should make much more sense.
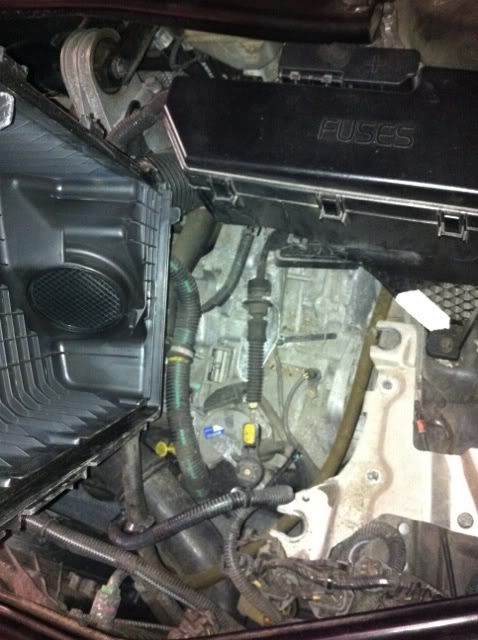
Here is the space where the airbox fits into the engine bay. I removed the box to perform the surgery on it. I went with a 1.5 inch fitting, but in hindsight, this is a bit too big. I should have gone with a 1" fitting for the inlet to allow more options for positioning. You will need to make sure that it is as close to the side of the box as possible. The wheel well and the engine "K" frame all come into play if you don't have it right up against the edge on the interior of the airbox. All of these fittings can be found in the electrical conduit section of the hardware store.
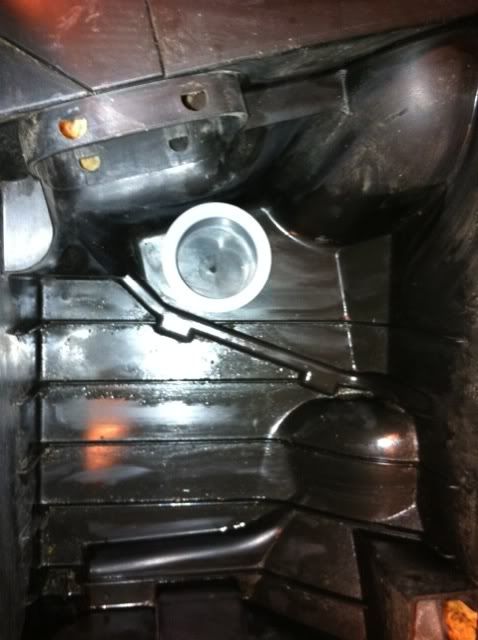
Notice the position to the stock cold air intake to wher the new hole will be. Having that 1" opening will allow you to drop the flange in without hitting the ribs on the airbox. I made a mess of the ribs by not accounting for where the flange would sit in the box (to hold it up). You will want to use a nice silicone caulk to really seal that flange against the airbox to create an airtight seal. I let mine cure for about 18 hours after installing the box in place.
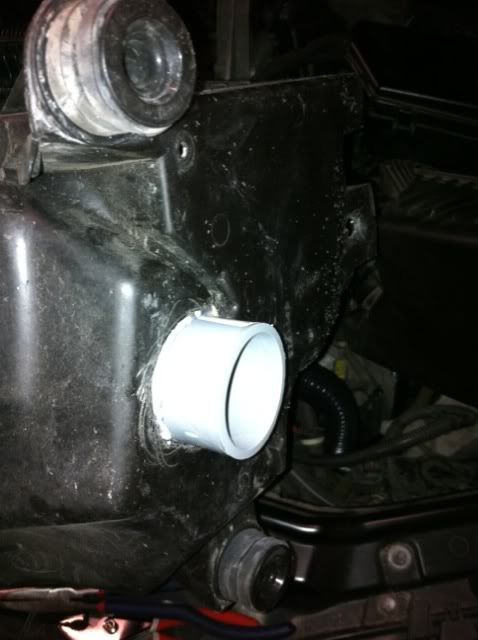
The female piece that you attach to the bottom of the airbox flange should not extend too far from the bottom of the box. If you can keep it within 3-4" you should have no problem attaching the hose once the airbox is in place. This will also allow you to disconnect the hose when servicing the area fairly easily.
At this point, you will need to decide on the routing of your hose. From what I could tell, there were only 2 options: curve the hose up and run right behind the stock air intake and create another scoop in the grill for more forced air
OR
route the pipe straight down through the engine cradle and the wheel well and pull cooler air from in front of the wheel well. The second option is much easier and will allow for more room or the addition of an affordable cone filter if you feel so inclined. I used a wet vac foam filter to provide a little more insurance against dust.
I have only been running this for about 3 days and really couldn't tell you about any improvements but it was a fun and easy project to do. With all the fiddling about with different tools and cutters and whatnot, it took about 2 hours to make it workable and seal it.
This was a very cheap project as well coming in at $7.00. If you have to go out and buy all the parts that I used, it might run you a total of $20. Here are the parts I used for this trial:
1.5" Sump Pump hose- 30ft- $12 (better option would be hose by the foot if you can find it in your size.)
Hose clamps- $1.50
PVC fittings- $2.00
Foam filter- $5.00
This was a very easy project that didn't take very long. Fun to do if you are in the middle of performance upgrades and don't have several hudred $$ to spend on what you need.


