Headliner?! I know what you're thinking... why mount this in headliner?
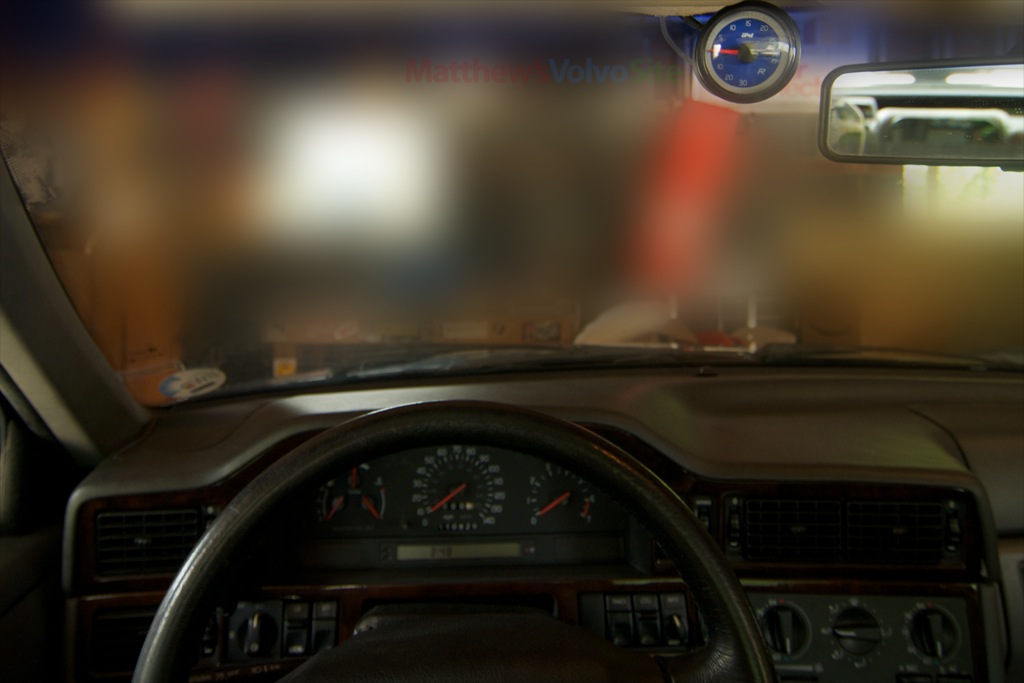
To put it simply, it was the best place for me. I tried A-Pillar, lower-left dash, and instrument cluster, but found that headliner/rearview mirror was best. I'm tall so my eyesight is up there anyway.
I have an A-pillar gauge holder if anyone wants it.
The end result is a nice-looking, nice-functioning boost gauge that dims with the rest of my 1997 850's instrument gauges. Because it's mounted up high it's unobtrusive, and far less likely to be seen by street racers, cops or thieves. It's there when I need to know boost, and invisible to me all other times. It's slightly nearer to my field of vision than any of the other mounting positions I tried, so my eyes are on the road more.
There are several bits missing from this tutorial -- like the 1. connection of the tube to the vacuum source and 2. routing tube through the firewall and 3. how I bent the metal rod to make an attachment anchor for the gauge -- and I will fill those in over the next few days.
Requirements
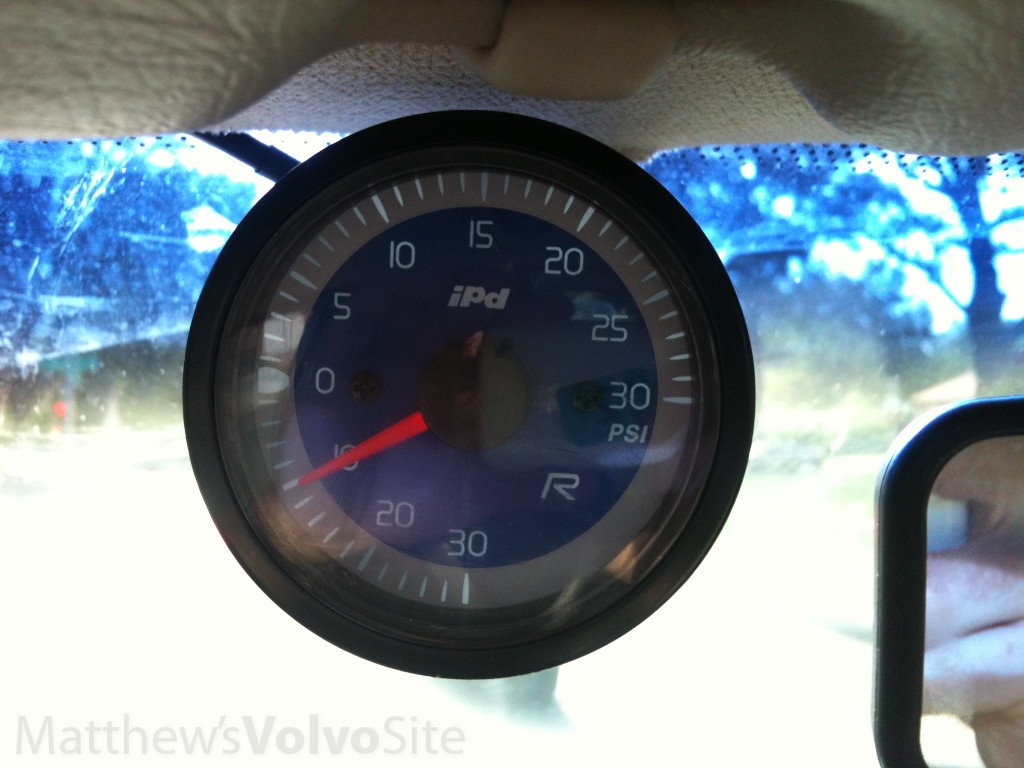
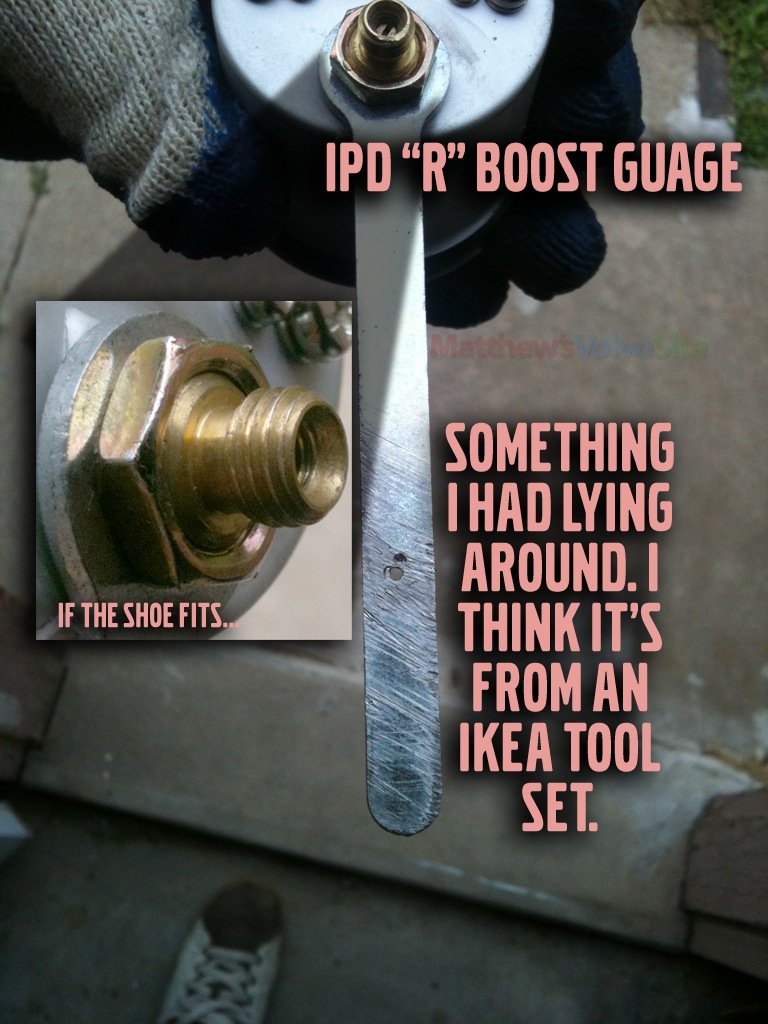
- You need a boost gauge, either lit or unlit. If you choose an unlit one, you don't have to do any electrical wiring, but it won't be illuminated at night. I chose the iPD R Boost Gauge (link to kit).
- Assuming you're going to do the headliner install like mine, you'll need a bracket or some random piece of metal to mount and keep the gauge where you want it.
- You need wiring. I think mine was 18 gauge. Also: misc. electrical bits like those cap connectors. I don't even know if that's the correct term.
- You need a coat hanger to route the vacuum line and wiring up through the dash and into the A-pillar, and finally across the headliner.

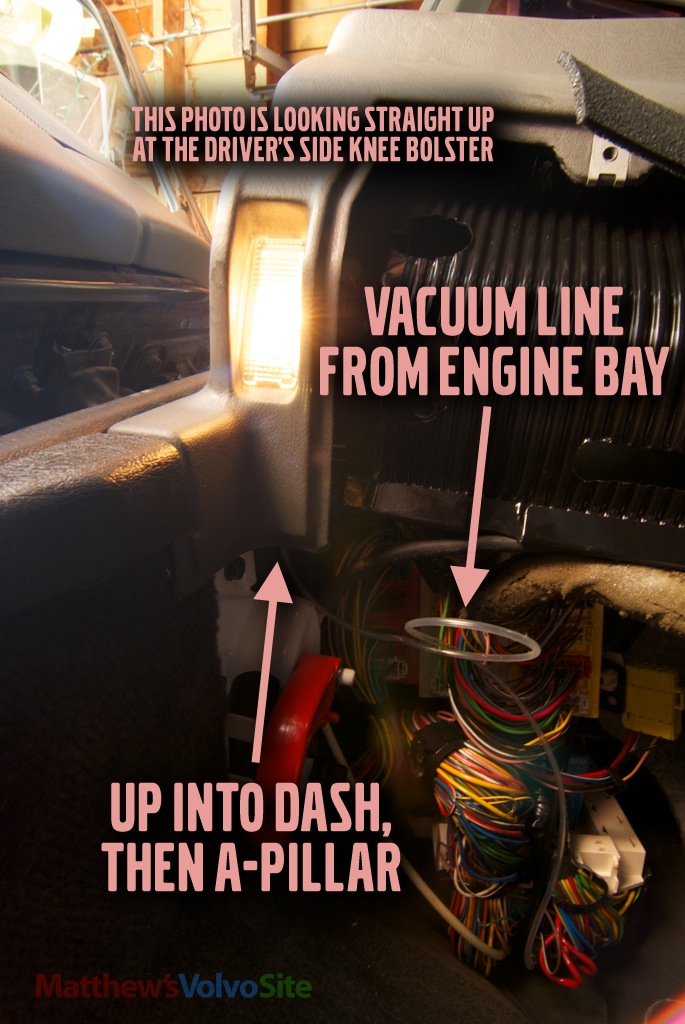
Routing the Vacuum Line
The vacuum line that comes with the iPD gauge is very generous, so I was able to go from the vacuum tree, through the firewall, up through the dash and A-pillar, and over to where you see the gauge. Really!
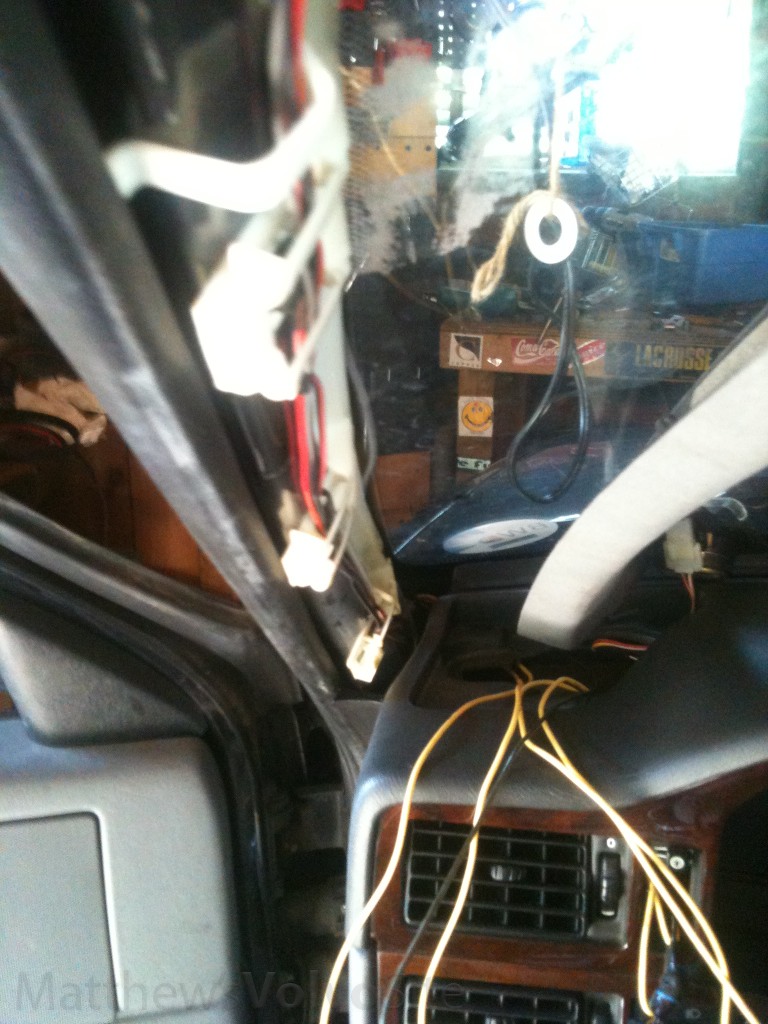
The knee bolster area of the dash has a fairly clutter-free zone that extends up to the dash speaker that lives at the base of the A-pillar. Take the grille off the speaker, then take the speaker out. Then you can run the vacuum line up to the speaker area by taping the end to a coat hanger.
From there, the line joins the two wires from the dimmer switch, and you snake those up the A-pillar, whose trim piece comes off with gentle (or not) prying. There are U-guides inside that pillar made just for wires. Snake your three items up to the top, then out of the pillar and under the headliner. The headliner comes open with a little tenderness, just like the pillar trim.
Working the Headliner
There's no magic here. I just gently seperated the headliner from whatever is above it (insulation? bare metal?) and pushed the two wires and vacuum line into it. They stay put until you get to the gauge. At this point I jammed a small piece of soft plastic after them so they wouldn't start working their way out. Does it look good? No. Will anybody see it besides you and your Volvo enthusiast friends? No. You can't see it from outside the car because the windshield is tinted at the top. From inside the car, you have to be looking for it.
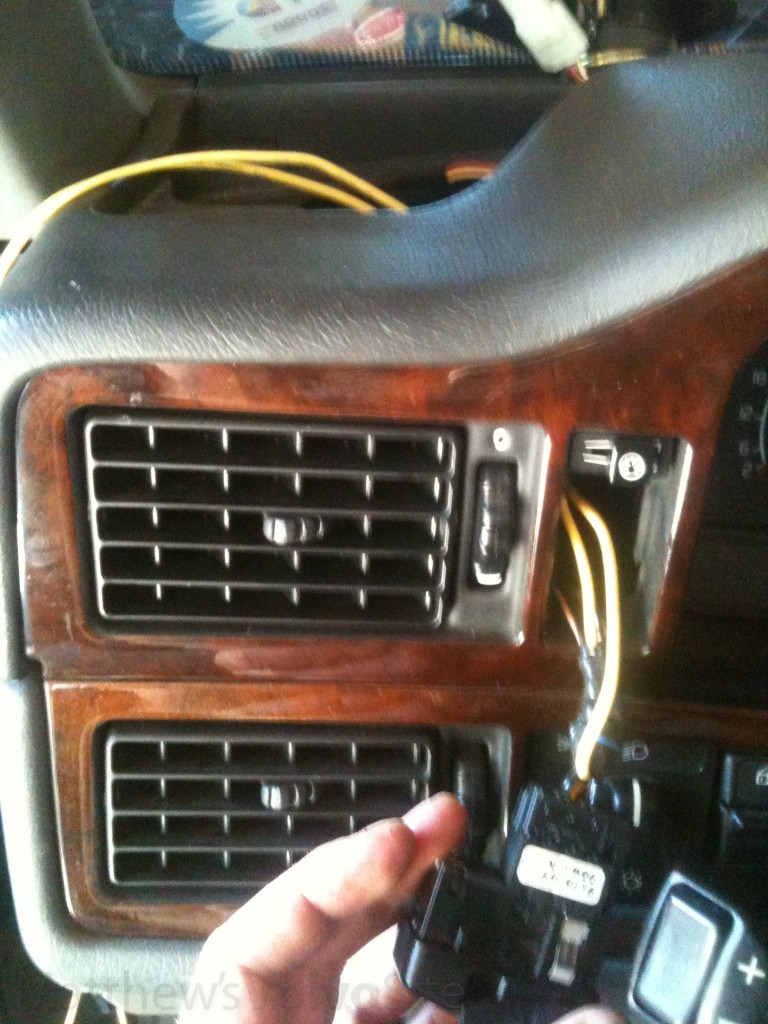
Tap Into the Dash Dimmer Switch
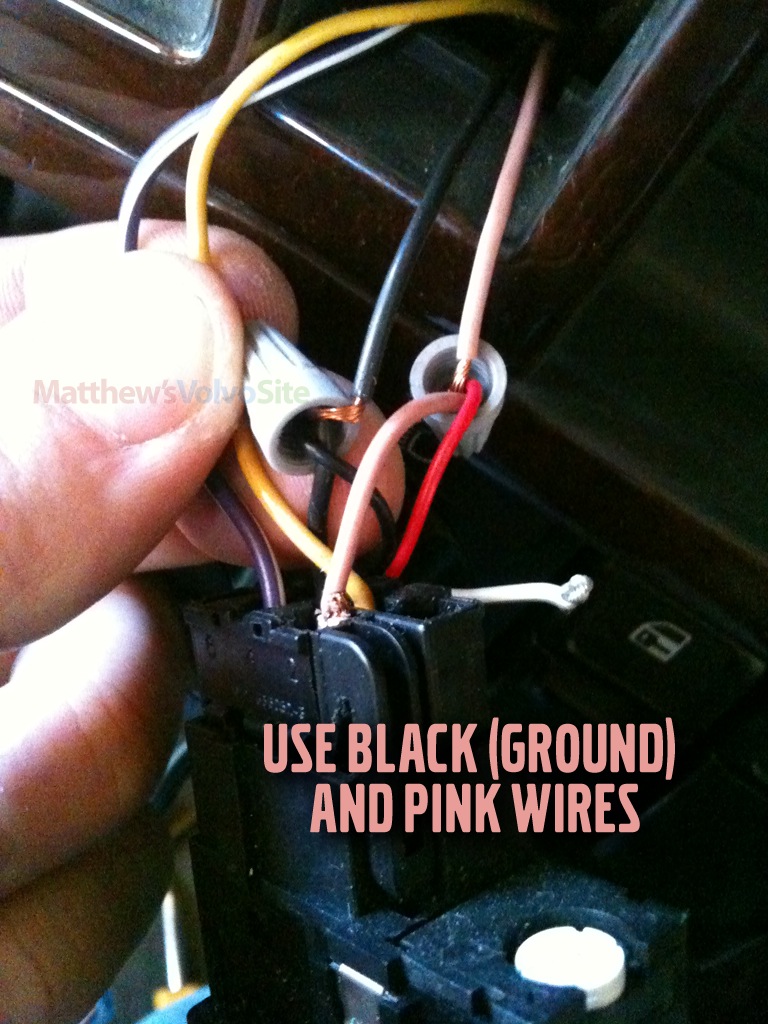
Take the fog light/dash dimmer switch out by gently prying on both sides. It'll pop out. Then splice into it as shown, making sure you have enough wire. Use the coat hanger to guide those wires back to the speaker area.
Fabricate the Gauge Anchor
This is where everybody will have a different method to secure the gauge to the ceiling. I just happened to rummage around until I found something that worked. I ended up bending that piece of metal in my vice grip until the flat part was level with the roof. Two bends I think. Then I simply (and carefully) put a nice dab of Gorilla Glue on the surface -- after roughing it, as seen in the photo -- and pressed it between the headliner and whatever is above it. I pressed up for about 5 minutes. So far, it's held for months, and it feels rock solid.
If you have a pre-made bracket, so much the better.