


Do at your own risk
What you need
Flex plate bolts (10) or Permatex Sealant 59235 if reusing the old ones
Torque converter torx bolts (6) or Loctite (blue) if reusing the old ones
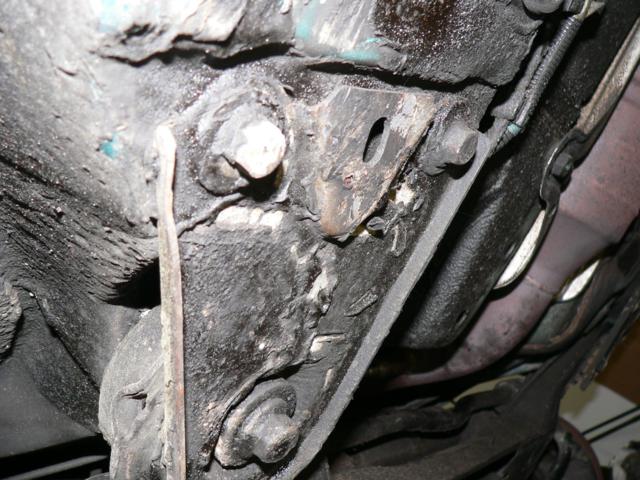
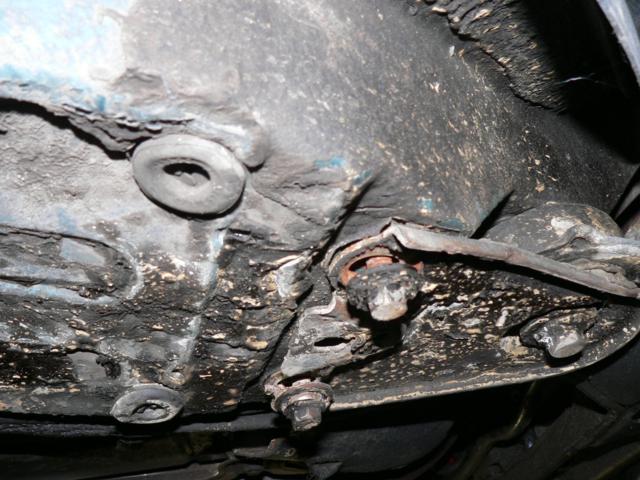
Control arm to sub-frame nuts/bolts (4) mine were heavily deformed
Sub-frame bolts, in theory should be replaced, mine were not deformed
Rear main seal if replacing
Axle seals if replacing
Pump seal if replacing (recommended)
Equipment needed
Engine Hoist
Engine support bar, home made or bought
Decent jack, plus another smaller jack
At least 2 jack stands, I recommend the 6 ton variety for their longer reach
Not too many hand tools, selection of 8, 10, 12, 13, 14, 15, 17, 18mm sockets and a 17mm 12 point socket (for flex plate bolts) as well as socket for the crank pulley, mine was 30mm (this can be borrowed from Autozone / Advance Auto Parts under their axle kit). 13, 15, 17 & 18mm wrenches. Extensions. Couple screwdrivers and pry bars.
I used an impact, made life a lot easier, I recommend the Harbor Freight 1/2" Earthquake for $75 w/ the 20% coupon. Plus air compressor to run it. Also I used an air ratchet made things quite a bit quicker but you don't absolutely need it.
Procedure
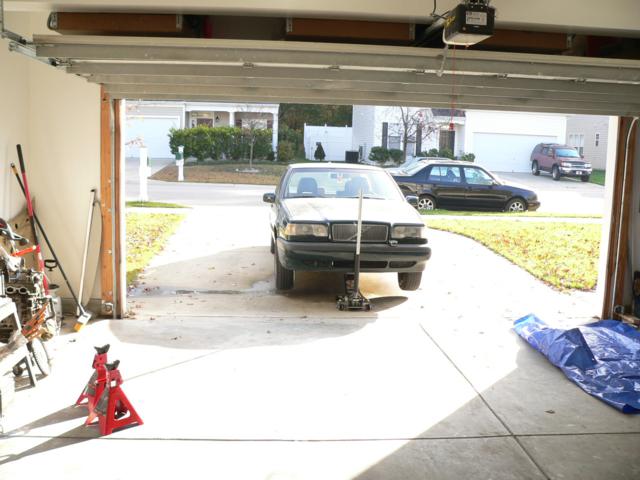
Raise car and clean off underside to make it nicer to work on
Push car back into place on level ground
Just a note, you will notice two different cars. I didn't take as many pictures during this guide so I had to improvise. You may notice inconsistencies throughout the process/pictures, however I mostly followed the Haynes book.
Step 1 removal of items in engine bay
1) Release the steering wheel adjustment and push wheel in and up as far as it will go. Lock down adjustment tab
2) Select Neutral on shift selector in car
3) Remove battery
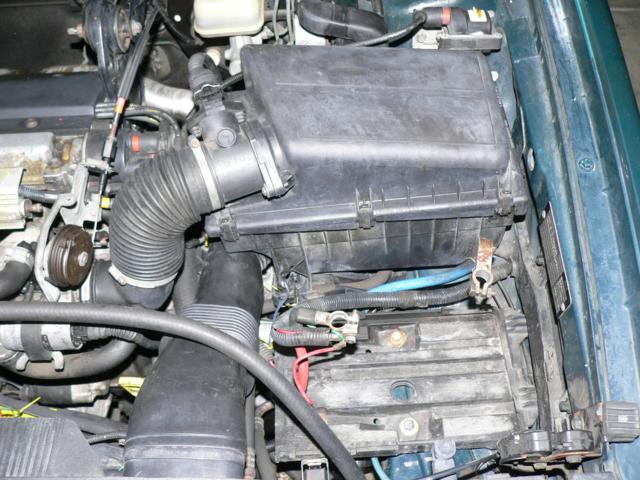
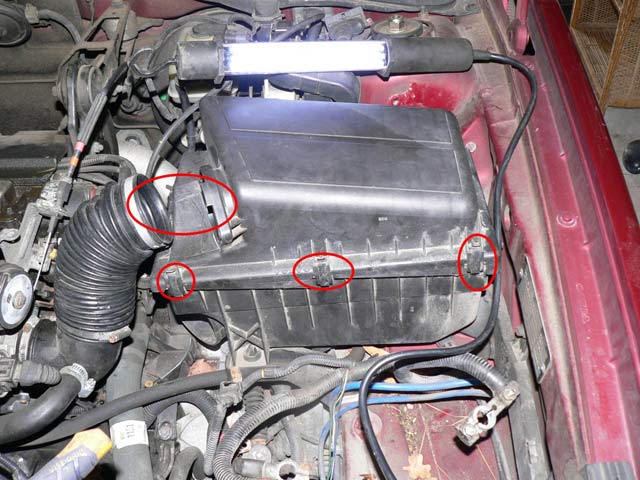
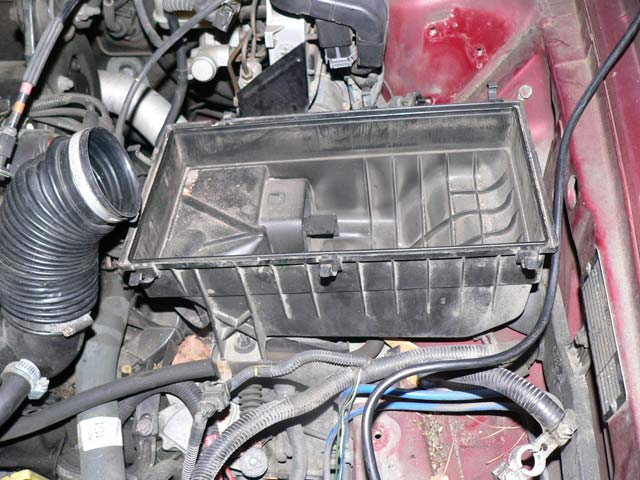
4) Remove air box (unsnap around outside of box) and intake manifold hose. Remove top portion then remove bottom portion by pulling straight up and it should unsnap from its base.
5) Remove the battery shelf (several bolts and items attached to it on bottom as well) and base for the air box. You have to undo the brake vacuum hose line..

6) Release the battery ground cable from the sub frame as well as the grounding point on the transmission/engine (follow it). No need to release the cable from the wheel well - keep the bolt in as it is not necessary to remove it. I recommend screwing the bolt back in so you do not lose it.
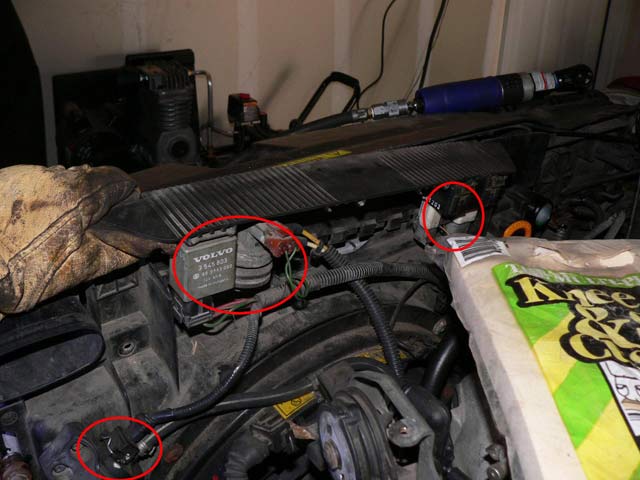
7) Remove the transmission selector control cable on top of transmission. Pry up on the metal tabbed retainer and slide it off. Also release the large wiring bundle plug on top of transmission by pressing down on the center tab then pulling the metal portion up.

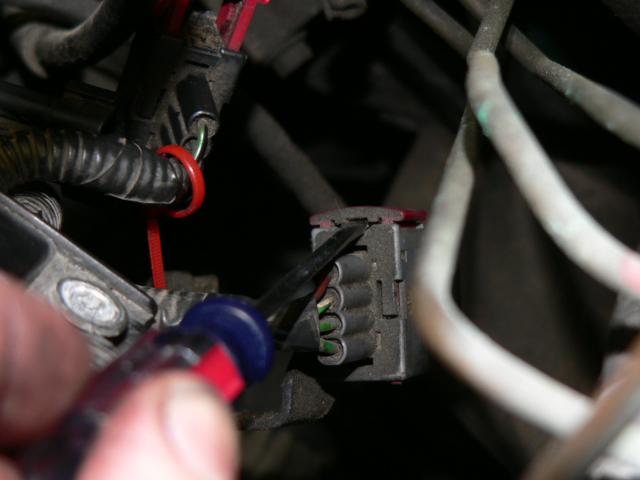
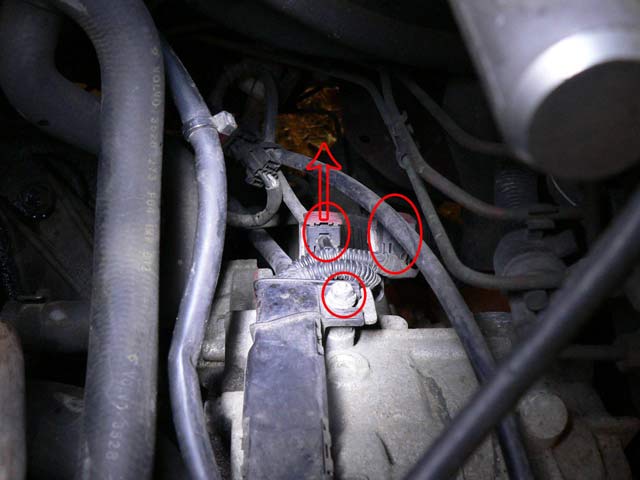

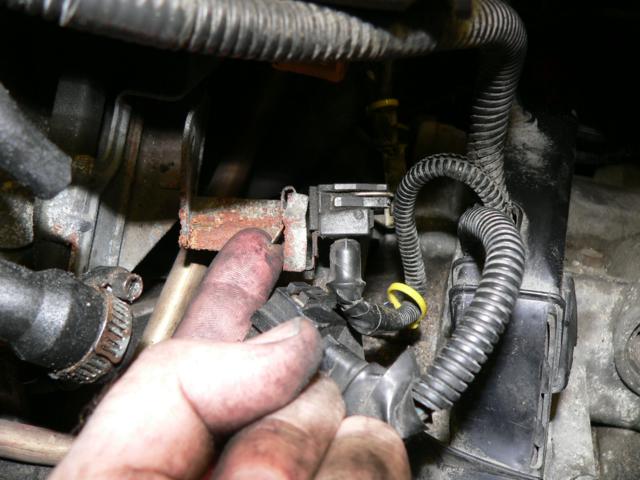
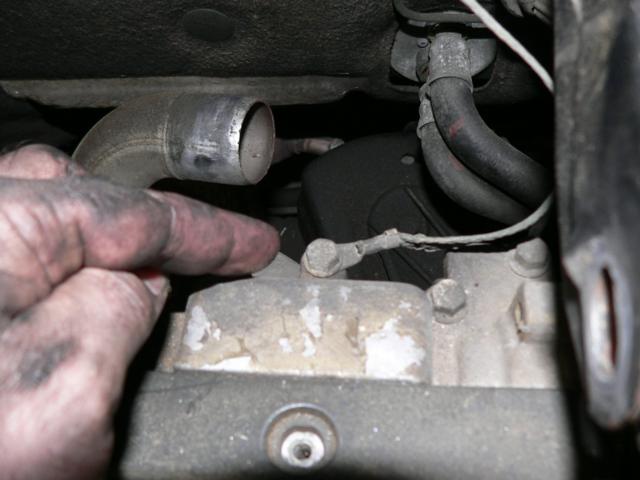
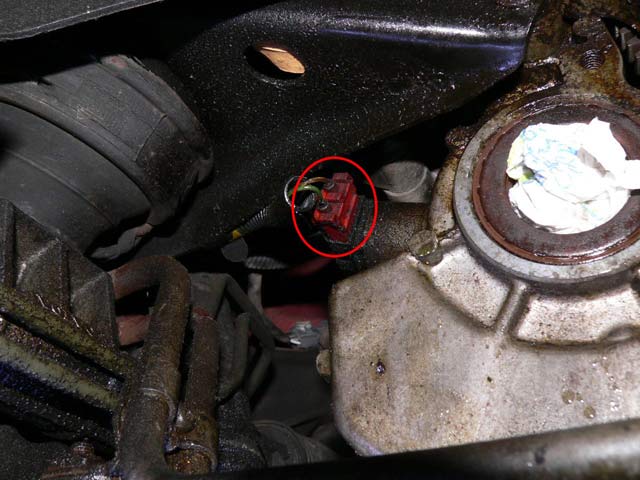
9) Remove the crank sensor wiring harness and unplug it. Also remove the cam position wiring harness and unplug it. Located on top of engine on drivers side, above transmission bellhousing.
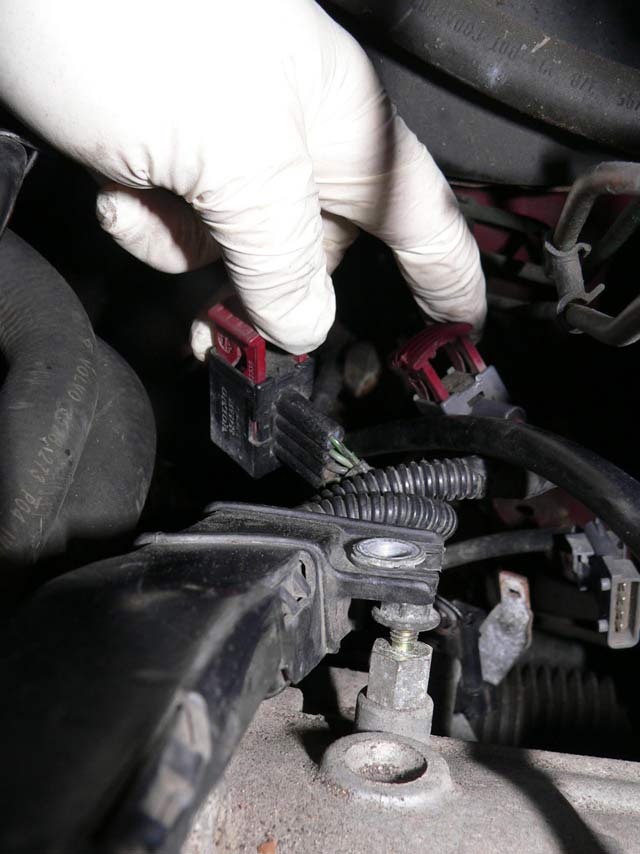
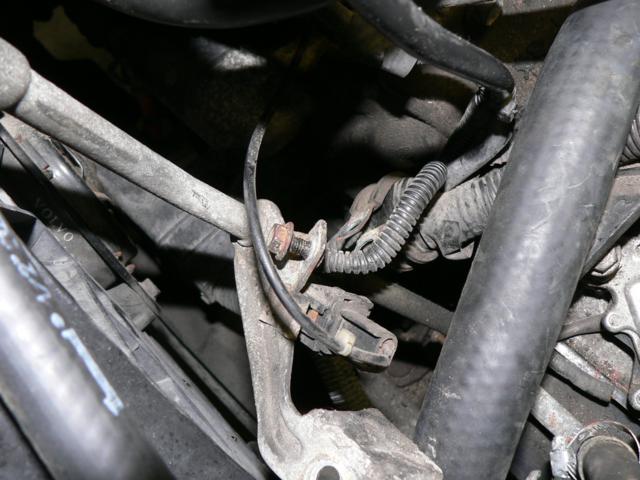
10) Now you should be able to undo the wiring harness on top by taking off the couple nuts holding it on. I recommend putting the nuts back in place once the wiring harness is off. You will remove the transmission speed sensor in a later step (below) once the car is off the ground allowing you to completely remove the wiring harness.
11) Remove the transmission dipstick by removing the nut holding the brace to the transmission case.
12) Not needed but highly recommended. Remove the radiator fan by undoing the couple component connections on top inside it, and then taking off the 4 small bolts holding it to the front of the car. Super easy. Label everything, I like to use different colored zip ties on each side of the components. Put the bolts back in where you took them out so you don't lose them.
13) Remove the upper and lower transmission cooler hoses (hydraulic lines NOT the large coolant hoses). These hoses run from the transmission to the radiator. You need snap-ring pliers or something similar to undo the clamps holding them on. Pull them out and plug the holes in the radiator. A little fluid will come out so be ready with a pan.

14) Remove starter by undoing the 14(?)mm bolts holding it on to the right side of the transmission case. Undo the red wire's (+) nut on the starter and unplug the small solenoid(?) wire. The negative portion can stay attached. I recommend securing the several red wires together with a zip tie. In the pic I was removing the other wires - this is not needed, do not do it. Your starter might also be bolted to the lower portion of the block - mine was not but you'd have to undo that as well. Then lift away the starter.
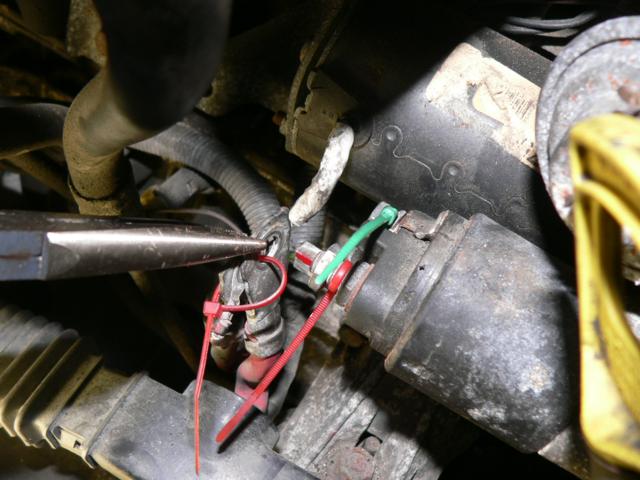
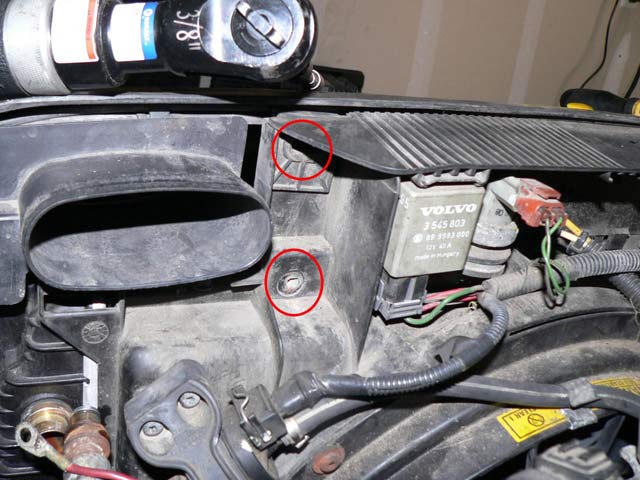
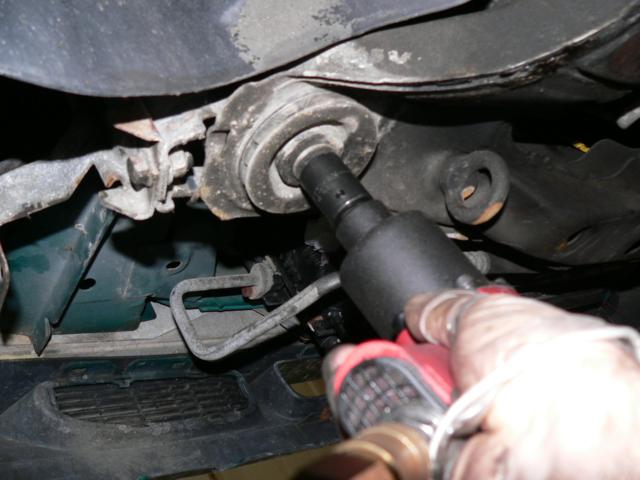
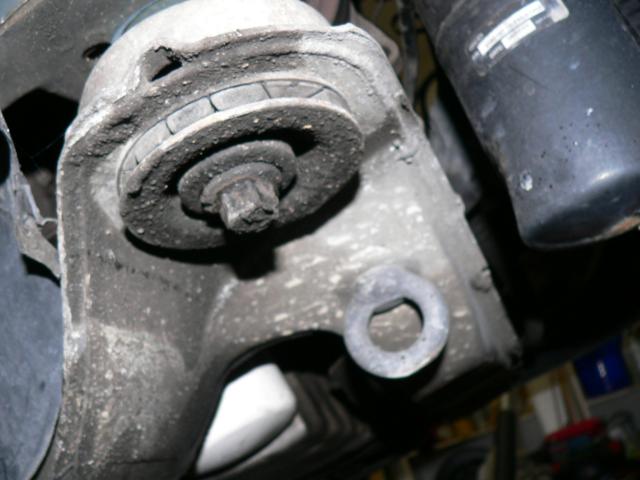
15) Undo upper engine mount bolt. 15mm and 13mm. Volvo says a new one is needed to reinstall...I don't listen to that stuff much if it's a low torque bolt...
16) Undo the two grounding straps on top of the engine block. Put the bolts back in the holes so you don't lose them.
17) Lift the engine coolant expansion tank from its secured spot and lay off to side.
18) There are 4 transmission bellhousing bolts on the top of the engine you can undo now. Do that.
19) This is what you should have off the car:

Step 1 complete
Step 2 removal of axles and components
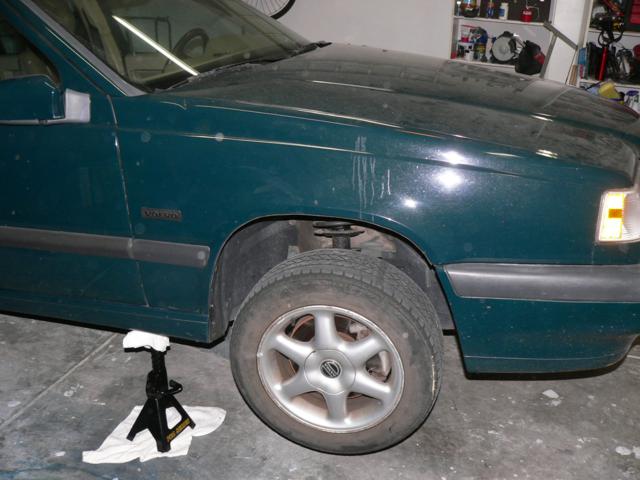
20) Raise car on jack stands. The 6 tons are better they have a longer reach. If you don't have air tools, crank the lug nuts before raising car. Remove wheels.
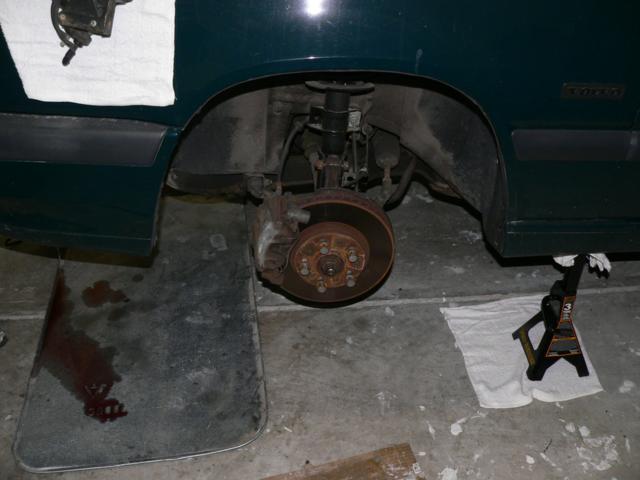
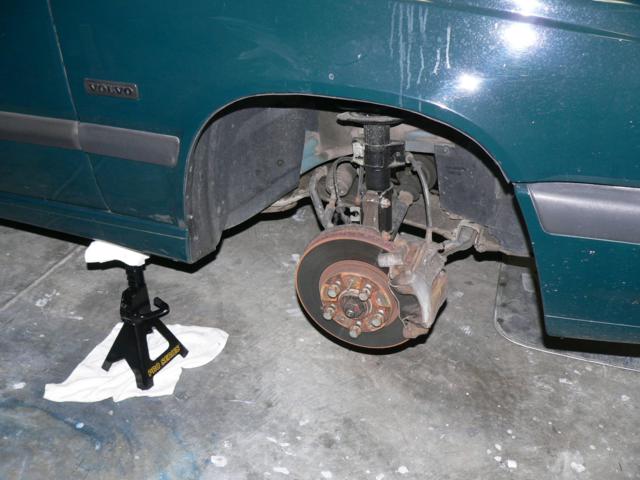
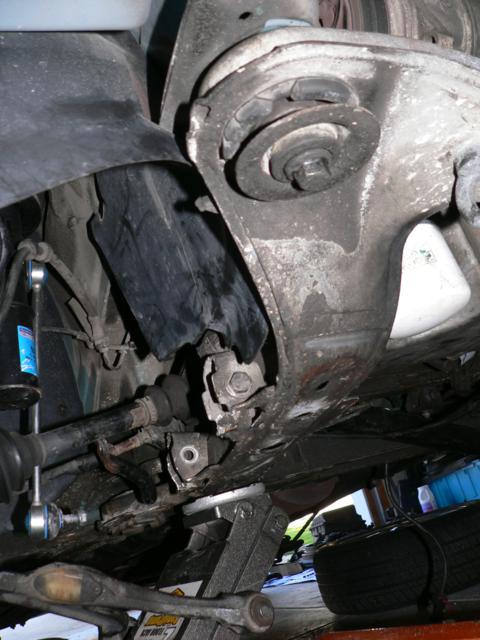
21) ** Volvo says to remove the axles from the hub. I'm lazy and did not want to do that ** Remove passenger (right) side axle from transmission. Do this by removing the cap (2 12mm bolts). Then remove the two bolts holding the lower control arm to the sub frame. 17/18 bolt/nut. These are tight I recommend a strong impact.
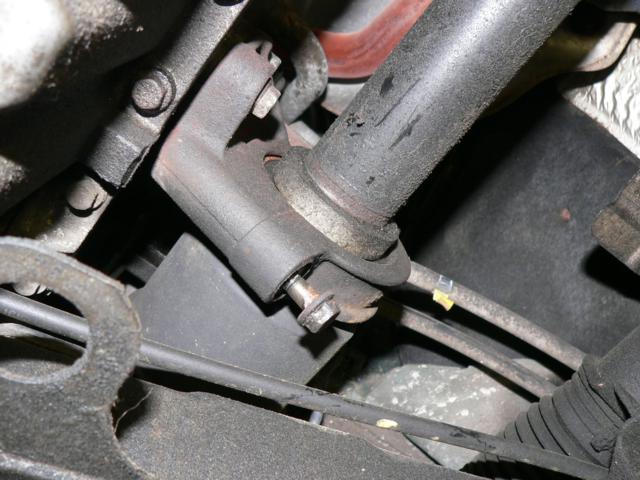
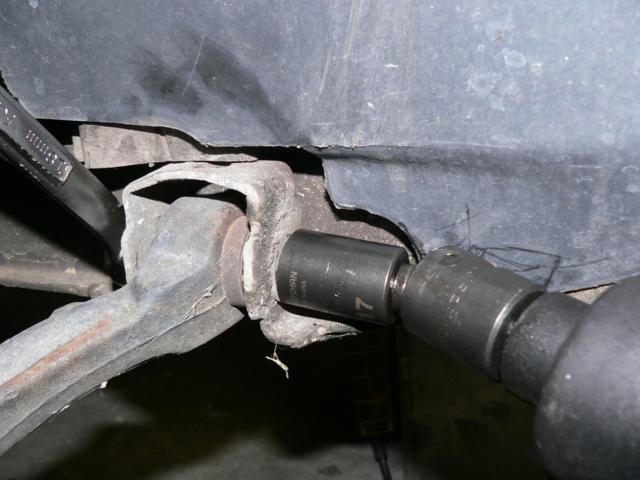
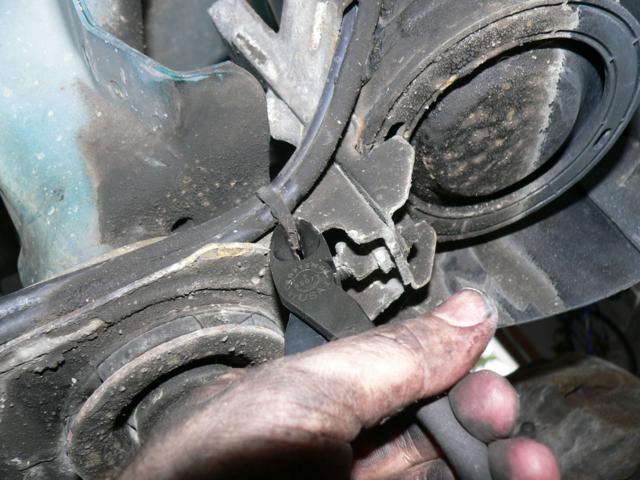
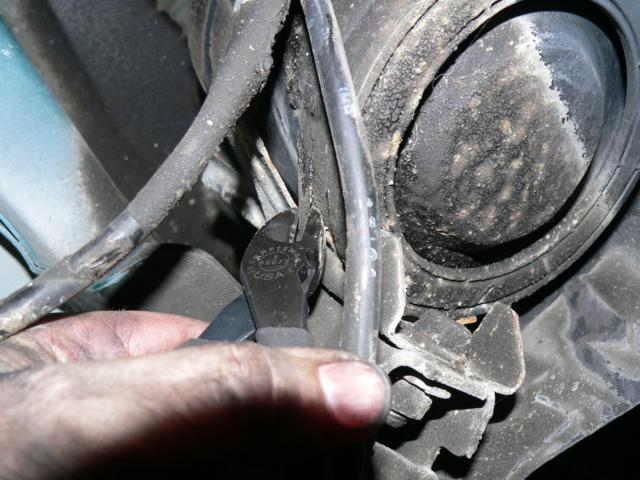
22) Rempve the lower sway bar link bolt. Mine are aftermarket so just a single 15mm on the back side. I think OEM you have to use a torx on front and a smaller wrench on back. PITA. Good luck. *Note on some pics you might see sway bar end link connected to subframe. I redid the procedure the way I wrote here and it's much better. So ignore those pics. Also you might have to pry down on the sway bar in order to release the tension from the end links. Just use a long pry bar.
23) Once the end link is off, your control arms will probably be stuck in the subframe. Use a pry bar (big) and hammer to get them out. They'll come just need persuading.
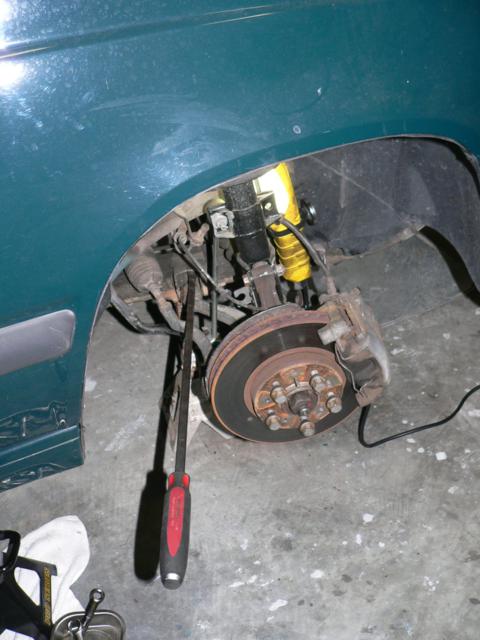
24) Now pry the right side passenger axle out of the transmission. It should come fairly easily. A little fluid will come out, have a pan ready. You can then maneuver the axle to hang below the steering gear if you want to.
25) Repeat for drivers side. Remove sway bar end link from sway bar/steering knuckle, will probably have to apply force on sway bar. Then remove the control arm bolts. Pry control arm down from sub frame. To remove the drivers side axle DO NOT PULL use a pry bar or a wooden wedge between axle and transmission case to hammer in and separate the circlip.
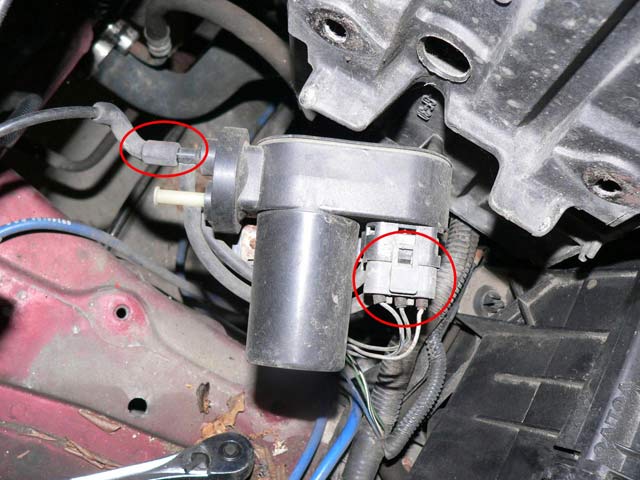
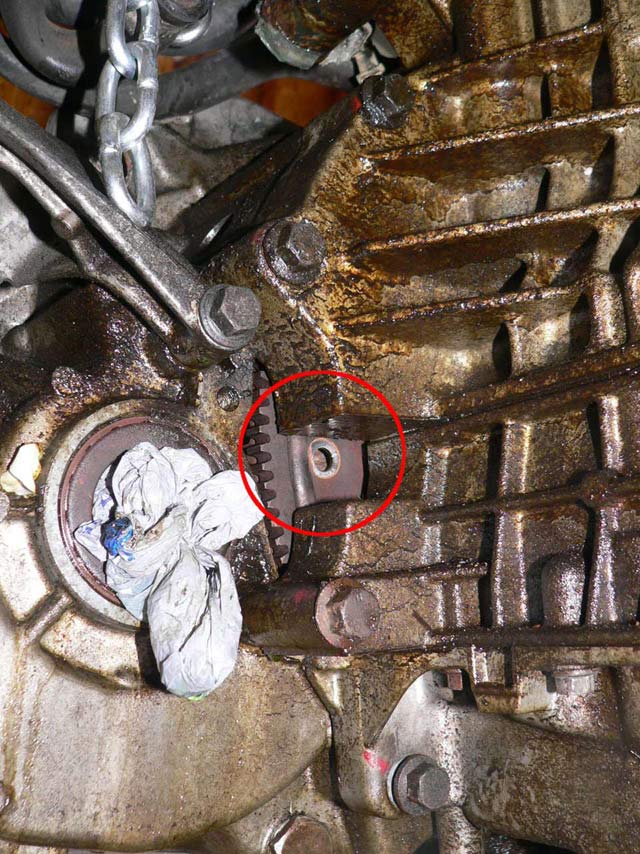
26) While under the car remove the engine speed sensor on back side of transmission. It is connected to the engine harness.
Step 2 is complete.
Step 3 removal of components from subframe and removal of subframe.
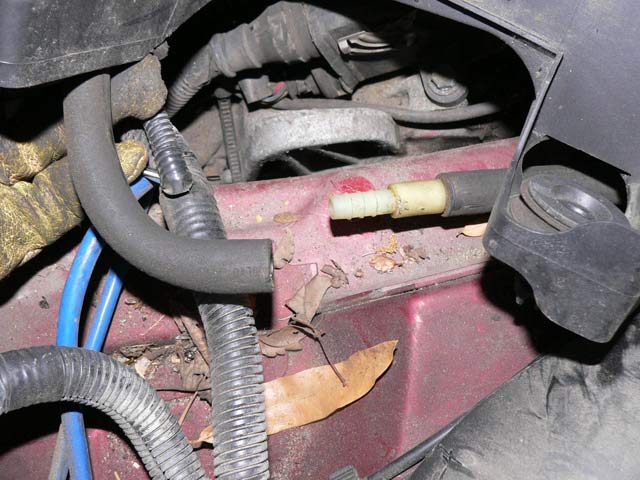
27) Release evap plastic line from front of subframe clips. Cut off zip ties securing the evap canister to the subframe and remove it, store it over on the passengers side somewhere by the right tire. Unplug the top evap line and it should route thru the subframe, remove it from there.
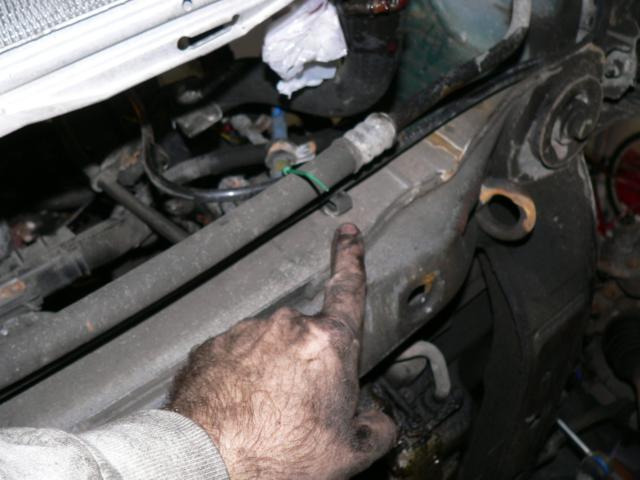
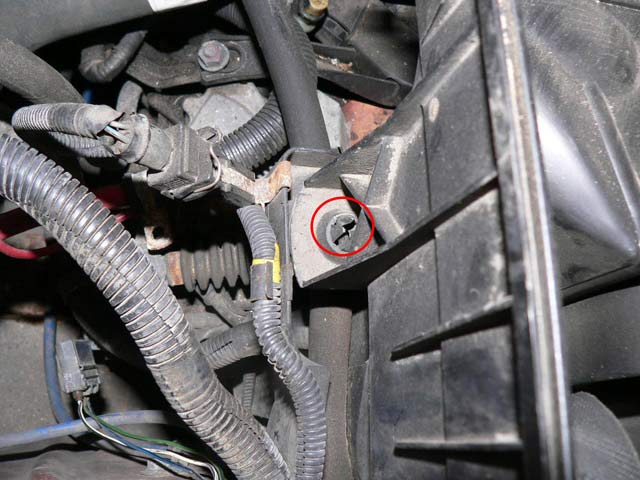
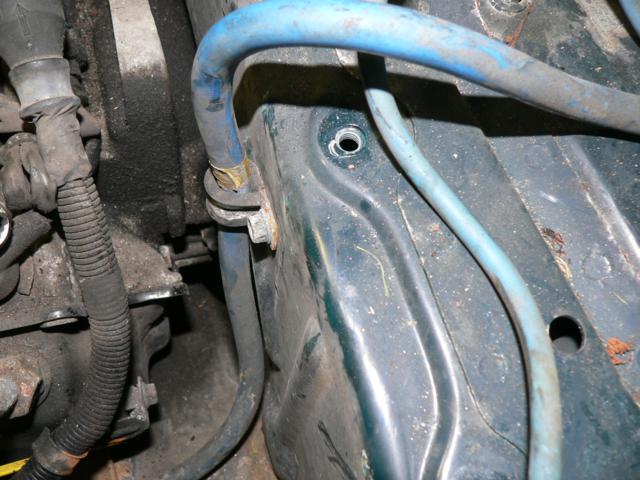
28) Undo the bolt holding the engine wiring harness to the subframe. This bolt is on the top of the subframe, front of the car, on the passenger side. It's a single 10mm IIRC.
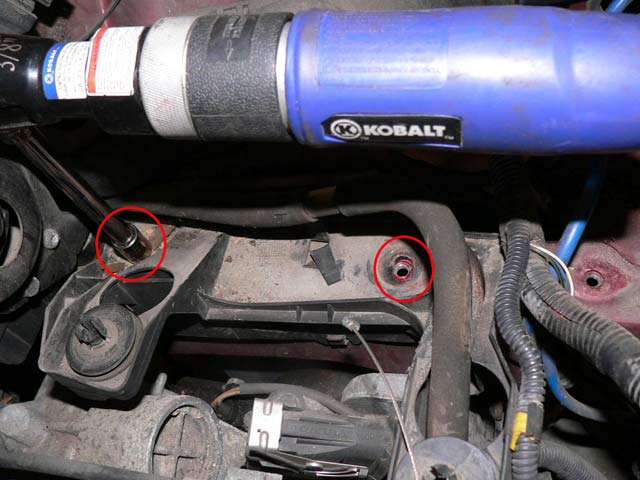
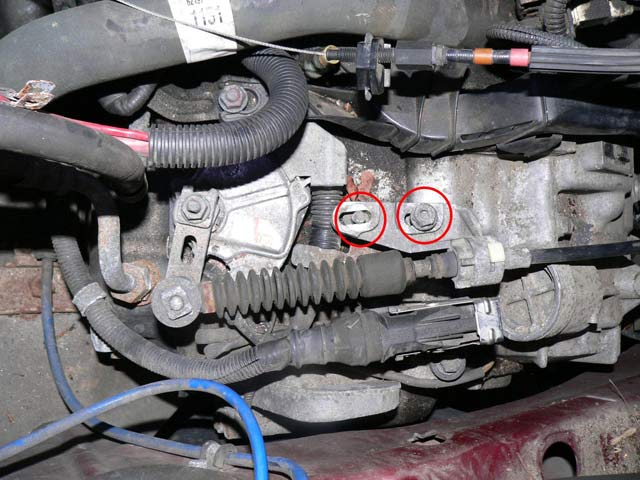
29) Remove the two large transmission mount bolts from the subframe as well as the smaller steering gear bolt right below that.
30) Remove the bolt from BELOW on bottom of subframe that goes UP into the FRONT engine mount. Do not remove any more bolts on the front engine mount. (no pics sorry)
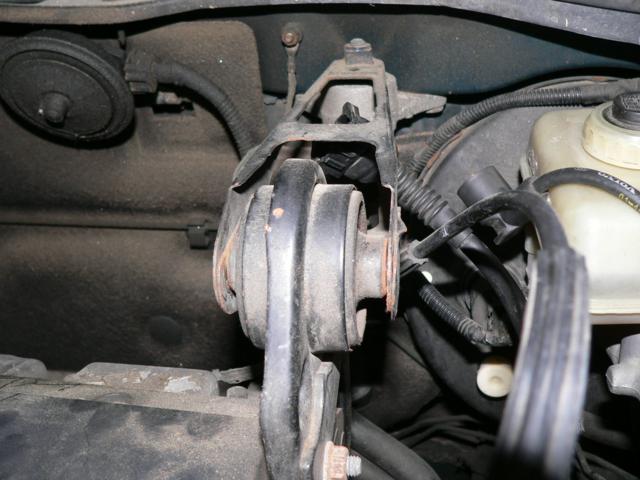
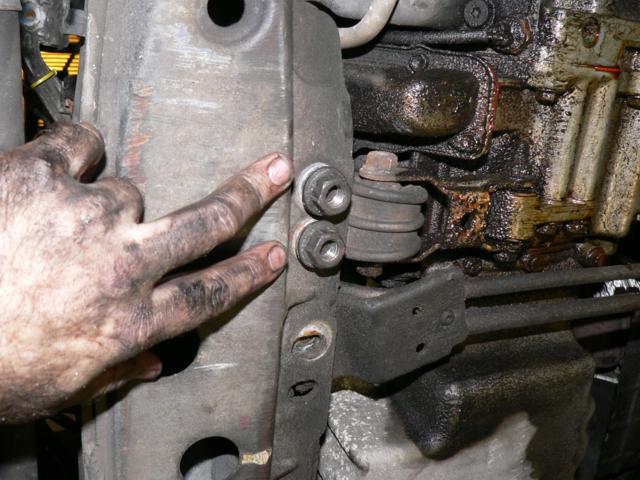
31) Remove the two bolts holding the side engine mount to engine on passenger side wheel well.
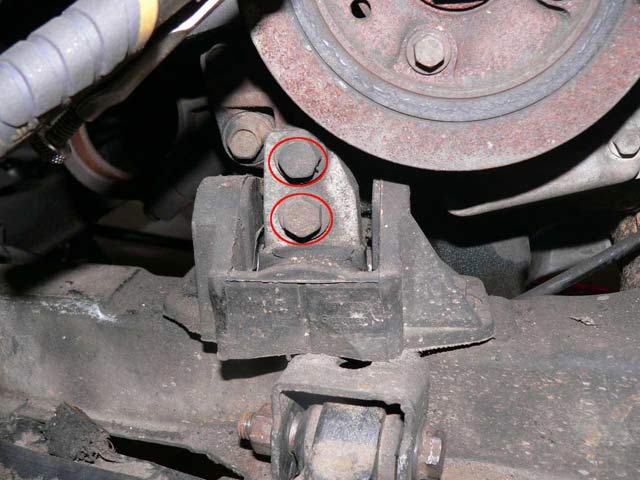
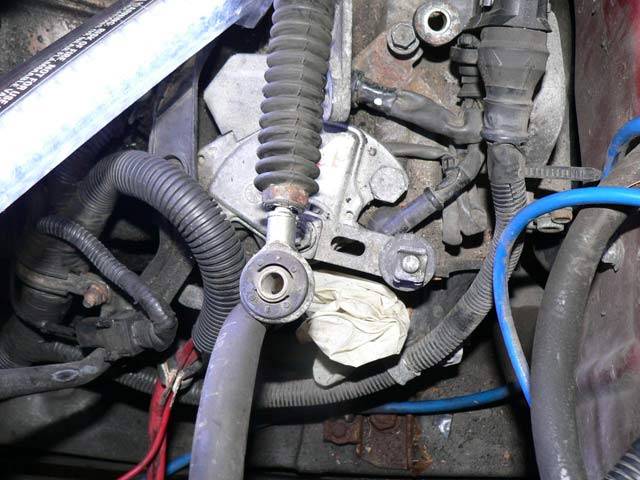
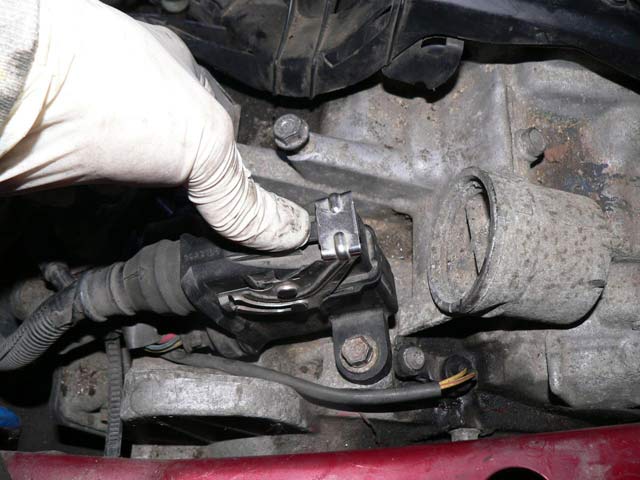
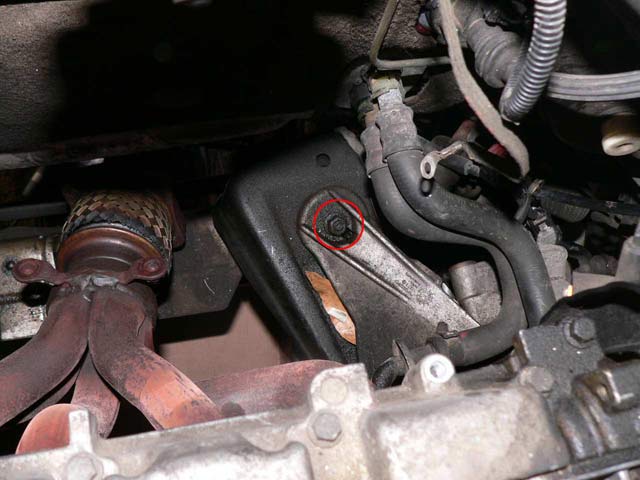
32) Remove the rear engine mount bolt down below the exhaust manifold. Also if you can, remove the 3 bolts holding it on. I believe this is when I did it but also wrote to do it at a later stage as well. Either way the 3 14mm bolts and the mount itself as well as the large metal pan need to come out.
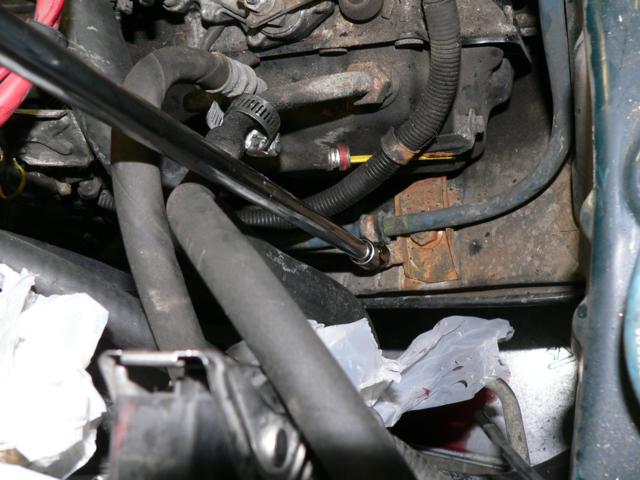
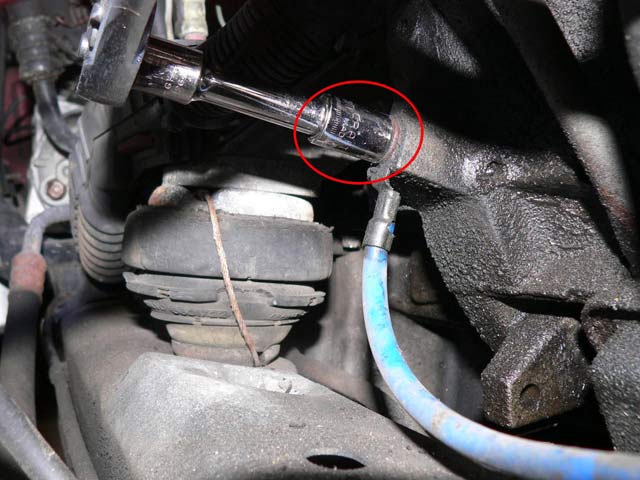
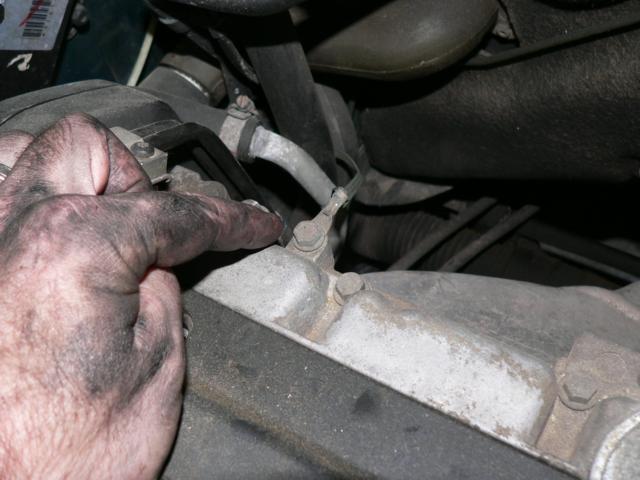
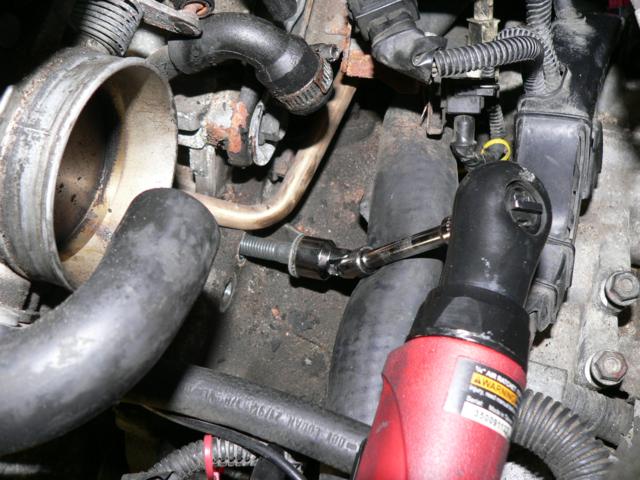
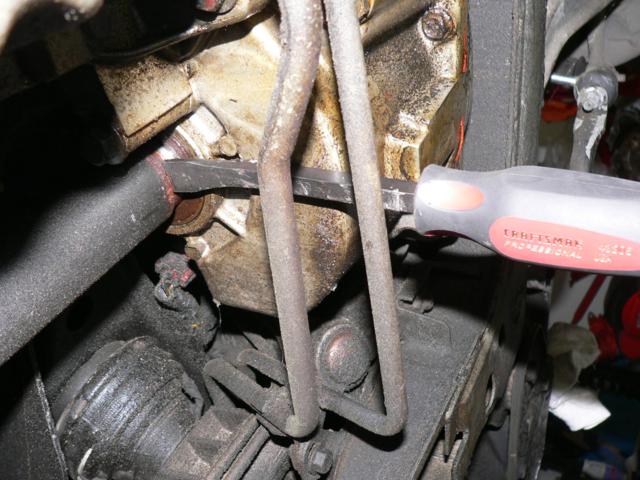
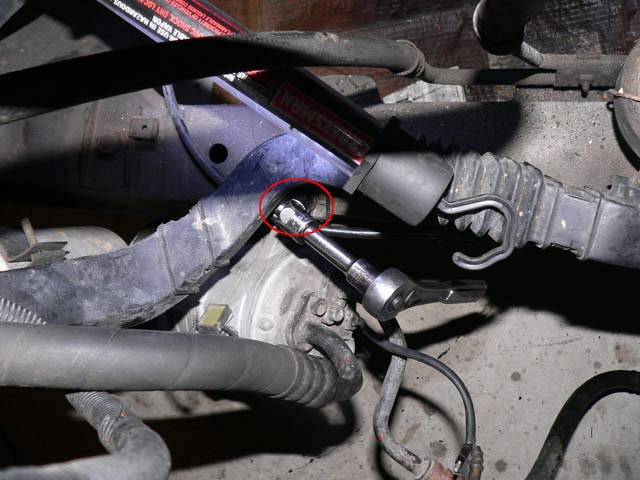
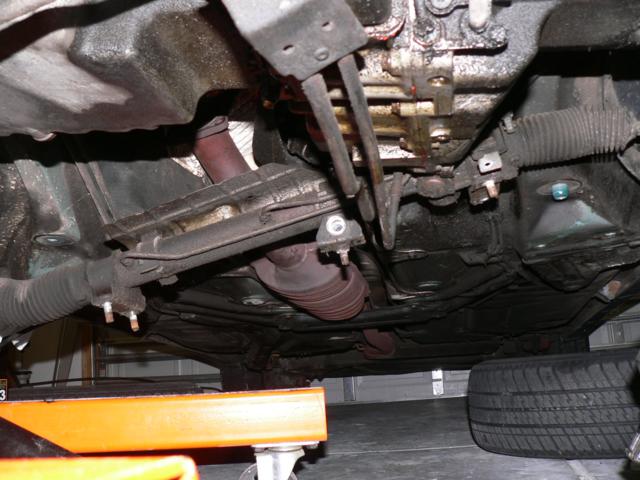
33) Remove the 5 or so powering steering rack bolts. They are mounted from below. These hold the rack to the subframe. They are all 15mm, do not remove the larger one. Only the vertical bolts need to be removed, and you do not need to remove the rear engine mount bolt (from below). Steering rack should probably be suspended with wire, I just let it hang. So far it seems OK. You can see them here removed w/ subframe dropped.
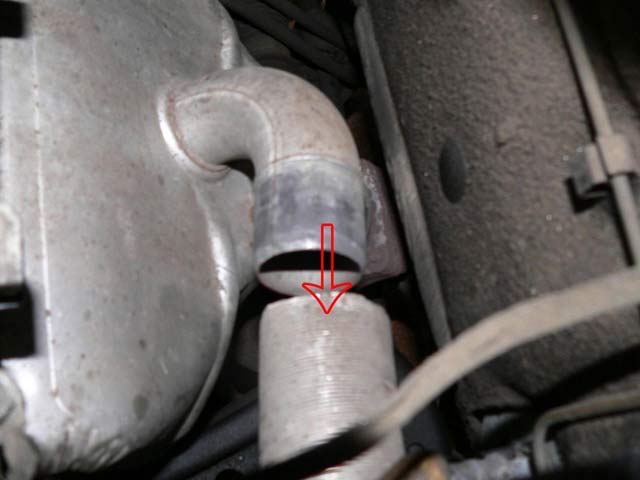
34) Either remove the exhaust coupling bolts (4) that couple the exhaust manifold to the exhaust pipe or further down there is a plate secured by 4 bolts into the bottom of the car that you can remove instead. This will give the exhaust room to go down as you lower the engine.
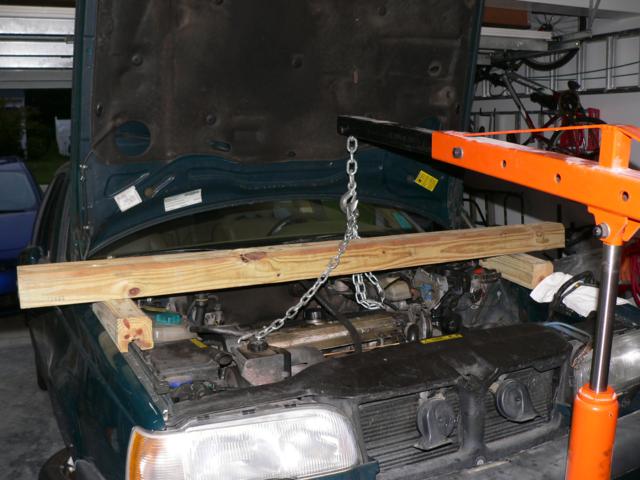
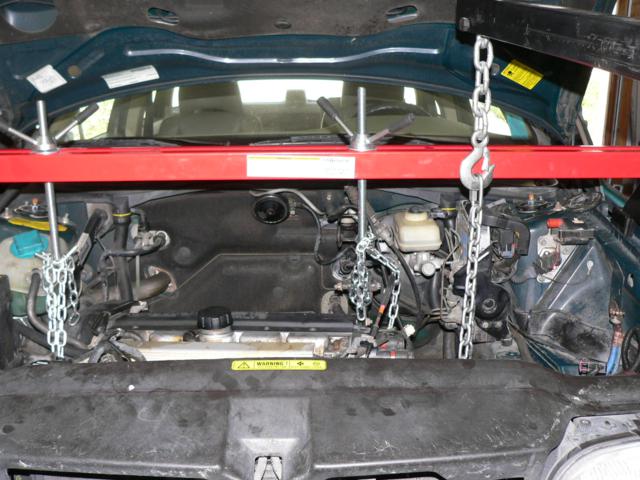
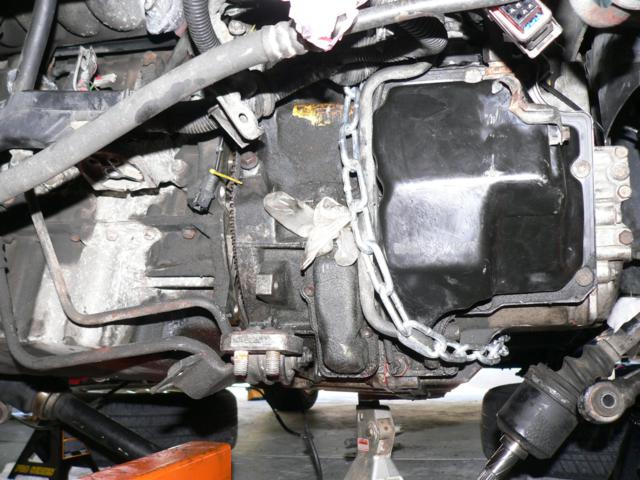
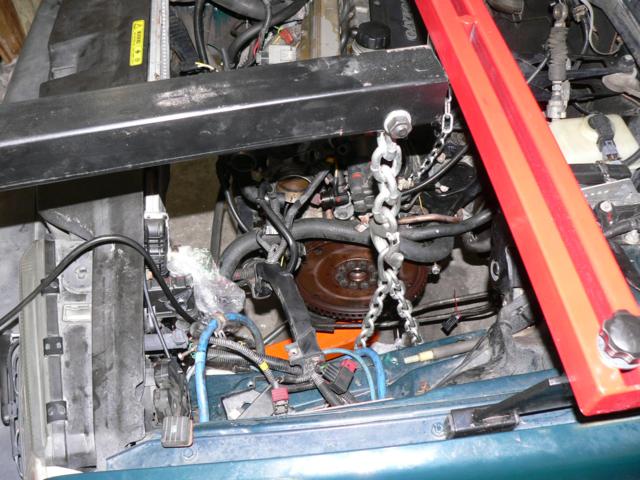
35) Secure engine in place by chosen method. I tried both, and enjoyed using the engine support more. $50 after coupon @ Harbor Freight. Just wrap chains and secure tightly.
36) Once engine is secured from falling, remove subframe bolts. There are one on each side up front, and 3 in back (including the cover plate). Remove all of one side first. Then raise jack to support that side while you undo the other side. Lower jack so that the subframe lowers slowly to the ground, and you can monitor it to make sure there is nothing hanging up on it. Remove the components that are still attached...
Step 3 complete
Step 4 removal of transmission
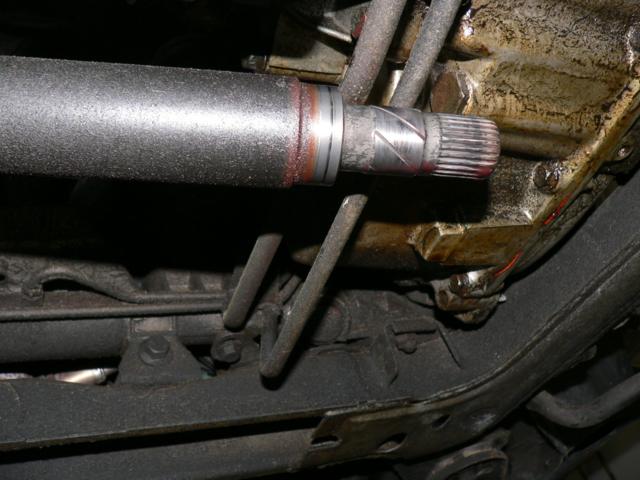
37) Lower engine about 6" to allow for the transmission to swing to the left (from inside car) and into the wheel well area.
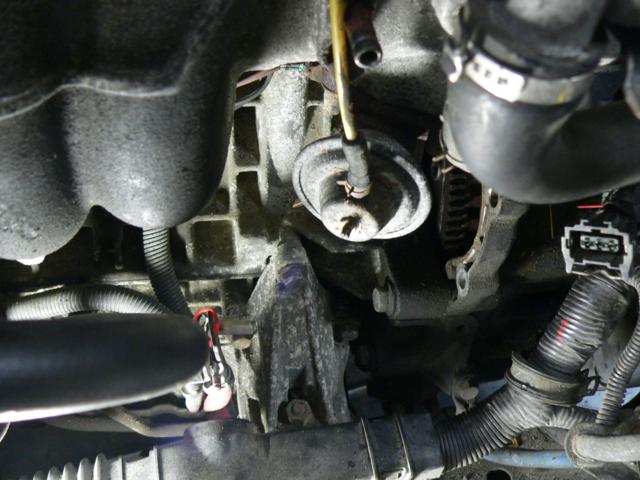
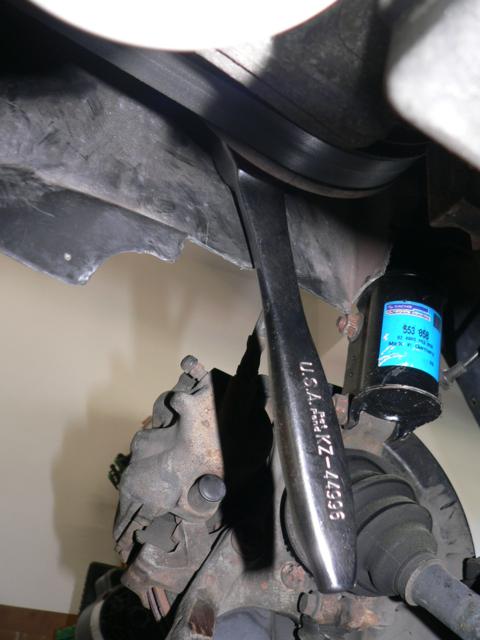
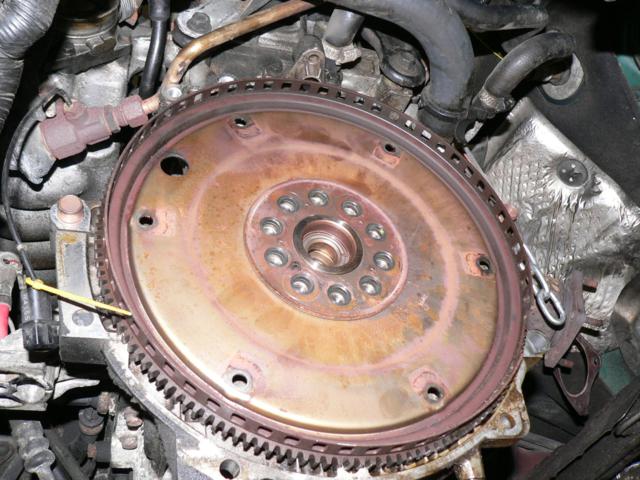
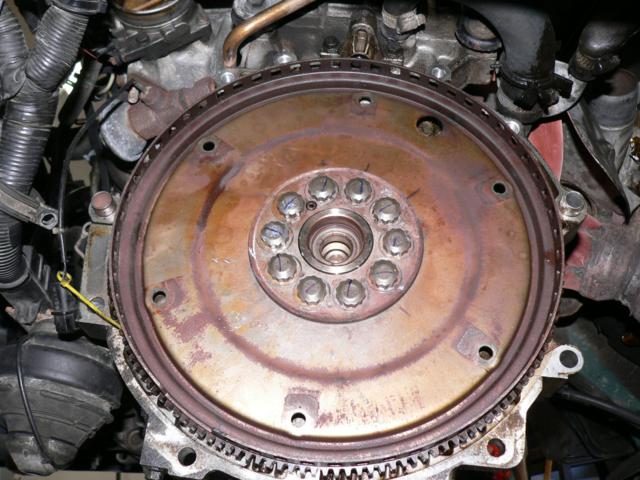
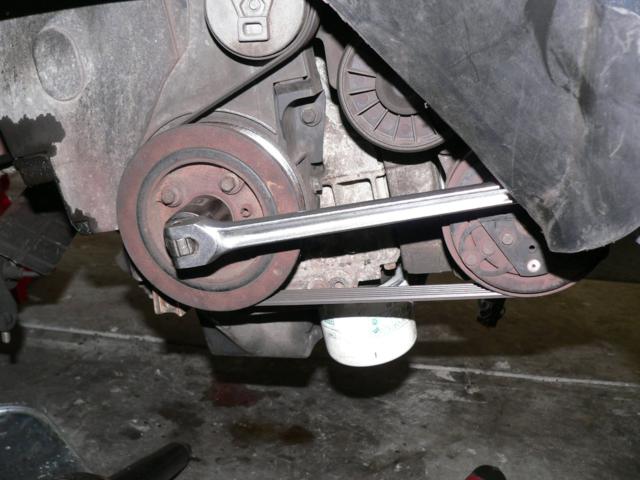
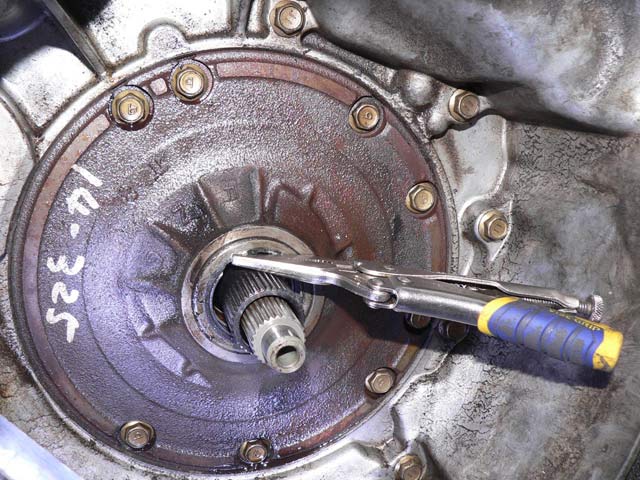
38) Go under car when engine is sufficiently supported from above. On the back side of the transmission next to the passenger side axle transmission opening there is a viewing port, allowing you to remove the flexplate to torque converter torx bolts. Use a 30mm socket and ratchet on the crank pulley and rotate the engine around until you see the bolts, and remove them one by one. IIRC they are sized T50. Volvo says new ones are required, my investigation showed that if I cleaned the threads and applied blue Loctite I was comfortable with that.
39) Slide in the engine hoist/cherry picker or suitable transmission jack and secure it against the transmission. I used an engine hoist and a chain wrapped around it.
40) Remove the rear engine mount support (3 14mm bolts) if you haven't done so already (see step 32). Remove the bottom transmission bellhousing bolts (14mm). I think there are 6 more from below. This should separate the engine from the transmission.
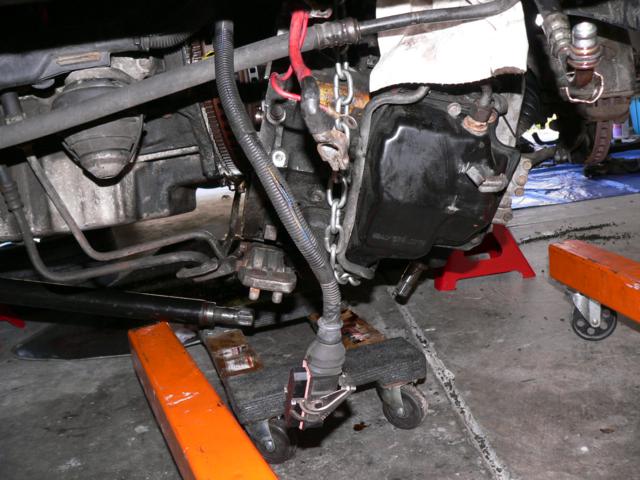
41) Slowly lower the transmission and it should fall towards the wheel well. Guide it. Make sure the torque converter stays attached to the splie gear on the transmission, or you will have one hell of a mess as the fluid pours out onto the ground. It actually is fairly easy it should come apart on its own perfectly. Position a dolly of some sort below to capture the transmission.
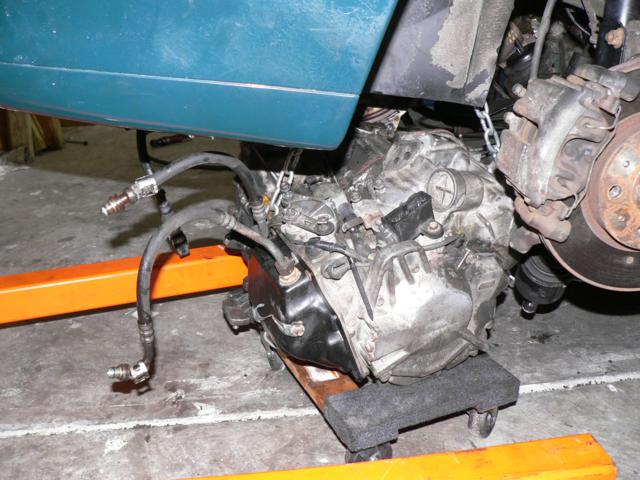
Step 4 is complete
Step 5 replacement of Rear main seal (optional).
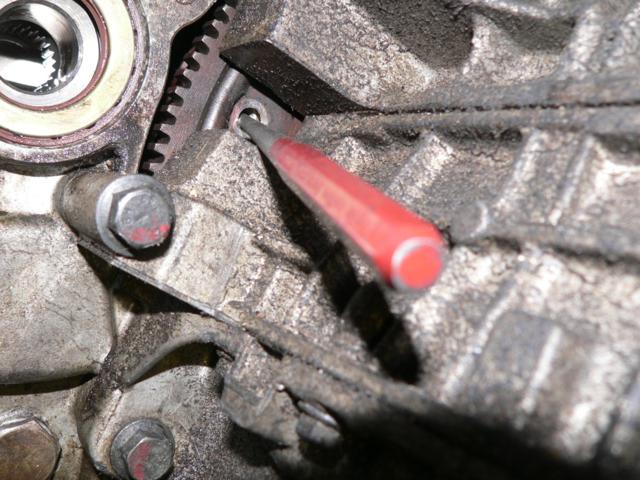
42) Remove the flex plate 17mm 12 point bolts. If you have an impact this simplifies it. Otherwise you have to use a breaker bar on the crank pulley to brace against a component as you twist them off.
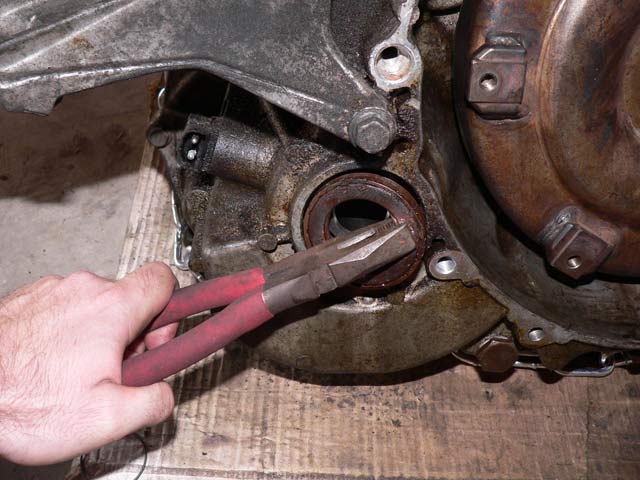
43) Remove the RMS. Easier said then done. If you use the screw method be careful not to scratch the metal surface. Also, DO NOT scratch the "inside" of the seal portion at all, that is the most critical sealing surface.
44) Once removed clean up the surface and apply oil to the new seal lips. Press in place and lightly tap around to snug it up. Use the old seal on top of the new one to push it ever so slightly inside the block.
45) Install flexplate. Before putting in bolts, use a shop vac to suck out the gunk from the threads (old sealant). If reusing old flexplate bolts (technically they should be replaced, as they are torque to yield...) you'll need a sealant on the threads. I used Permatex 59235.
A note about reusing the bolts. The original bolts I took out were not stretched or deformed. I felt fine reusing them. Clean the threads real well with a wire brush and degreaser and apply the sealant as directed.
46) Use a breaker bar on crank pulley to brace as you install flexplate bolts. Check Haynes for torque IIRC it's 37 ft-lbs then 60* from there. Torque all bolts evenlly to the ft-lbs rating going back over them to make sure they are all seated. Do it in a criss-cross pattern like lug nuts. Then torque to yield 60* (turn another 60 degrees). I marked the bolt heads for ease of doing this. Use a breaker bar on the crank pulley side and that will hold the flex plate from moving as you torque to yield.
Step 5 is complete
Step 6 Install transmission to engine
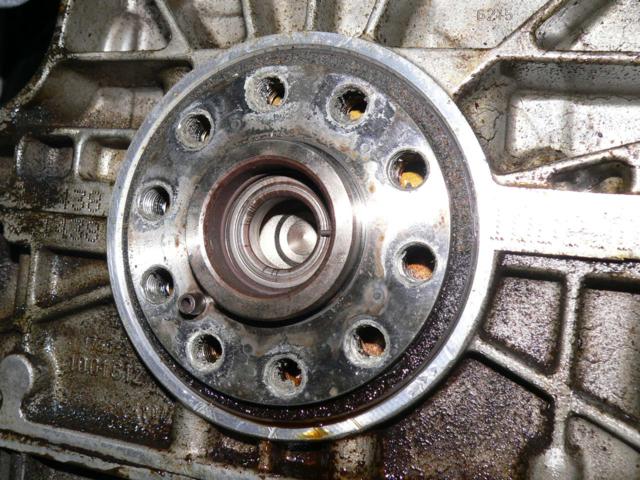
47) If reusing your torque converter from old transmission, pull off torque converter. It will drop quite a bit of fluid even positioned horizontally. Replace pump seal if desired. Comes off easy.
48) Reinstall torque converter. It will clunk down several steps as you twist it back and forth.
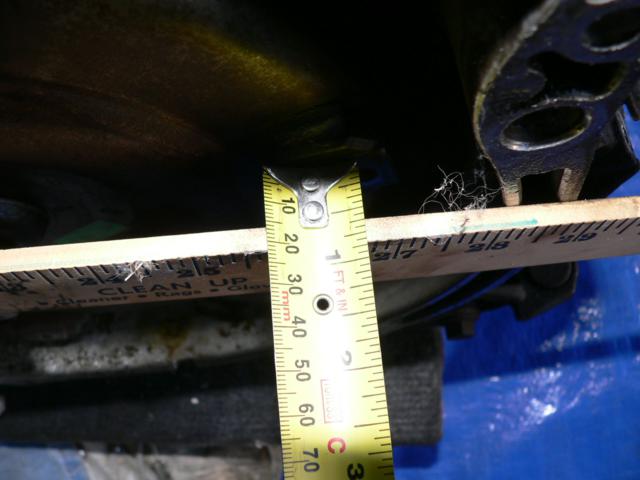
********IMPORTANT OR YOU WILL BREAK YOUR PUMP GEAR ON TRANSMISSION*******
When torque converter is FULLY SEATED it will measure 0.55" (just over 1/2") from torque converter flexplate bolts to to top of housing. CONFIRM THEM or you will break something!! To easily measure place a flat object across the transmission bellhousing and measure to flexplate bolt tabs.
49) Now is a good time to replace the axle seals as well if desired
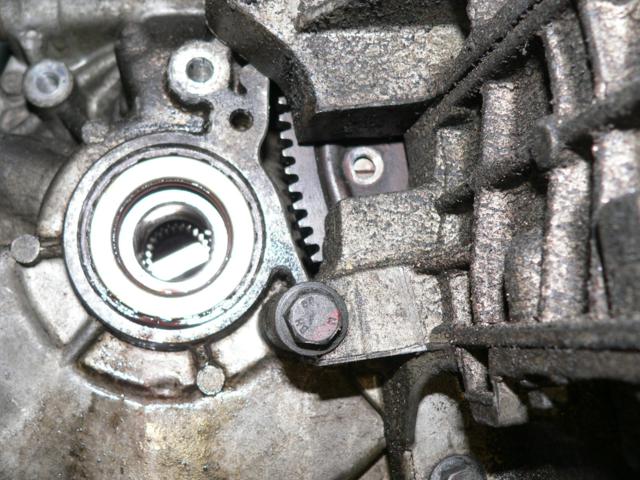
50) Roll transmission under car in approximately orientation. Raise transmission with engine hoist or transmission jack. Try to orient one of the torque converter bolt flanges to hit the opening on back of engine so you don't have to turn torque converter. If unsuccessful don't fret. There is an opening on the back of the transmission housing where your finger can fit thru and push on the torque converter. More on this later.

51) There are several dowel type pins on the engine bellhousing that allow the transmission to slide into place. Secure bottom transmission bellhousing bolts (6 IIRC) to secure engine and transmission together.
52) Use a ratchet and 30mm socket on crank pulley to rotate flexplate bolts on opening on back of the engine. If the torque converter bolt does not line up, use your left hand finger to push on torque converter thru the rear access hole and spin it around to line it up. Get it close and you can use an alignment punch or small screwdriver to position it the rest of the way. This hole is a little tight but doable.
53) Install torque converter to flexplate T50 bolts, remembering to use new or cleaned and freshly Loctitied old bolts. Rotate around using the ratchet on crank pulley method. I hand tightened them at first then redid them with correct torque spec (22 ft-lbs).
Step 6 is complete.
Step 7 reinstall subframe.
54) Raise engine back up slightly. Connect exhaust flange or exhaust cover plate behind catalytic converter if disconnected previously.
55) Maneuver subframe under engine. Run evap line thru subframe from behind and toward the front. This next part will most likely require two jacks or one strong person and a jack. Use jack to raise one side of subframe up. Then lift other side up and secure the front subframe bolt. Work in the rest of the subframe bolts. It is a little bit of trial and error lining everything up, including the power steering rack. It shouldn't be too bad, getting the subframe up is the hardest part. Make sure the engine is up slightly higher than originally installed so you have some room.
56) Once subframe is installed start bolting everything back up as you lower the engine on to it. My computer froze here and I lost everything I wrote. Basically all the stuff you took off it. The power steering rack bolts/nuts, engine mount bolts for front and side. Rear engine mounting bracket and plate. Re-secure the evap canister with two large zip ties. Reattach the wiring harness to the subframe by front engine mount. Reattach the transmission oil cooler lines to the radiator. When doing so I also wrapped a zip tie around the metal hose clamps to prevent them from coming off while driving. You should probably also replace the o-rings on there but I did not.
Step 7 is complete
Step 8 reinstall axles
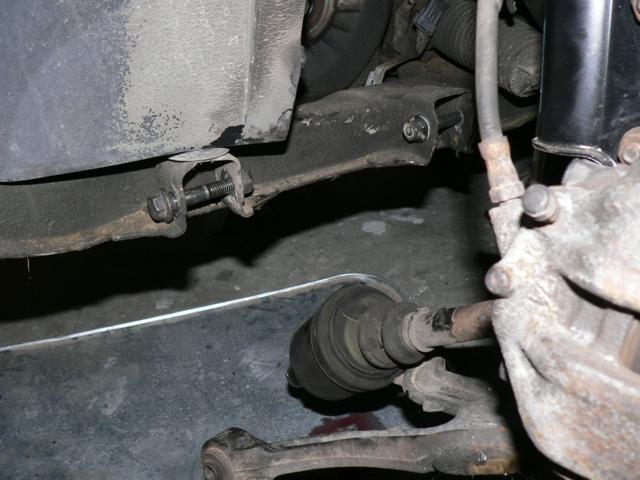
57) Connect control arms to subframe. Use an alignment tool or large screwdriver in bolt holes to help align. Use a large hammer to help get the control arms in position as well. Volvo says to use new bolts. They are torqued heavily and then twisted 120 degrees IIRC. The threads on mine were deformed.
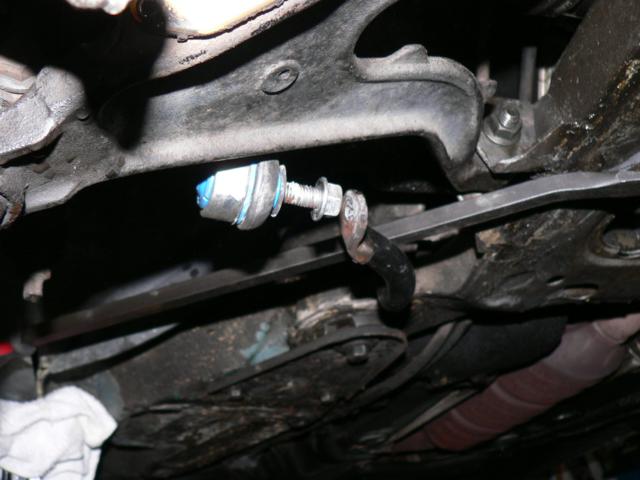
58) Attach sway bar end links to sway bar. One side will go on easily and you'll have to apply downward pressure on the sway bar to get the other end link on and torqued correctly.
59) Pop in axles, shouldn't take much force, just a pop. Remember to reattach the passenger side bearing cap holding the axle in place. Passenger side goes in super easy, I used the play in the CV joint on the drivers side to use it as a sort of slide hammer to pound it in past the circlip.
60) Plug in transmission speed sensor
Step 8 is complete
Step 9 reinstall everything else
61) If you are all done on the underside of the car put the wheels back on and lower it down.
62) Reinstall the upper engine to transmission bellhousing bolts. Reinstall the starter. Shifter cable. If you move the shift lever on the transmission don't sweat it. Just go forward (front of car) and back off 2 steps (1st reverse 2nd is neutral). Dipstick. Radiator fan and components. Crank and cam sensor connections. Engine wiring harness on top of transmission. Connect O2 sensors. Transmission dipstick. Battery cable ground. Battery tray, air box, intake manifold hose, battery. Depending on how much transmission fluid came out top it off just a bit.
63) Pray and crank it over.
Step 9 complete

