


Missed last week? Short Ram vs. Cold Air Intake
Catch up to this week? No Turbo? No Problem! Part 2. Take the Fast Friday Poll.
No Turbo? No Problem! Part 3.
With intake systems being one of the more popular upgrade parts for vehicles, and with consideration to the upgraded intake system on the non turbo build, let's take this week and talk about engine breathing and intake systems!
The Sum of Go Fast Bits
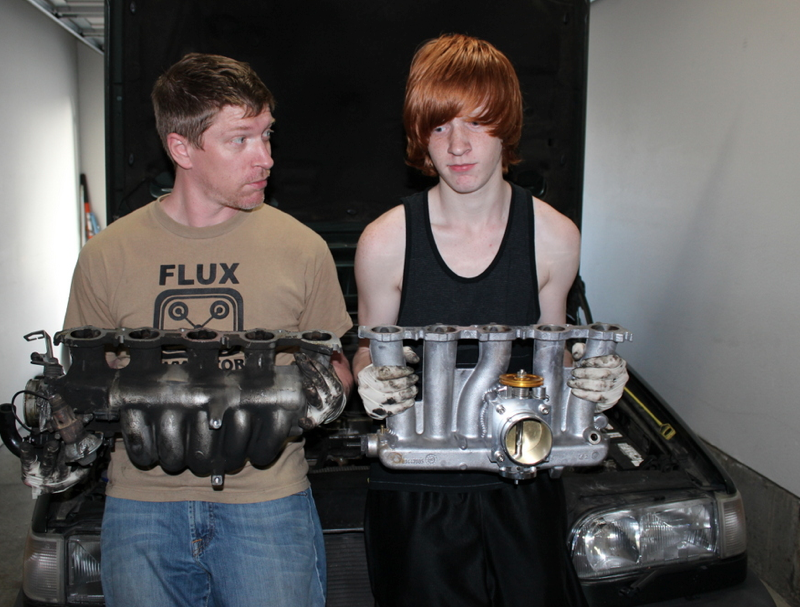
This week it's all about the install as we take our collection of go fast bits and fasten them down onto the engine! Install went quite well and honestly is pretty much within the grasp of the average enthusiast so I hope to see this be more than a one of a kind build.
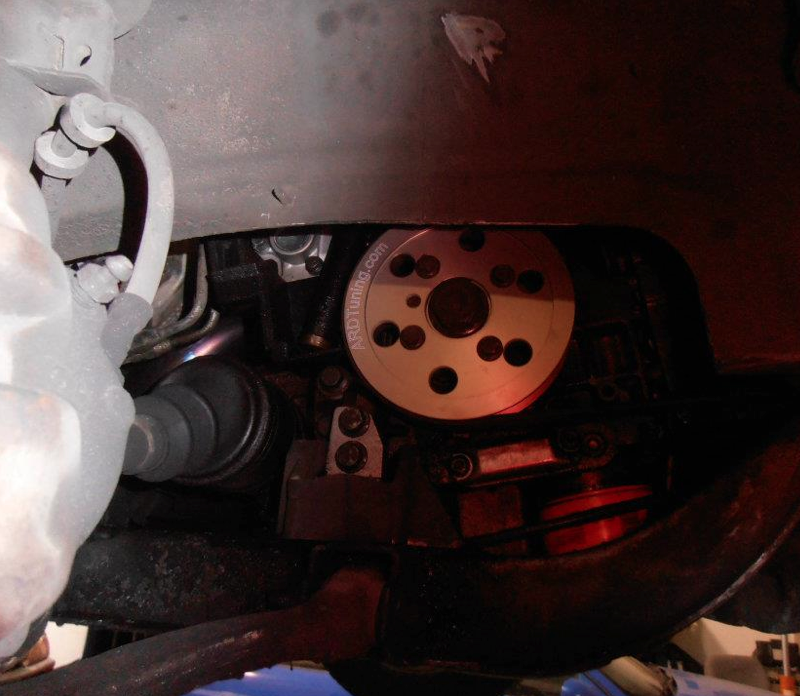
Pulley: The easiest part we installed, we lost 4lbs of weight from the OE unit by replacing with the lightweight unit from ARD, will it help….? Who knows but lowering weight won't make us slower
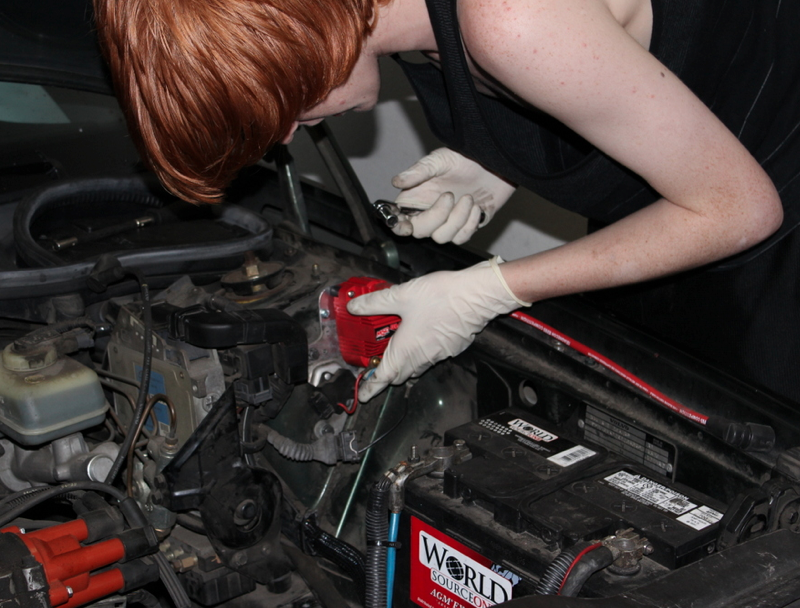
Ignition coil: It's a family affair when the manchild steps in to install our MSD coil from Eurosport. Cutting off the old rivets and bolting up the included bracket makes it fit like a glove!
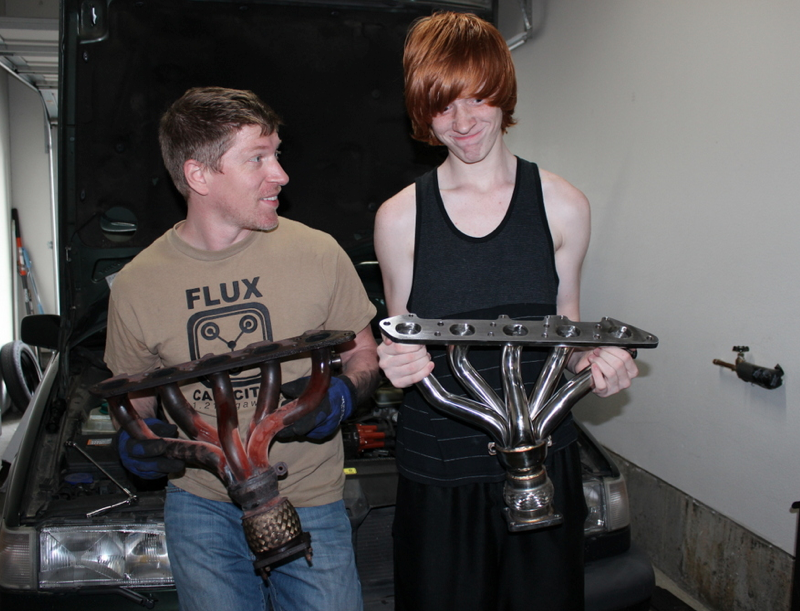
Exhaust: Our original header was shockingly full of carbon such that, by my measurements, over 10% of the flow was reduced by virtue of the caked up junk. That alone should give us some benefit.
Battery: We rotated the battery mount 90 degrees to give us a bit more room for the routing of the air filter and inlet tube. Ultimately it wasn't all that necessary but since it's such an easy mod that requires no parts it seemed worth it anyway.
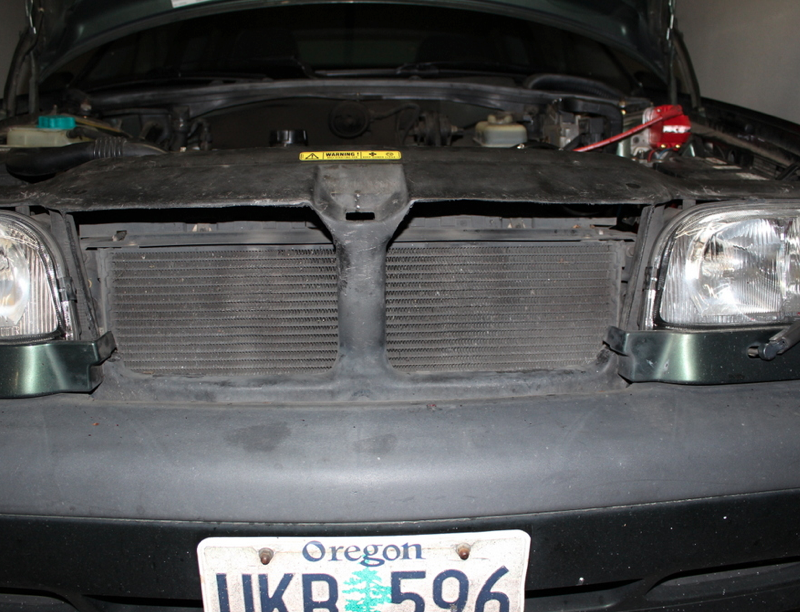
Airflow: We enlarged the air inlet openings behind the front grill to help encourage airflow into the intake as well as provide additional flow over the radiator to keep temps down as much as we could.
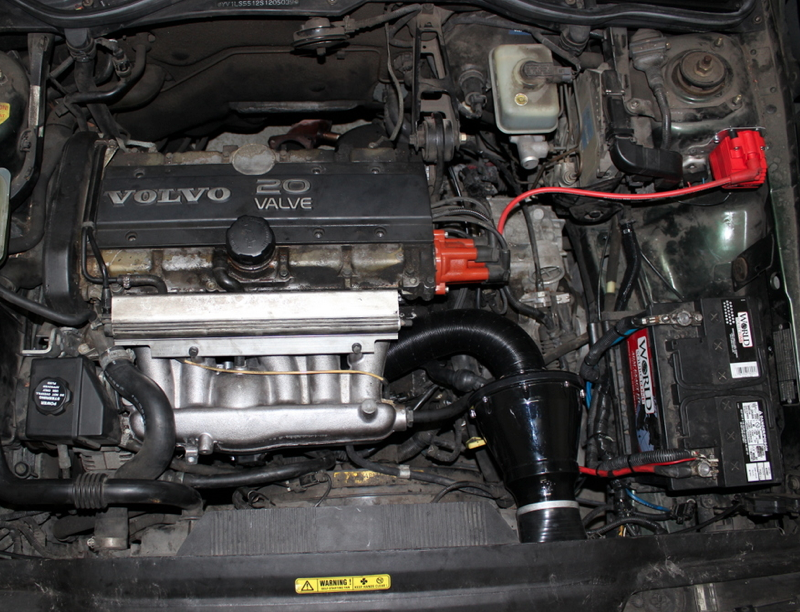
Intake: This was bar far the most unknown part of this build. Everything told me it should work but how hard would it be to make fit? Turns out.. not bad! A lot of back and forth with the install to make everything bolt up but once we were done it looked like an OE fitment… aside from the dry flow K&N filter. This is the more involved part of the build so we'll spend the most discussing that.
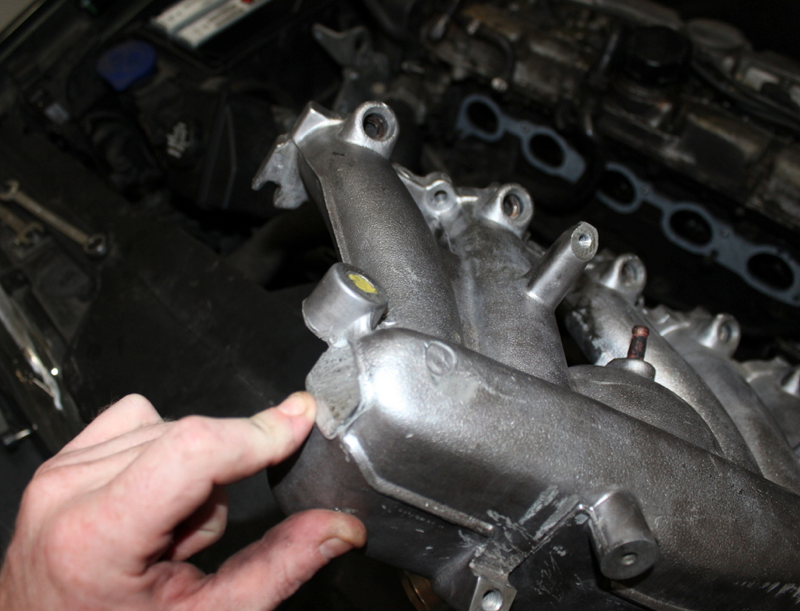
First, the boss on the side of the manifold directly interferes with power steering reservoir so it has to be shaved off. I left the surface rough for the pic so you could see the area in question. Once done we smoothed it out a bit with the sander. Note: We had to remove the PS pump to be able to fit the intake into position then reinstall the PS pump. Without this step we could not get the manifold to clear the PS pump return line.
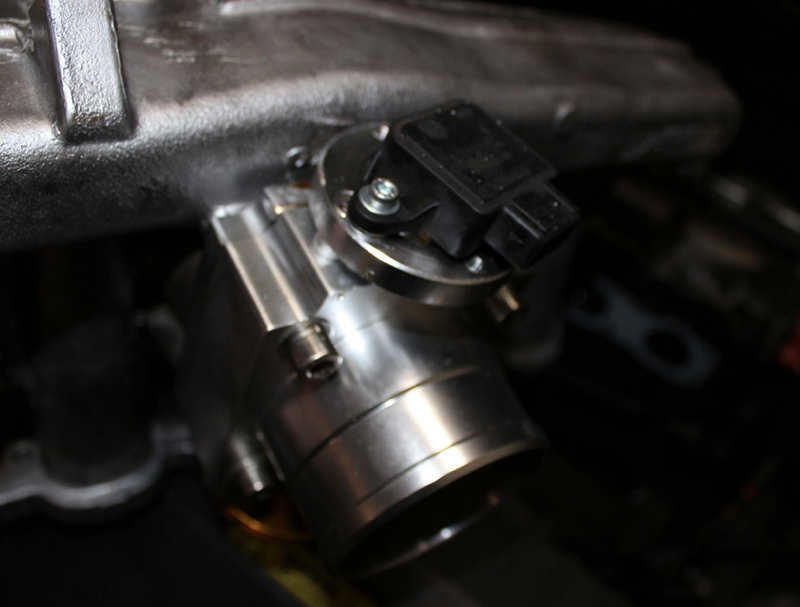
Second, The new 70mm throttle body came with a base mounting plate that we drilled and then tapped into the factory manifold, the 70mm throttle body then screwed down onto the mounting plate for a straight forward install. The reason we chose the 70mm throttle body is that the opening in the intake manifold was also exactly 70mm. This keep the air flow laminar and prevent being disrupted by diameter changes. Stock throttle body and manifold inlet is 65mm.
Third, The TPS had to be re-located to the new throttle body. Fortunately the shaft diameters are identical so a few drilled holes later and we were in business.
Fourth, The factory throttle cable was about 4 inches too short to be able to connect up to the new throttle body so a bit of cable from a previous project allowed us to lengthen it enough to grab on to the bell crank. After that we used the factory throttle cable mount and bolted it up to the far right (unused) manifold mounting hole by cutting it down a touch and bolting it on.
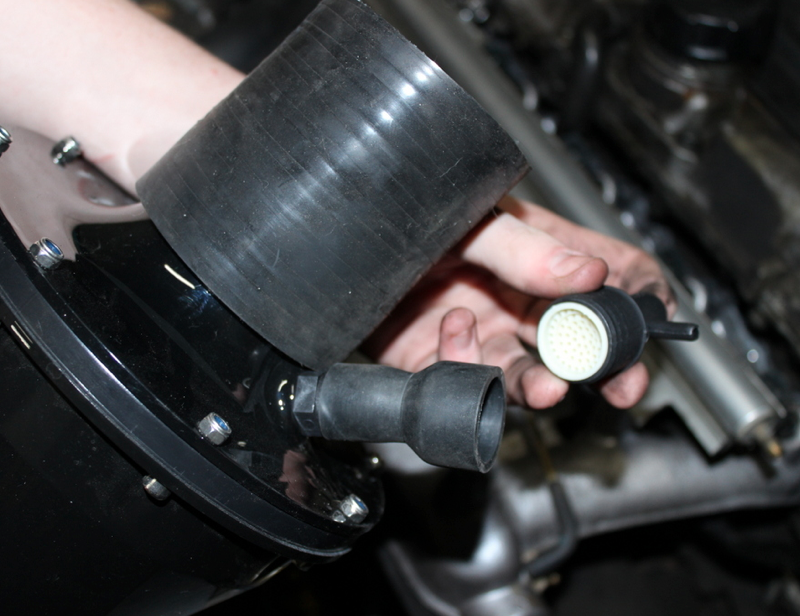
Fifth, The PCV had to be reconfigured as the original system was integrated into the air inlet tube. Going back to the early red block PCV of similar design made connecting up to the oil separator box a dream. Connected right into the high flow filter we used and then routed to the hard plastic line from the oil separator box. Vacuum nipple off the side was connected to the inlet manifold itself.
Sixth, We used an oil dipstick tube and dipstick from a later ME7 car so it would bolt up to the new intake manifold as the mounting point is different from the early to late manifold design.
Seventh, Wiring for TPS and MAF had to be extended by about 6 inches to reach the new sensor locations. Proper soldering and shrink wrap made quick work of that. Note for this build we deleted the EGR and the IAC. This was done for both simplicity and ease, although we did use software from later model cars without EGR so the tailpipe emissions are not negatively impacted. IAC removal does mean the idle can be affected a bit when the A/C compressor turns on but this proved to be a minor issue and wasn't nearly as impactful as I initially suspected.
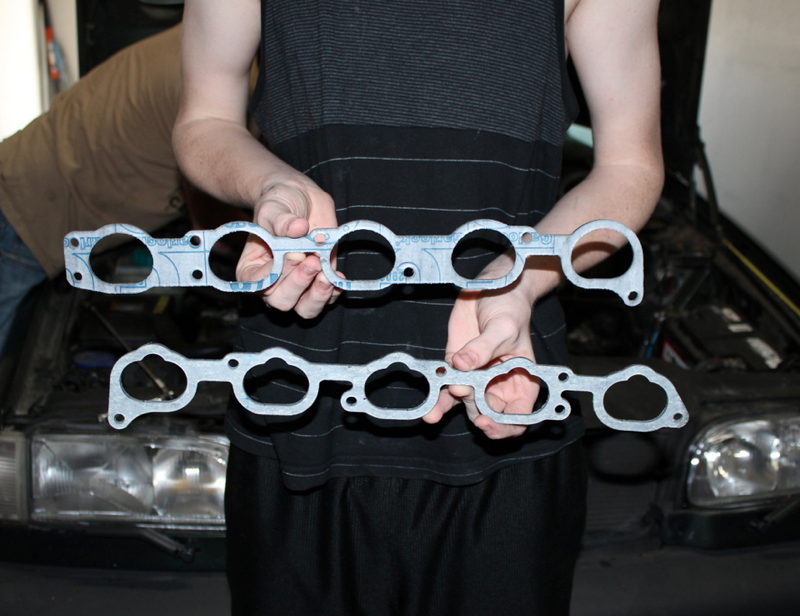
Eighth, the intake runners are of a slightly different shape from older to newer style so we used a Snabb intake manifold spacer from the later model cars and shaped the back side to form a smooth transition from the manifold to the head. This allows for smooth laminar flow transition from the intake manifold and doesn't upset injector spray pattern enough to be of consequence.
Now it's time to get track side! Stay tuned for the final episode of our non-turbo build!
Robert Lucky Arnold
~ ~ ~
[list][*]Questions, comments, arguments and freakouts accepted and encouraged. Really. Lucky WANTS to answer your questions.
[*]If you want to remain anonymous, email me your question or comment and I will post it as "Anonymous User".
[*]It takes Lucky and me several hours combined to bring you Fast Fridays. Your questions and comments validate FF's value.
[*]I write paragraph headlines, and sometimes article headlines. Yell at me if you find these not to your taste.
[*]Same thing with italics and bolds , they're all mine.
[*]Cams and turbos and MBCs and chips and... whoo![/list]
Matt
