


Volvo 850 S2 Transmission Solenoid Replacement w/Pics
This topic is in the MVS Volvo Repair Database »
Volvo 850 S2 Transmission Shift Solenoid Replacement w/Pics
Re: Volvo 850 S2 Transmission Solenoid Replacement w/Pics
Dave, did you drop the subframe or work from the top? I'd really like to avoid dropping the subframe if I can.
93 850 GLT sedan 156K
94 850 Turbo 189K
94 850 Turbo 189K
-
daversm
- Posts: 52
- Joined: 28 March 2014
- Year and Model: 850 1994
- Location: California
- Been thanked: 1 time
I worked from the top, but it's worth saying that doing it from the top is also the reason I ending up breaking one of the solenoid. The lock up solenoid is at the bottom of the valve body so when you are pulling out the pan, the pan tends to get stuck of the edge of the lock up solenoid. In my case, the pan was stuck on the plastic part of the solenoid and it broke a bit off.
You will have to jack up the engine/trans a little so you can get some extra room to take out the pan, and also so you can reach some of the screws. I jacked up the engine/trans without removing any subframe bolts. Just put a jack under the trans, and jacked it around 1.5 inches.
If you do decide to do it from the top, here is a tip.
Being that the pan tends to get stuck on the edge of the lock up solenoid,when pulling out the pan there is a point were if you look from the bottom of the car you will see that the pan is stuck on the solenoid.There will not be much room but at this point try and undo the screw of the lock up solenoid, this will allow the solenoid to twist and give you more room to take the pan out. Do the same thing when putting the the pan back on.
As a last word, I really did not enjoy doing this job from the top. Maybe if you are more experienced with working on car you will have a easier time doing this. Someone else said they were able to do this job in about 5-6 hours.
Also if doing this from the top, I found it impossible to use any kind of chemical gasket because of all the wiggling you have to do to get the pan out. I used a gasket paper, its only been 2 days but so far no leaks.
Last edited by daversm on 25 Aug 2014, 16:57, edited 1 time in total.
-
daversm
- Posts: 52
- Joined: 28 March 2014
- Year and Model: 850 1994
- Location: California
- Been thanked: 1 time
Nope, didn't undo the upper engine brace, the re install was MUCH easier than removing the pan. The reason of this is that I didn't unscrew the solenoid like I mentioned above when taking the pan off.
I put the gasket on first, then the pan on.
It took me around 20 mins of wiggling to get the pan on. I did the thing I mentioned above about leaving the bottom lock up solenoid unscrewed, this will allow you to twist the lockup solenoid out of the way of the pan, then when the pan is past the solenoid, lock the solenoid in place with the screw. Then screw in the pan.
Just it clarify, don't remove the solenoid completely, just remove the screw that will allow the twist in place. which will let the plastic bit of the solenoid get out of the way of the way.
-
polskamafia mjl
- Posts: 2640
- Joined: 1 April 2009
- Year and Model: 1995 Volvo 854 T-5R
- Location: Hershey, PA
- Has thanked: 19 times
- Been thanked: 21 times
Glad it's doing ok for you! What method did you use for shaping the gasket correctly?
I should have done what you did and placed the gasket on the transmission side and wiggled the pan into place. For some reason I thought it was smarter to place the gasket on the cover and secure it with all night bolts and then wiggle it into place. In doing so, I lost one of the T40 screws and visibly tore the gasket in at least two spots. I was short on time (sun was dangerously close to the horizon) so I went with it any way hoping it would be ok. Obviously it wasn't.
Hearing that you had success with the gasket paper has made me rethink this and I may try making a new gasket and doing it your way. The thought of contorting to remove those 8 bolts again fills me with dread.
A couple of questions for you. When you pulled the pan out did you struggle with getting the upper ATF cooler line out of the way? I'm talking about the one that runs from the top of the radiator to the bottom of the actual transmission. On my car there is some kind of bracket that holds that hose in place. The bracket is located right where the engine and transmission meet. If I could have released that hose and moved it out of the way it would have made things a thousand times easier I think.
Second question. Do you have any tips for getting the two screws on the left out, you know the really hard ones? I got them both in and out but they took up a significant amount of time. If I could speed up there removal/installation I think I could cut the the labor time in half for this project.
EDIT: One other question, how much time or how well did you clean off the mating surfaces of the pan cover and transmission?
EDIT: Thought of yet another question. Anyone know where I can get a replacement T40 screw? Would the stealer have those on hand?
'All my money is gone and I have an old Volvo.' - Bamse's Turbo Underpants
Current: 1995 Volvo 850 T-5R Manual - Bringing it back from the brink of death
Previous: 1996 Volvo 850 GLT - Totaled
Current: 1995 Volvo 850 T-5R Manual - Bringing it back from the brink of death
Previous: 1996 Volvo 850 GLT - Totaled
-
daversm
- Posts: 52
- Joined: 28 March 2014
- Year and Model: 850 1994
- Location: California
- Been thanked: 1 time
To make the gasket I put the pan on the gasket paper and traced the outside edge of it with a pencil, I cut that out with scissors. I then put the cut out on the pan, I put holes where they need to be with a pencil (for the 9 torx screws), then I put the screws in the pan ( to hold the paper in place). At this point I used the scissors to cut the inside. I put a hole in the middle of the paper and slowly cut outward till I got the shape of the pan. I didn't do that good a job. I think as long as you don't have any rips in the paper you should be OK. Or if you can just use RTV.
As for cleaning the mating surface for the gasket, I did clean the pan rim because it had a lot of old RTV on it, and then I rubbed it with a sponge ( soap and water). I didn't clean the transmission surface at all. It didn't have any RTV on it so I just left it.
Cooler line: I actually had to remove this totally. There was no way I could get to 2 of the screws without taking it off. To take it off there are 2 screws. The first one is shown in picture 4, it is where the line goes into the transmission. The second is shown in picture 3, to see this bolt I had to remove the plastic air guide ( held in place with 2 nuts) at the bottom front of the car. Once I took this off, I could easily see the second screw to remove the cooler line. The cooler line on mine had a green o-ring where it goes into the transmission. Once the screws are out, just pull it out.
Also when you remove this bottom plastic air guide plate, you can get a good view of one of the hard to reach T40 screws, I used a long socket extension to take this screw out, from this angle it was very easy.
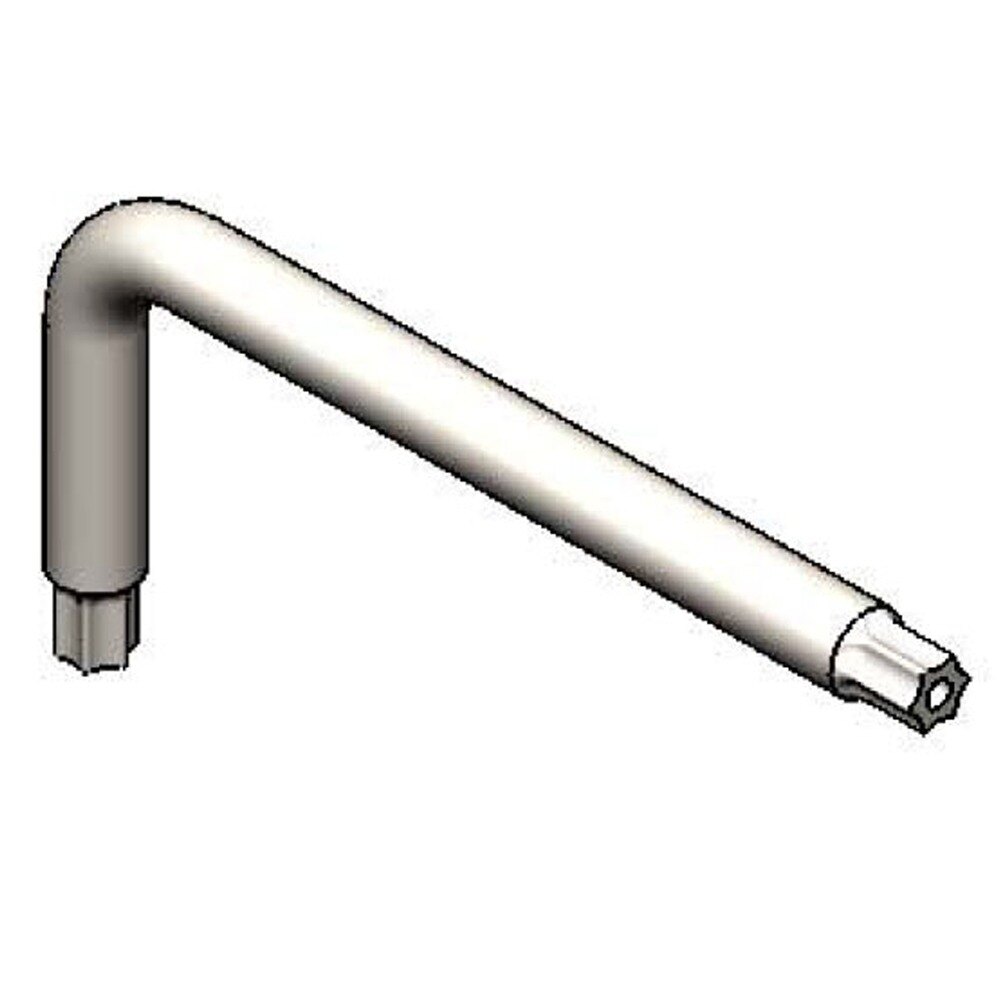
So one of the 2 hard to see T40 screws can be seen when you remove the bottom air guide plate. There is one more hard to see screw which is on the left side, the lower one of the 2 left side T40 screws is the one that gave me the most trouble. I had a T40 screw driver in an L shape which is what I used to get this out, while under the car.
http://www.webstaurantstore.com/images/ ... -l-key.jpg
Picture 2 is the view you have when you take out the bottom air guide plate. The yellow rectangle is the opening you get.
Picture 1 is the bottom air guide plate I am talking about.
And yup I agree, I could literally cut the time in half if I could remove and install those t40 screws quicker.
Also might be worth mentioning, but when I did this job from the top, I removed the transmission dipstick tube. Don't know if it actually helped but I felt like it gave me more room to work and move around the pan when removing it.
Daver
As for cleaning the mating surface for the gasket, I did clean the pan rim because it had a lot of old RTV on it, and then I rubbed it with a sponge ( soap and water). I didn't clean the transmission surface at all. It didn't have any RTV on it so I just left it.
Cooler line: I actually had to remove this totally. There was no way I could get to 2 of the screws without taking it off. To take it off there are 2 screws. The first one is shown in picture 4, it is where the line goes into the transmission. The second is shown in picture 3, to see this bolt I had to remove the plastic air guide ( held in place with 2 nuts) at the bottom front of the car. Once I took this off, I could easily see the second screw to remove the cooler line. The cooler line on mine had a green o-ring where it goes into the transmission. Once the screws are out, just pull it out.
Also when you remove this bottom plastic air guide plate, you can get a good view of one of the hard to reach T40 screws, I used a long socket extension to take this screw out, from this angle it was very easy.
So one of the 2 hard to see T40 screws can be seen when you remove the bottom air guide plate. There is one more hard to see screw which is on the left side, the lower one of the 2 left side T40 screws is the one that gave me the most trouble. I had a T40 screw driver in an L shape which is what I used to get this out, while under the car.
http://www.webstaurantstore.com/images/ ... -l-key.jpg
Picture 2 is the view you have when you take out the bottom air guide plate. The yellow rectangle is the opening you get.
Picture 1 is the bottom air guide plate I am talking about.
And yup I agree, I could literally cut the time in half if I could remove and install those t40 screws quicker.
Also might be worth mentioning, but when I did this job from the top, I removed the transmission dipstick tube. Don't know if it actually helped but I felt like it gave me more room to work and move around the pan when removing it.
Daver
- Attachments
-
- first cooler line screw
-
- 2nd cooler line screw
-
- view when you take off bottom air guide plate
-
- air guid plate to remove
- 1284.jpg (57.17 KiB) Viewed 2370 times
Last edited by daversm on 26 Aug 2014, 02:45, edited 2 times in total.
-
polskamafia mjl
- Posts: 2640
- Joined: 1 April 2009
- Year and Model: 1995 Volvo 854 T-5R
- Location: Hershey, PA
- Has thanked: 19 times
- Been thanked: 21 times
I knew there must be some way to remove that cooler line. I knew about the bottom 10mm bolt I couldn't see that 2nd bolt though so thanks for the tip.
EDIT: I had intended to call the dealer today and check to see if they have the screw. I'll try tomorrow.
EDIT: I had intended to call the dealer today and check to see if they have the screw. I'll try tomorrow.
'All my money is gone and I have an old Volvo.' - Bamse's Turbo Underpants
Current: 1995 Volvo 850 T-5R Manual - Bringing it back from the brink of death
Previous: 1996 Volvo 850 GLT - Totaled
Current: 1995 Volvo 850 T-5R Manual - Bringing it back from the brink of death
Previous: 1996 Volvo 850 GLT - Totaled
-
polskamafia mjl
- Posts: 2640
- Joined: 1 April 2009
- Year and Model: 1995 Volvo 854 T-5R
- Location: Hershey, PA
- Has thanked: 19 times
- Been thanked: 21 times
Finally finished it! I posted a write up: https://www.matthewsvolvosite.com/forums ... =1&t=65527
Everything went well the second time around except for snapping the head off of the transmission cooler line where it joins the bottom of the transmission. Nothing can ever be easy.
Everything went well the second time around except for snapping the head off of the transmission cooler line where it joins the bottom of the transmission. Nothing can ever be easy.
Last edited by polskamafia mjl on 28 Aug 2014, 16:50, edited 1 time in total.
'All my money is gone and I have an old Volvo.' - Bamse's Turbo Underpants
Current: 1995 Volvo 850 T-5R Manual - Bringing it back from the brink of death
Previous: 1996 Volvo 850 GLT - Totaled
Current: 1995 Volvo 850 T-5R Manual - Bringing it back from the brink of death
Previous: 1996 Volvo 850 GLT - Totaled
-
- Similar Topics
- Replies
- Views
- Last post