I just did the timing belt, WP, etc. on my 2005 XC90 2.5T with 110K miles.
I just came up with a nice way to line up the crank and want to share with everyone. This easy trick is true for all Volvo 5-cylinder engines, from 850, S70, V70, C70 to S80, S60, XC90 etc.
On the issue of Crank Marks, there are tons of youtube videos, DIYs showing the tiny tiny marks on the crank that are so hard to see unless you have good eyes or you remove the Crank Pulley.
There is a MUCH MUCH EASIER way to line it up, even with the Crank Pulley in place.
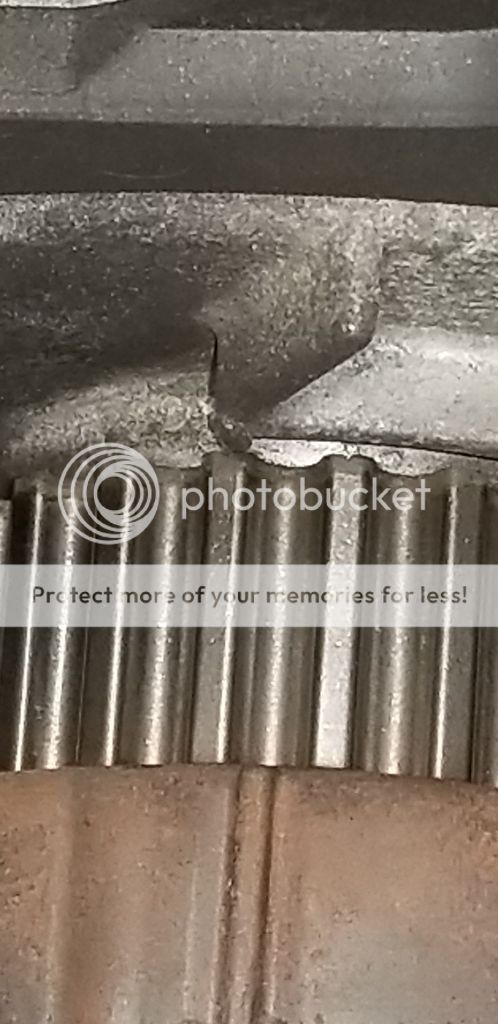
1. Method #1: use the index finger and feel both ridges (RED arrows). This photo is shown with the Crank removed, but you can easily feel both ridges even with the Crank Pulley in place.
2. Method #2: This method is much easier!
- Note the Locating Pin is at approx 1 o'clock position.
- Incidentally, one of the Crank Pulley bolts lines up with the bolt on the Engine Mount (assuming your Engine Mount is still good and not collapsed), as shown in the red rectangle at roughly 8 o'clock position.
Start with method #2 because it is very easy to do, then verify with #1. This is basically a bullet-proof approach!
The EASY way to line up Crank marks for Timing Belt
This topic is in the MVS Volvo Repair Database »
Crank Marks -- The EASY Way to Line Them Up for Timing Belt
- erikv11
- Posts: 11800
- Joined: 25 July 2009
- Year and Model: 850, V70, S60R, XC70
- Location: Iowa
- Has thanked: 292 times
- Been thanked: 765 times
Method #1 is a winner, those are well known factory marks. It is not for everyone because you are working blind, using feel not vision, but it works. Nice picture and a helpful tip.
Method #2 I would never trust except to get you in the ballpark to then properly use the factory timing marks. "Approximately" is not a word to use in aligning timing marks, and there are way too many possible variables on the engine mount construction (many different models, many different makes on that part, sometimes the mount is broken, etc.).
And then, no matter what method you use, make absolutely certain you look at those tiny, tiny notches and that they are properly lined up. Those must be confirmed. You can always see them without removing the crank pulley, a good strong light source is your friend in that endeavor. On the P80 cars remove the coolant bottle from its mount when you start, and I like to remove the serp tensioner.
'95 854 T-5R, Motronic 4.4, 185k
'98 V70, T5 tune-injectors-turbo, LPT engine, 304k, daily driver
'06 S60 R, 197k
'07 XC70, black, 205k
'07 XC70, willow green, 212k
'99 Camry V6
153k
gone: '96 NA 850 210k, '98 NA V70 182k, '98 S70 NA 225k, '96 855 NA 169k
'98 V70, T5 tune-injectors-turbo, LPT engine, 304k, daily driver
'06 S60 R, 197k
'07 XC70, black, 205k
'07 XC70, willow green, 212k
'99 Camry V6
gone: '96 NA 850 210k, '98 NA V70 182k, '98 S70 NA 225k, '96 855 NA 169k
- abscate
- MVS Moderator
- Posts: 35267
- Joined: 17 February 2013
- Year and Model: 99: V70s S70s,05 V70
- Location: Port Jefferson Long Island NY
- Has thanked: 1497 times
- Been thanked: 3810 times
I put a big gorp of whiteout in the valley between the marks, let it dry for 15 minutes, then even I can see it from up top.
To time these cars, you have to be within one tooth on the belt - it is not just a matter of having clearance - just like Erik says
Empty Nester
A Captain in a Sea of Estrogen
1999-V70-T5M56 2005-V70-M56 1999-S70 VW T4 XC90-in-Red
Link to Maintenance record thread
A Captain in a Sea of Estrogen
1999-V70-T5M56 2005-V70-M56 1999-S70 VW T4 XC90-in-Red
Link to Maintenance record thread
-
cn90
- Posts: 8249
- Joined: 31 March 2010
- Year and Model: 2004 V70 2.5T
- Location: Omaha NE
- Has thanked: 4 times
- Been thanked: 466 times
The "Locating Pin"...if you set it at 1 o'clock position, you are already within 1-2 mm of the factory mark on the crank sprocket.
The idea is...after you jack the car up and remove the wheel, while you are down in the wheel well, you do not even have to look at the Cam marks. Just turn the 30-mm nut so that the locating pin is at 1 o'clock position. This puts the engine very close to spec. Now all you have to do is "fine tuning".
2004 V70 2.5T 100K+
2005 XC90 2.5T 110K+
-
precopster
- Posts: 7543
- Joined: 21 August 2010
- Year and Model: Lots
- Location: Melbourne Australia
- Has thanked: 8 times
- Been thanked: 128 times
The locating pin position has been moved from a central location between the two 10mm bolts to slightly right of that centre in later models.
Not sure when the break was however some time after 2002 is my guess. The crank sprocket on the right is from a 2004 XC70
Current cars VW Transporter 2.5TDI, 2010 XC90 D5 R Design
-
XC70Rider
- Posts: 538
- Joined: 18 October 2018
- Year and Model: 2007 XC70
- Location: TN
- Has thanked: 35 times
- Been thanked: 41 times
After reading this thread it appears the crankshaft on my 2007 XC70 is close enough for timing.

You cannot see the ridge on the crankshaft gear without the harmonic balancer removed. I'll be removing the crankshaft gear to get to the oil pump and front crankshaft seal. When I have the gear removed I'll use my dremel to make tiny markings on the splines surrounding the ridge so in the future I won't need to remove the balancer. After making the markings I'll smooth out the top of the splines so they don't damage the timing belt.

You cannot see the ridge on the crankshaft gear without the harmonic balancer removed. I'll be removing the crankshaft gear to get to the oil pump and front crankshaft seal. When I have the gear removed I'll use my dremel to make tiny markings on the splines surrounding the ridge so in the future I won't need to remove the balancer. After making the markings I'll smooth out the top of the splines so they don't damage the timing belt.
-
Ozark Lee
- MVS Moderator
- Posts: 14798
- Joined: 7 September 2006
- Year and Model: Many Volvos
- Location: USA Midwest
- Has thanked: 4 times
- Been thanked: 75 times
You are about half a tooth off in that picture. On that style of sprocket you center the oil pump mark in the valley between the two notches. On the older style there was a single notch that was in the valley of the tooth on the sprocket that you lined up with the oil pump ridge. Putting the belt on with the crankshaft in that position could go either way, spot on or one tooth off.
...Lee
...Lee
'94 850 N/A 5 speed
'96 Platinum Edition Turbo
Previous:
1999 V70XC - Nautic Blue - Totaled while parked.
1999 V70XC - RIP - Wrecked Parts Car.
1998 S70 T5
1996 850 N/A
1989 740 GLT
1986 740 GLT
1972 142 Grand Luxe
'96 Platinum Edition Turbo
Previous:
1999 V70XC - Nautic Blue - Totaled while parked.
1999 V70XC - RIP - Wrecked Parts Car.
1998 S70 T5
1996 850 N/A
1989 740 GLT
1986 740 GLT
1972 142 Grand Luxe
-
jimmy57
- Posts: 6694
- Joined: 12 November 2010
- Year and Model: 2004 V70R GT, et al
- Location: Ponder Texas
- Has thanked: 4 times
- Been thanked: 320 times
#1 is the way most techs do it. Now that most have a flex cable camera (borescope) they use the camera to look at that mark and/or to confirm the twin marks. You can see the front of the crank gear mark as you rotate engine with breaker bar and look over fender. XC90 can be a challenge with its higher fenders.
-
tardcart
- Posts: 410
- Joined: 8 February 2019
- Year and Model: 96 850t. 93 940t
- Location: Pittstown Nj
- Has thanked: 3 times
- Been thanked: 37 times
another ball park at least on the p80 is the timing mark on the balancer lines up on the fwd timing belt. good additional proof
the crank is in the right spot if marks are hard to see on the gear. I tried using a Mac four pin cam lock but did not work. seems like the rear cam gear is always one tooth advanced when Im done every time I put the top cover on to check. its sitting on a valve and springs fwd naturally. might as well remove the pressure fuel line from the rail, and the spark plug cover or its no fun putting the cam cover on and off. only mount the bottom bolt in the tensioner and leave it vertical so the pulley can drop the critical 1/8 inch to wrestle the new belt on, then swing in the tensioner and put in the top bolt. watch the plastic button and have the slot towards the pulley pad. remember to only remove the balancer, unbolt the four bolts and leave the gear there. you have to back out the top bolt on the lower guard to get the belt under. not sure why the bolt is long like it is to just touch the belt. if some one knows tell me. I would not try the trick of slipping the belt under the balancer in place. the belts are not playable enough and you may nick it. im off in the weeds here, but since I did this yesterday its fresh in my mind. last thing is you really need a flat socket bar for 3/8 sockets to get some of theses tight spots,
the cheap ones that are for serpentine belts. since they are so long use only light pressure when tightening.
-
XC70Rider
- Posts: 538
- Joined: 18 October 2018
- Year and Model: 2007 XC70
- Location: TN
- Has thanked: 35 times
- Been thanked: 41 times
I stopped at an Indy shop and they confirmed I need to rotate the crank gear 1/2 notch CCW.Ozark Lee wrote: ↑11 Feb 2019, 07:58 You are about half a tooth off in that picture. On that style of sprocket you center the oil pump mark in the valley between the two notches. On the older style there was a single notch that was in the valley of the tooth on the sprocket that you lined up with the oil pump ridge. Putting the belt on with the crankshaft in that position could go either way, spot on or one tooth off.
...Lee
Doesn't matter now because I just removed that gear to get the oil pump. I'll line it up after I get the gear back on.
As you can see the splines do have markings on them.

They are not on top but on the side facing the engine. Who in the world has sharp enough vision to see those while on the engine?
Well I made tiny smooth grooves on the top side of those splines for future reference.
-
- Similar Topics
- Replies
- Views
- Last post
-
- 8 Replies
- 2265 Views
-
Last post by GlennG2759
-
- 22 Replies
- 7227 Views
-
Last post by abscate


