


not too much..
repaired the glove box.
-the latch broke in the closed position.
replaced the dash cover
-no more air bag cover flappin at me.
replaced the stock dash speakers.
i found a local salvage yard that had a near-perfect (appearance) 855 that i have been stripping.
next week, front seat(s) and a new sunroof.
well...new to me.
thanks for all the tips on how to do the work i've done so far.
The I Worked on My Car Today Thread
This topic is in the MVS Volvo Repair Database »
2000 V70 Tailgate Trim Rattle Fix
-
RobTheModd

- Posts: 1104
- Joined: 20 August 2009
- Year and Model: 98 S70T5M
- Location: Florida
- Has thanked: 5 times
- Been thanked: 7 times
As many of you may remember.. I had a cracked bumper!
Well I ran into a fellow MVS member on here.. I may have forgotten your name... 240atari is only part I recall sorry.
Was at the junk yard found a black 854 97
so now I have a new bumper! you can expect a writeup about it since I havent seen any on here.
also... perhaps a never been done modification soon..
-
boosted5cyl
- Posts: 1100
- Joined: 29 January 2010
- Year and Model: '98 V70 T5, '99 S80
- Location: St. Paul, MN
- Been thanked: 1 time
No so much today, but last weekend......
Cleaned, polished and waxed body.
Tested what looks like a duff MAF sensor (it started cutting out and behaving very badly on Sat)
Replaced spark plugs with autolite coppers gapped to .026"
Inspected distributor cap (cracked!) and spark leads (they have 04/97 on them, so im guessing they are original!!).
Compression test (all around 170-190PSI)
Up next weekend:
Clean\Condition leather seats.
Tranny fluid drain and fill with Dexron VI.
Oil and filter change, add Seafoam.
Change MAF.
Replace spark leads, distributor rotor & cap.
Repalce oil filler cap seal.
'04 XC90 2.5T AWD (Angus) 134K.
'99 S80 T6 (Medusa) 214k. On borrowed time LOL
'98 V70 T5 (Vivienne). RIP @ 228K. Spun rod bearings.
'99 S80 T6 (Medusa) 214k. On borrowed time LOL
'98 V70 T5 (Vivienne). RIP @ 228K. Spun rod bearings.
-
patrioty3k
- Posts: 134
- Joined: 23 December 2008
- Year and Model: 1995 850 Turbo Wagon
- Location: Southwick Ma.
1995 850 Turbo S/Wagon,Alpine head w/Sirius Sat. Radio--"OCTANE" power!
200K $400 Sleeper...nuff said!
200K $400 Sleeper...nuff said!
-
RobTheModd
- Posts: 1104
- Joined: 20 August 2009
- Year and Model: 98 S70T5M
- Location: Florida
- Has thanked: 5 times
- Been thanked: 7 times
All I did today was fix a problem I had with my headlight led strip.
One of the bulbs burned out, the company I bought them from told me they accidentally sent me a bad strand which is why I received 3 instead of the 2 I had purchased.
just finally replaced it.
check it out to see what im talking about.
Headlight LED Writeup
One of the bulbs burned out, the company I bought them from told me they accidentally sent me a bad strand which is why I received 3 instead of the 2 I had purchased.
just finally replaced it.
check it out to see what im talking about.
Headlight LED Writeup
-
whoa
- Posts: 461
- Joined: 30 July 2008
- Year and Model: 850 Turbo Wagon 1996
- Location: san francisco
- Been thanked: 1 time
Yesterday was a remedial session: the trip computer backlight went dead immediately after I repaired the odometer (so I figured I screwed up a wire), and the blower chirp was starting to come back after I'd oiled the lower bearing.
Turned out both bulbs in the trip computer were dead. I didn't have new ones on hand, but I had extra #37 bulbs from when I replaced bulbs in the ECC unit. So I managed to put them in the old trip computer bulbs' housings (by prying the metal contacts out, clipping the old bulb-to-contact wires, putting the contacts back in, bending the wires on the new bulbs out sideways, and sticking them in the housings. They work fine, but now I have a "bad bulb" idiot light on the instrument panel, which I didn't have when they were dead---and I don't see any dead headlights or tail lights. Could it be from the new backlight bulbs? The original bulbs are 1.2 watts. At 12 volts that's .1 amp. The new bulbs are rated at .09 amp, which is pretty close.
I pulled the blower (again), and this time pounded the shaft out of the cage. You have to wham it pretty hard, but I guess the cage is strong. That let me clean out the thing much better, and of course that is the only way to get access to the upper bearing. Both bearings are protected on the inner sides by soft rubber/plastic shields, which makes oiling them from afar a pretty hopeless proposition. But you can pry the shield away from the bearing and get oil under the shield. I don't know if that will be effective in oiling the bearings; we shall see! Anyway if I do have to replace things, it's now clear that I can replace just the motor ($80 for Bosch) rather than the whole enchilada (much more unless you go knock-off, which I am reluctant to do on this). To put the cage back on you just pound the other end of the motor shaft; you can pound it too far, so that the cage binds on the plastic motor case; then just pound it back a little. There is the question of balance, so you probably should put matching marks on the cage and motor shaft/rotor before taking the cage off.
Last edited by whoa on 25 Apr 2010, 16:49, edited 1 time in total.
1996 850 Turbo Wagon
-
RobTheModd
- Posts: 1104
- Joined: 20 August 2009
- Year and Model: 98 S70T5M
- Location: Florida
- Has thanked: 5 times
- Been thanked: 7 times
Currently doing this!
Not just today, but for the last number of weekends I’ve been making one good Volvo out of two bad ones. My 93 850 got rear ended and wasn’t pretty anymore, so I bought a 89 S 70 GLT. To date the transaxles, brake pads, power window motor controller, assorted light bulbs and a few other miscellaneous parts have come out of the 93. Replaced everything but the tie rod ends and hub assemblies in the front end. Will be replacing them next weekend, got hit on inspection because of them. Yesterday I pulled out and inspected the hub I was told was bad. Going to replace both tie rod ends and hubs, figure what the heck, might as well put lower motor mounts while I’m at it. This car had to be one of the most neglected cars I’ve seen. Running and riding like new now, I think it likes it’s new daddy.
93 850 GLT
96 850 GLT
98 S 70 GLT
88 Bertone
94 850 Turbo
96 850 GLT
98 S 70 GLT
88 Bertone
94 850 Turbo
-
RobTheModd
- Posts: 1104
- Joined: 20 August 2009
- Year and Model: 98 S70T5M
- Location: Florida
- Has thanked: 5 times
- Been thanked: 7 times
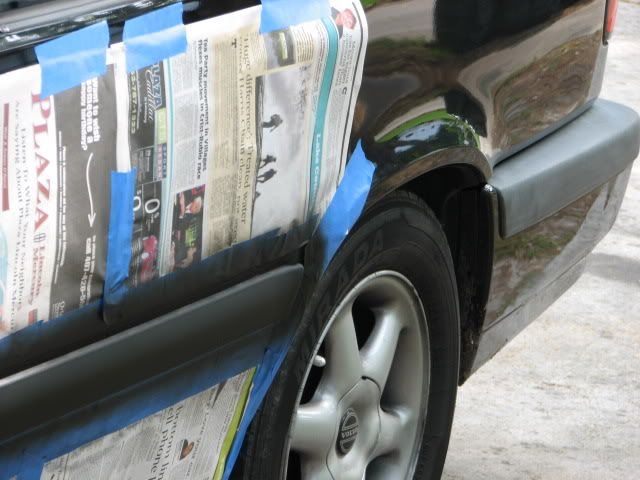
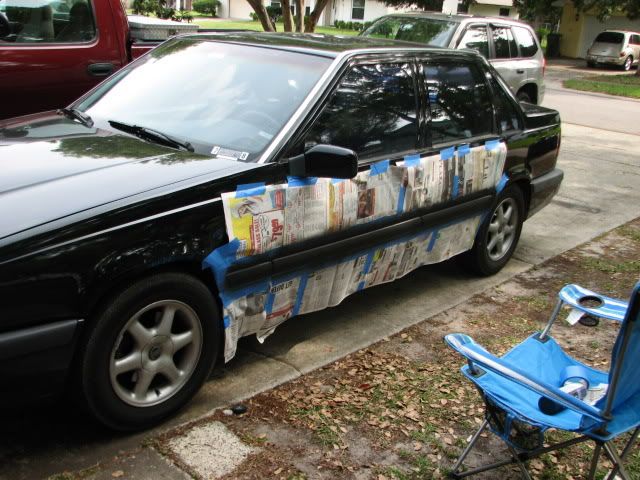
yes I know the side molds come off... before someone says it.
anyways, yeah looks NICE!!!!!!!
now I have to do front bumper, sadly a big bad storm is coming so had to stop for the night. will finish tomorrow!
im happy now because I have something to do tomorrow.
anyways, yeah looks NICE!!!!!!!
now I have to do front bumper, sadly a big bad storm is coming so had to stop for the night. will finish tomorrow!
im happy now because I have something to do tomorrow.
- Attachments
-
- IMG_6802.JPG (144.9 KiB) Viewed 1640 times
-
- IMG_6801.JPG (119.84 KiB) Viewed 1640 times
-
- need to finish front.
- IMG_6807.JPG (85.78 KiB) Viewed 1640 times
-
- Similar Topics
- Replies
- Views
- Last post
-
- 21 Replies
- 6210 Views
-
Last post by abscate
-
- 0 Replies
- 845 Views
-
Last post by Craigd2599