


The CEL on my 2004 XC90 with ~148k miles has been on with a P0134 code - "Oxygen O2 Sensor Circuit No Activity". Pretty sure I'm needing to replace it, I started doing research on the procedure, but couldn't find any for the 2004 XC90 2.5T. We're the original owners of this car, and as far as I can remember, the O2 sensors have never been replaced, so even without the CEL code, it's probably a good time to replace it anyway.
The very popular procedure out there (https://www.matthewsvolvosite.com/forums ... 10&t=36398) refers to the T6 which I didn't think translated directly enough to the 2.5T. So I put this guide together for someone looking for help on this procedure on the 2.5T. Note that I replaced only the front O2 sensor as that is what the CEL was referring to. I did not touch the rear sensor. Unlike the T6 which has three sensors (two front and one rear), the 5-cyl only has two (one front and one rear).
From start to finish, the process took me approx. 2 hours, but with enough knowledge, this should be easily done in about 30 minutes. I spent over an hour just trying to figure out how to disconnect the sensor from the harness!
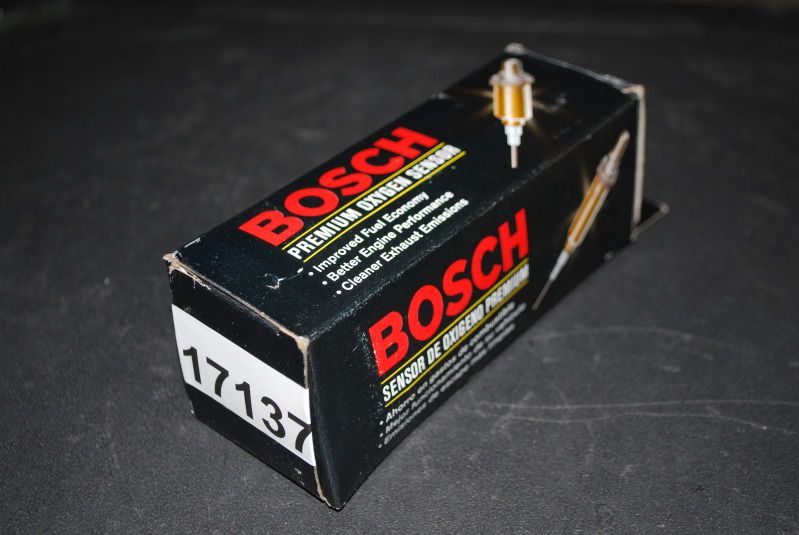
I decided to go with the Bosch-branded sensor (not the Volvo-branded one). An Amazon vendor had them on close-out, so I was able to snag a brand new one for just $82.58 shipped.
So here we go!
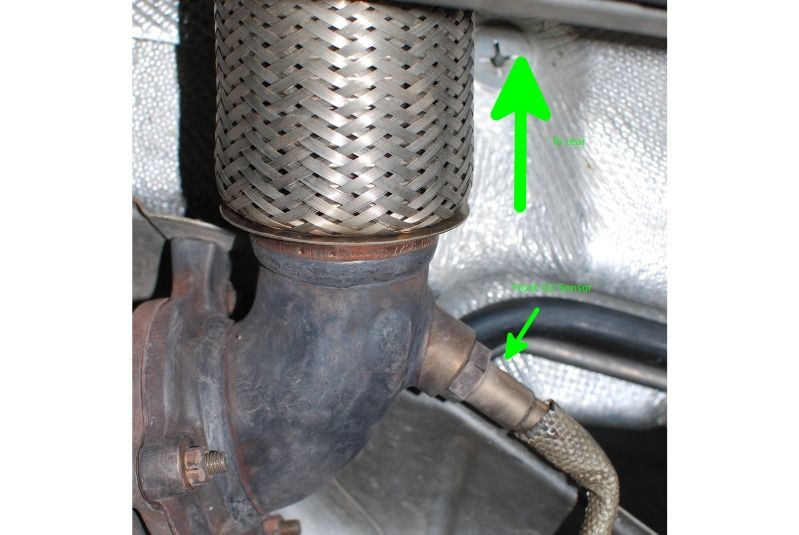
1. I first lifted the car with ramps so I could spray some PB Blaster on the old sensor, giving it time to work itself in. Here's a pic of the front sensor from underneath the car looking up. In this picture, up is towards the rear.
2. Back in the engine compartment, I disconnected the MAF connector, and undid the clamp holding the air intake pipe onto the airbox.
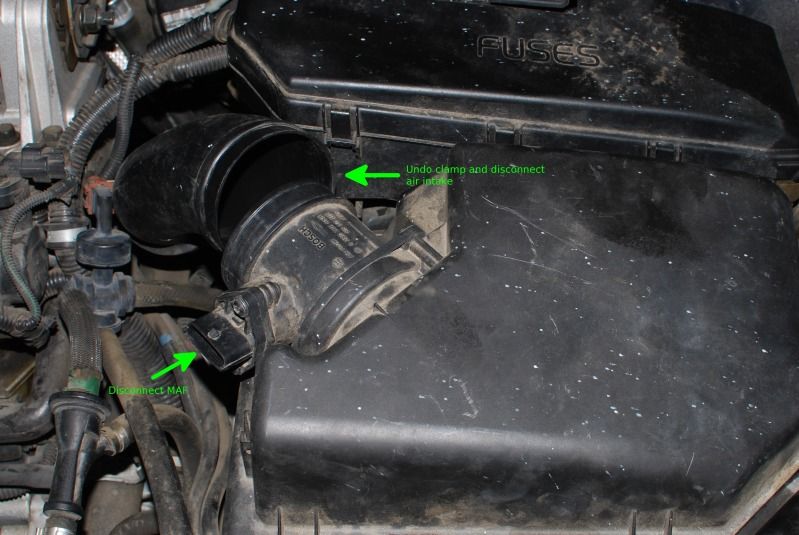
Even without the clamp, I found the air intake pipe to be pretty tightly attached to the airbox cover. Just keep wiggling it and it will come off.
3. Once the air intake pipe is free of the airbox, you should be able to push it upwards, giving you access to the O2 sensor connectors.

The front O2 sensor is attached to the connector on the left.
4. After blindly fighting with the connector trying to get it unhooked in place for close to an hour, I decided to try and figure out how to bring them closer to me. I noticed that the connectors for both front and rear sensors were held in place by a metal plate (see picture above). Removing a nut holding it in place allowed me to pull the harnesses up closer to me where I was finally able to see how the unlatching mechanism worked!
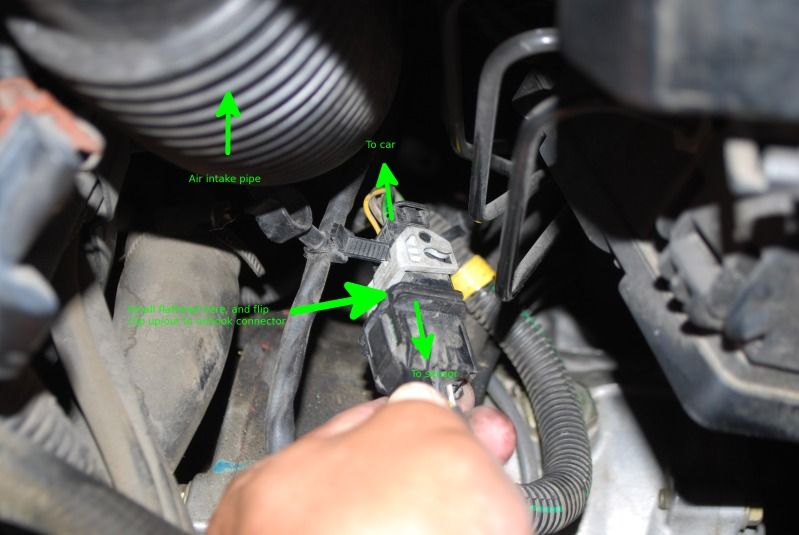
The pic above was with the harness flipped around from when it was mounted. I flipped it around so the sensor end was towards me.
In the picture, you can see how the locking mechanism works. There's a white latch that locks the connector in place. I used a small flathead screwdriver to pry/push the latch up/out. If I had known the latching mechanism worked this way, I may have been able to detach the connector in place. Maybe.
5. Everything's easy from here!
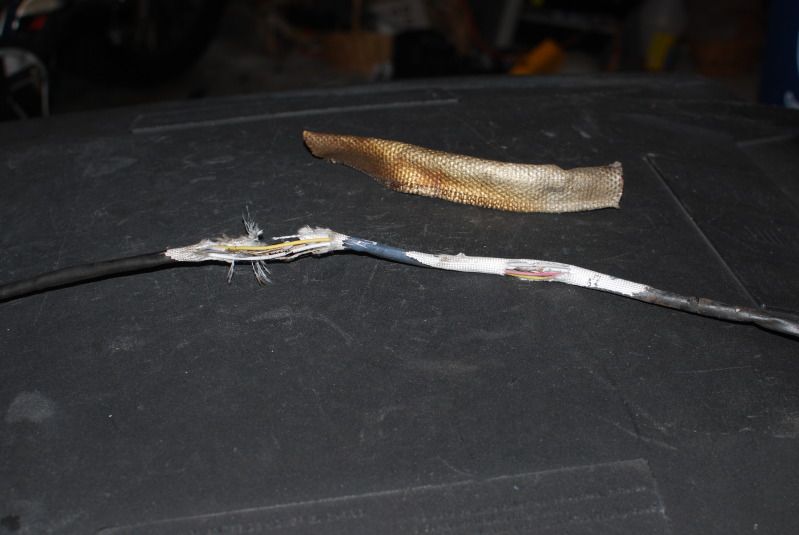
About a year ago, I had work done to replace my exhaust manifold gasket. I was getting a squeeking/screeching noise, which was determined to be exhaust escaping from a leak in the gasket. I guess during that repair, they somehow rerouted the O2 Sensor wiring in between the exhaust manifold and heat shield. The wiring was melted in a couple spots and was in pretty bad shape.
Here's a photo of the old sensor's wiring:
6. Back under the car, install the new sensor. My new sensor came with some anti-sieze compound already on the threads, so I just screwed it right on. I routed the wiring carefully so that it would not come in contact with any extra-hot parts. Make sure the heatshield jacket is in place to protect the wiring from the exhaust manifold.
7. Attach the new sensor to the harness.

The connector for the sensor has round pegs on both sides of it. With the white latch pulled up, plug the new sensor's connector in and align the pegs with the openings in the latch, then push the latch down to lock it in place.
8. Re-attach the metal plate with the nut removed in step 4. Re-install the air box by re-installing the clamp for the air intake pipe, and re-connect the MAF connector. And you're done!
By the way, I took the opportunity to clean the MAF sensor while I was at it. I had already pre-ordered a 5-pin Security Torx bit set in preparation for this, which is what you'll need to remove the MAF sensor.
There you go. I've already driven approx. 150 miles with the new sensor, and the CEL has not come on. I hope this helps someone out there!
