Help, Advice, Owners' Discussion and DIY Tutorials on Volvo's stylish, distinctive P2 platform cars sold as model years 2001-2007 (North American market year designations).
So after reading may threads on how to install lower ball joints I got all the require stuff and started the task. Well everything went well with getting the old ones out but when it came to getting the new ones in I could not get them totally down all the way on the one side. Even after tapping them back out and trying again it would stop at the same spot and would go no further.
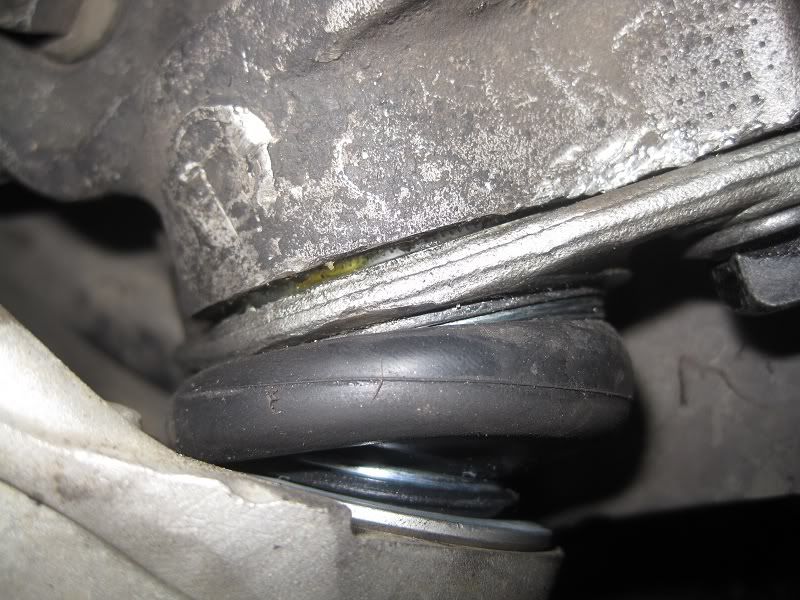
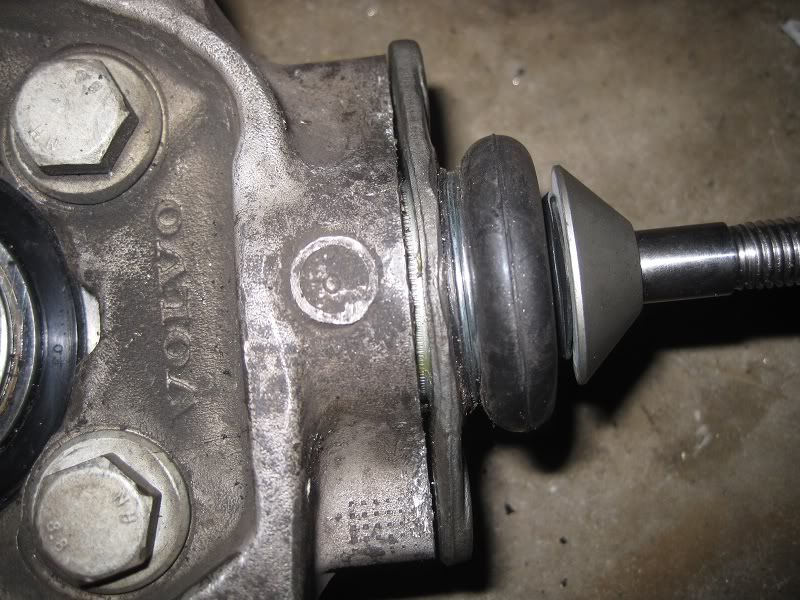
Here are some pics of the drivers side which I reinstalled and the passanger side which I still have out. I was wondering if they will work themselves the rest of the way flush or should I just take them somewhere with a press?
They are snug little buggers, that's for sure. Good photos by the way.
I recently did this task and know exactly what you're talking about. One thing I noticed when installing them is that when you first start them into the hole, it helps to rotate the ball joint one way or the other just a tiny bit so that you feel the knurls align with the grooves that were left by the old ball joint's knurls. You just have to be sure you don't rotate it to the point that the bolts holes won't align.
Also, the mistake I made was to assume I could use the bolts to pull the ball joint home. But the "ears" are too soft and will bend up as you tighten the bolts. It appears from your photos that that is what's going on in your case - the ears are bent and hitting home before the center part is all the way home. Either you tried as I did to pull it together with the bolts, or you wailed on the ears with a hammer. Once I realized what was happening, I pulled the ball joint out and with the aid of my bench vise I bent the ears back to where they belonged. Then I re-installed them (aligning the knurls and grooves) tapped them home using a hammer and an old deep socket that I didn't care about any more. I placed the socket in numerous different spots around the base of the ball joint as close to center as I could get, yet being careful not to damage the rubber bladder. Be patient, working around and around different spots on the base. Once it's home, THEN install the bolts.
Well I finally figured out the main reason why . The grease I put on them was causing it to hydraulically lock and not allow it to go any further. Once I tapped it back out and cleaned out all the grease it went right in with no issues. I did decide based on advice from a few others that I didn't redo the on the drivers side since it was pretty much down but only a very tiny bit and pretty much flush.
I know it is old thread . Could some one please let me know how to pull or take out the ball joint out please with a special tool. I have exact same model ball joint and I want to buy special tool but i dont know which one(I dont have air tools or impact wrench) but will use breaker bars for most of my jobs.
I didn't use any special tool, but I might have been lucky. To get the old one out, I put the ratchet on the nut and turned it a little - without a torx socket - so as to make the ball joint turn a little inside the control arm. Then released the nut while keeping the rod with a torx socket from rotating. Did not touch to the two mounting bolts of the bj on the control arm.
Placing back a new ball joint is easy if the control arms are old. I think it's better done with both front wheels off the ground. With new c-a the bushings will be stiff and prevent the bj rod to slide back into the c-a. I had to remove the two lower strut bolts - both front wheels off the ground or the sway bar will make it hard to put the strut bolts back in place. When the strut bolts are removed, the spindle will fall so the axle nut must be removed and the axle must be supported with a wire or the CV joint can dislodge and it's a paint to put it back together. I did use a long pry bar to push the c-a downwards.
The tool you need to separate ball joint from control arm is OTC 6297 or similar. It helps to compress the strut a bit using external spring compressor, maybe inch or so, that way you don't need to do most of what oragex has explained.
Old ball joint comes out of wheel hub assembly easily with help of a chisel and 3+ lbs hammer. To press a new ball joint in use a piece of PVC pipe and a hammer. Position pipe as close to rubber as possible, but make sure not to jam and pinch it.
Thanks of your guidance Oragex and Vtl.
Here is what Iam going to do . Please correct me if Iam wrong.
Iam going to change the control arm with the ball joint.
So first
1. I will loosen the inner control arm bolts and then remove the ball joint control arm bolts.
2.Then undo the tie rod bolt – so I can maneuver the Hub.
3.Then Undo the ball joint – control arm bolt.
4. Using strap wrench lower the control arm end to release it from the ball joint bolt.
5. Now remove the control arm from the sub frame( inner side)
6.To remove the ball joint undo both the bolts on the ball joint and re connect the control arm with the ball joint bolt and tighten it. Then with a big hammer start to hit it on the lower control arm near the ball joint. So control arm will pull the ball joint together out. (CORRECT ME IF IAM WRONG HERE PLEASE).
7. Then re inserting is find a nice big construction pipe which fits the ball joint around the rubber and start hitting it with the hammer.
And also please let me know what kid of grease we have to put in the ball joint when putting it back.
Thank you
I'm curious as to which brand of ball joint caused this. I once fitted some Karlyn ball joints (FCPs budget priced offering from a couple of years ago) and had the same result.
I now only use Lemfoerder or Febi or Swag which are usually reboxed OEM components or very high quality and never had a problem since.
Current cars VW Transporter 2.5TDI, 2010 XC90 D5 R Design
No need to do anything with control arm if you only need to do ball joint (besides touching bj bolt). Also I use cheap Harbor Freight spring compressor to compress spring a bit while the strut assembly is in place, so I could remove the entire wheel hub and the strut won't collapse onto CV axle. This is much easier than dealing with the strap. HF compressor is utter crap, but it fits in that tight area and can shorten the spring for inch or two without complication.
When you are taking wheel hub out or generally touches the hub's upper bolt, first take outer caliper and measure the distance between front edge of hub and rear of strut around bolt area. Caliper should only lightly scratch both ends. This way you'll know how to set camber angle back and avoid paying for wheel alignment.