Login Register

Replacing Rear "Wheel Bearing/Hub Assembly" 2001 V70XC/XC70

Help, Advice, Owners' Discussion and DIY Tutorials on Volvo's stylish, distinctive P2 platform cars sold as model years 2001-2007 (North American market year designations).

2001 - 2007 V70
2001 - 2004 V70 XC (Cross Country)
2004 - 2007 XC70 (Cross Country)
2001 - 2009 S60
2003 - 2007 S60 R
2004 - 2007 V70 R

This topic is in the MVS Volvo Repair Database » Replacing Rear Wheel Bearing/Hub Assembly, 2001+ XC70/XC90
Post Reply
zacharyzoosh
Posts: 20
Joined: 20 March 2013
Year and Model: S80 1999
Location:
Been thanked: 1 time

Volvo Repair Database Replacing Rear "Wheel Bearing/Hub Assembly" 2001 V70XC/XC70

Post by zacharyzoosh »

I am happy to share photos and details of the process to replace your rear wheel bearing/hub assembly on a 2001 Volvo V70XC (same as the XC70 in the next few subsequent years, and also XC90 applicable. This is for AWD models with a splined hub on the rear axle.

Tools needed: Tire Iron 19mm socket/ or breaker wrench; (for lug nuts to remove rim/wheel), flathead screwdriver and 7mm allan key wrench (for brakes caliper disassembly), 13mm Socket (for brakes), 14mm socket for center of hub bolt. 17mm socket/wrench for four wheel hub bolts. Hub/Bearing Puller Kit (for older rusty hubs.) Optional 18mm to remove some of the suspension to reach lower rear hub bolt if you don't have certain

I've done hubs on a few different vehicles and I was expecting it to be a more difficult job on this P2 Volvo, but this was actually quite an easy one. I'm sharing to dispel any anxiety for those who are curious or concerned about what it takes. You can do it!

1. Jack up vehicle until tire is not quite off floor (so you can loosen lugs without tire spinning). Once all lugs are loose, jack up car into air significant distance off floor.

2. Secure jack stand in steady position beneath under carriage jack placement. Lower jack and continue to remove lug nuts and wheel completely. Image

3. Remove brake caliper assembly[/b] with brake pads from Rotor. Remove brake line from brackets and clips and push out of the way. Image Image
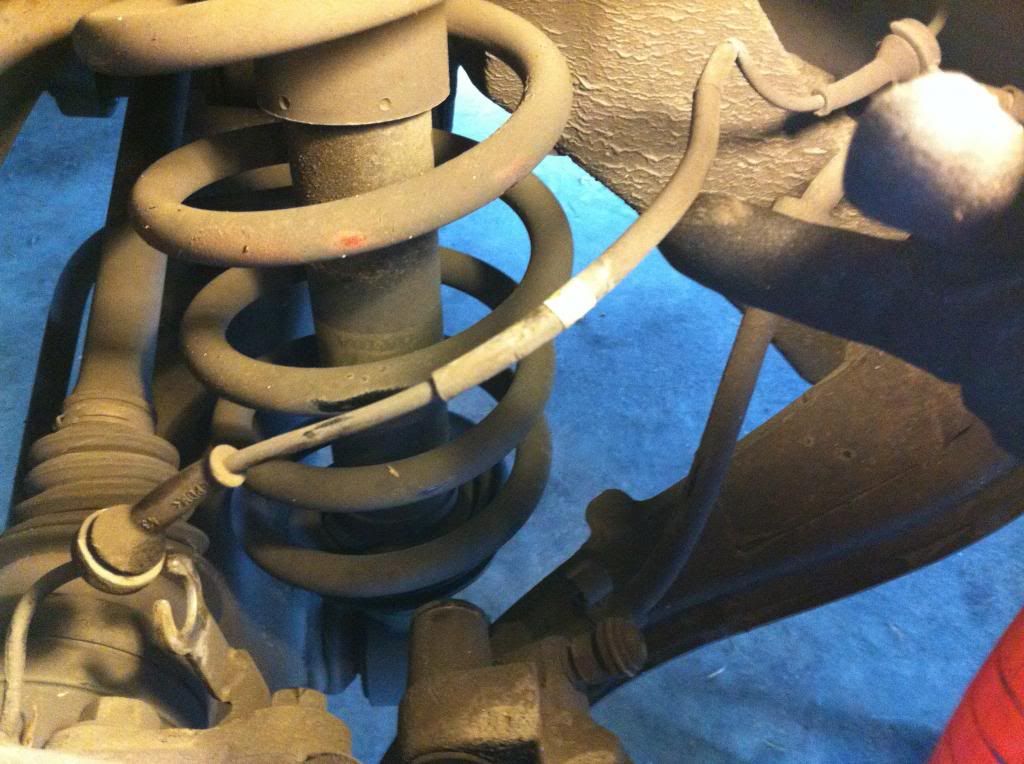
a. Use flathead to pry plastic caps from brake housing. Use 7mm Allan wrench to loosen and pull out bolts.
Use 13mm socket to remove bolts from brake caliper assembly connected to suspension. Image
Its important to remove both sections of the brake assembly here, as it will be easiest to remove it all from the Rotor this way. If you have a new flat and smooth rotor, you may be able to get away with just removing the 13mm bolts and sliding the whole assembly off. Otherwise you'll have to disassemble the housing with the brake pads, which also requires removing the metal wire tension clip on front of housing. ImageBe sure to hang your removed Caliper assembly with a small tight bungee cord against the strut to make sure the brake line isn't strained.

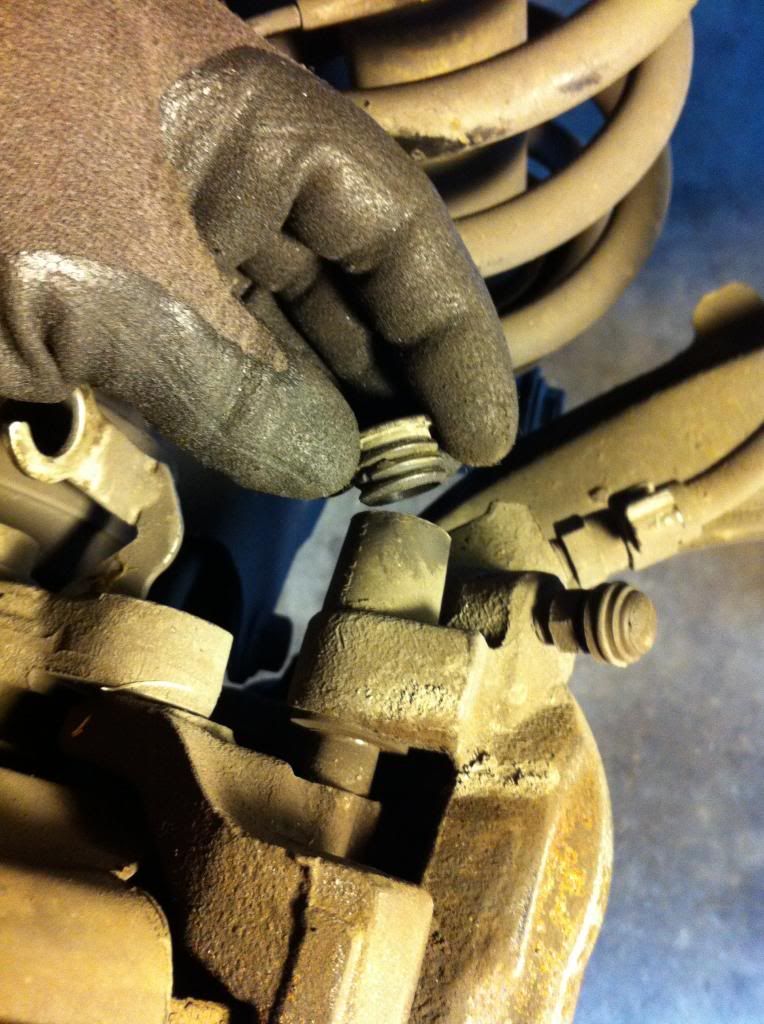
4. Remove Rotor:[/b] locate guide pin on front of Rotor, and remove with 10mm deep socket. Remember to release parking brake after you remove this 10mm guide pin bolt. Image
(There are drum brakes under this rotor. Don't pull the Rotor while the parking brake is on, or it will feel like there are springs holding it on. Guess why? Cause there are!)
Pull Off Rotor. Image

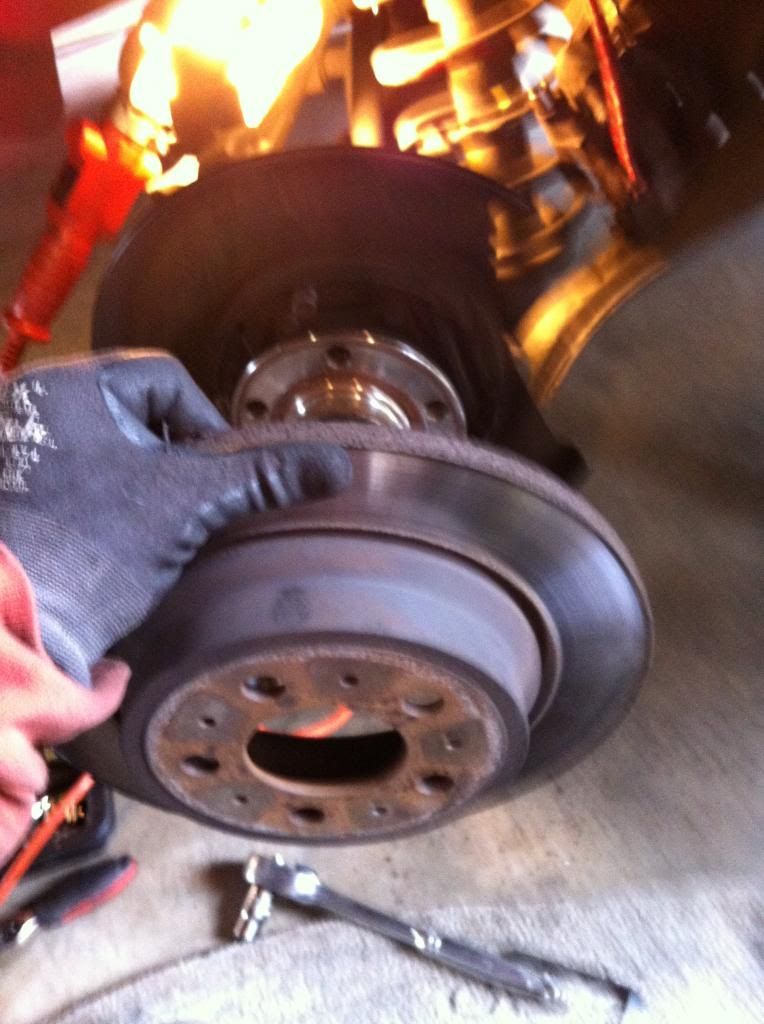
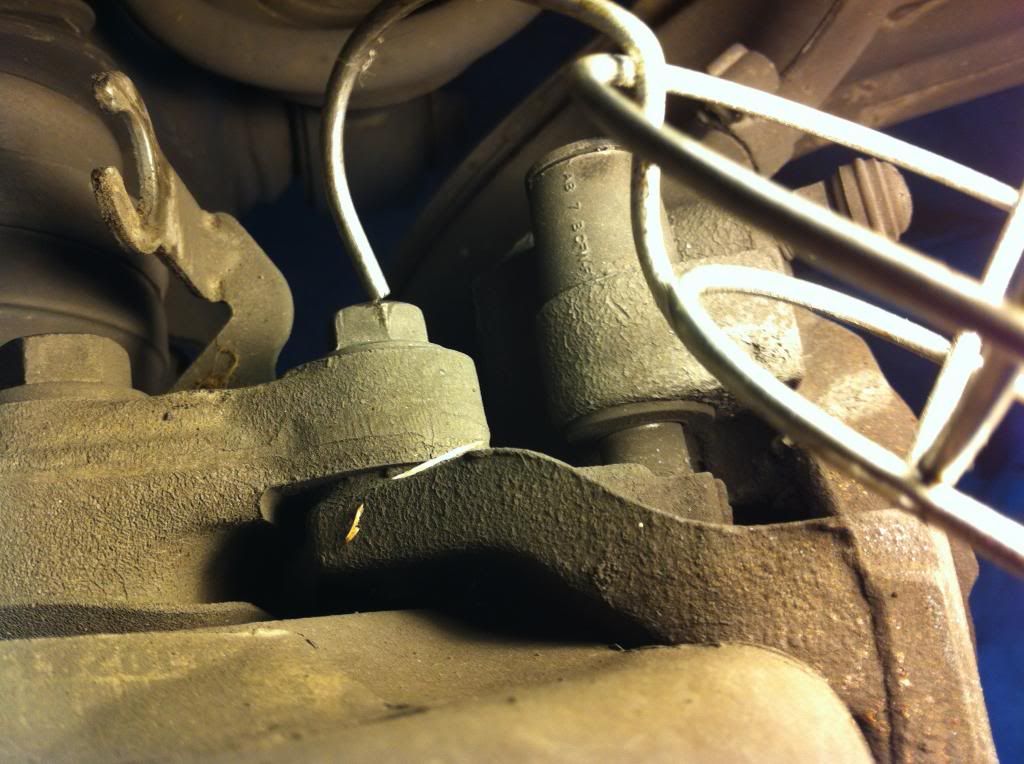
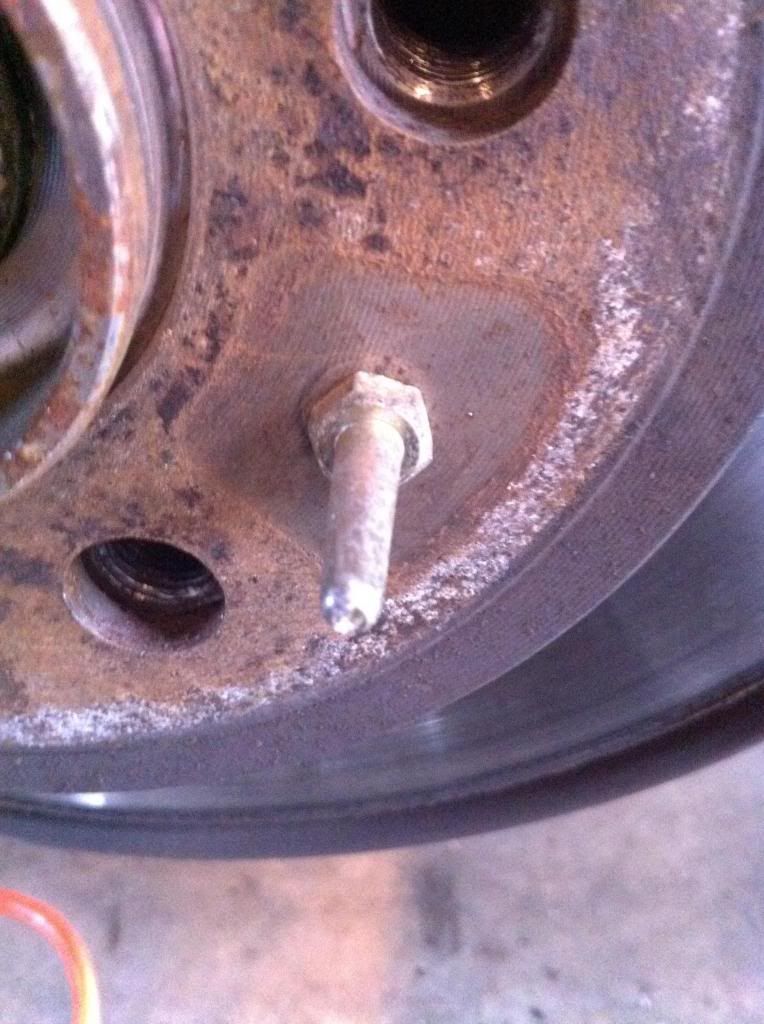
5. Remove wheel hub bolts: four 17mm bolts securing Wheel Hub, located behind suspension housing. and one 14mm bolt in the middle front of hub assembly (which screws into axel spline.)
a. The four 17mm bolts on rear of suspension should be easily identified. Image They align with the Hub assembly and can be seen coming through from the front of hub assembly housing. The upper two 17mm bolts are easy to get to. The lower bolt toward vehicle front is easy to access as well. They are pretty tight so get a snug socket and short breaker if you have one. The 17mm bolt that is lower, and toward rear of vehicle has a very tight access port, so to speak. I have a variety of twisty wrenches and sockets and I was able to loosen it without much trouble. Image But if you need more access, you can remove lower suspension which clogs its access. Use 18mm socket there.
b. The one 14mm bolt in the center of the wheel hub isn't terribly tight.Image
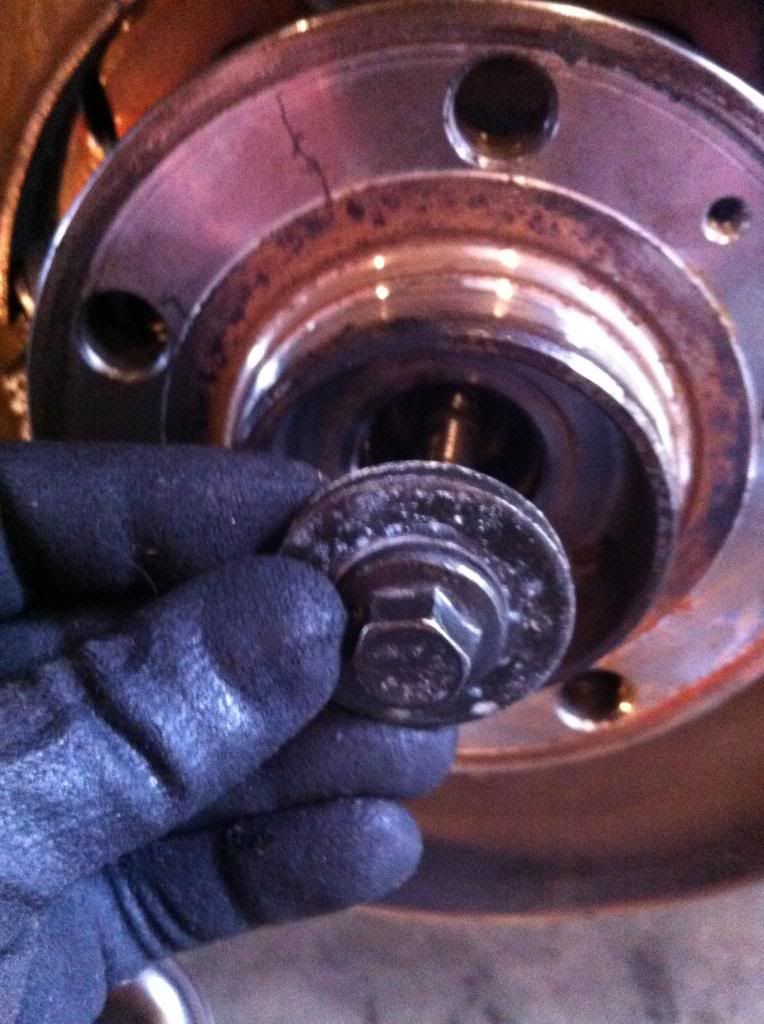
I stuck two extensions into the hub bolt holes and secured the assembly from spinning with a long 22 wrench and then removed the 14mm bolt easily.

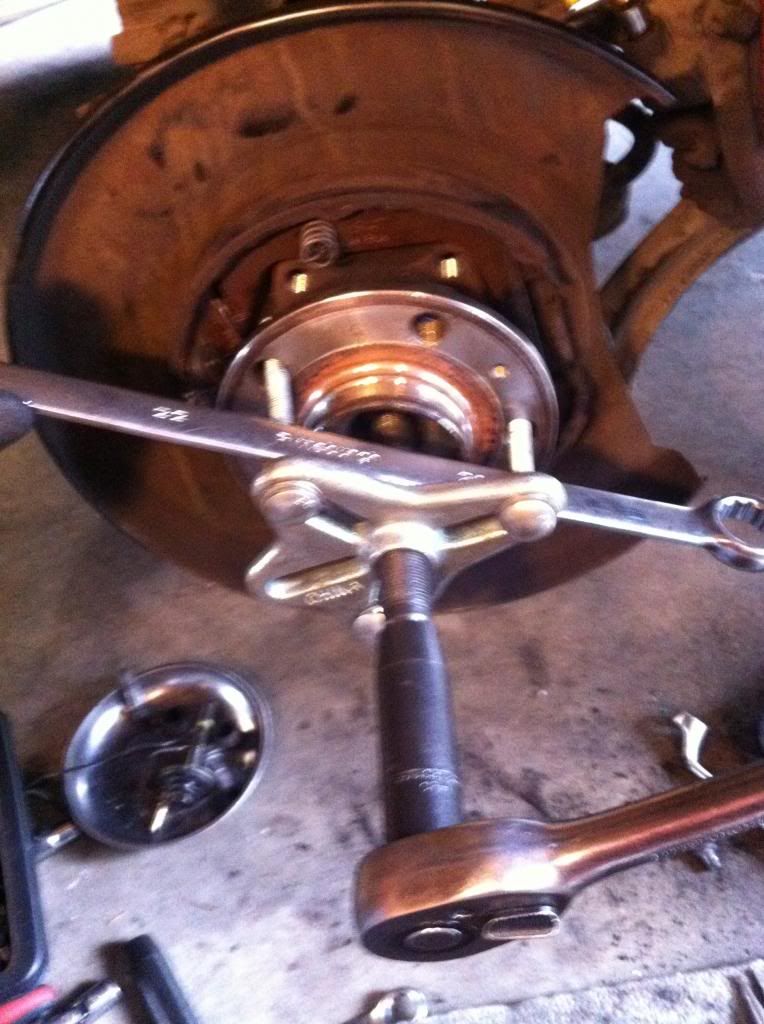
6. Either pull the hub assembly straight out, or get out your hub/bearing puller kit. In my experience you'll need a hub puller. The old hubs tend to rust onto the housing, and you don't want to damage your axle spline. The best thing to do is to attach hub puller to the hub, and push that center bolt right onto your axle spline, which slowly un-marries the two. Be careful to use a socket or something solid between your bolt puller "pusher bolt" so that you don't damage the axle spline as its pushed apart. Image


6. Clean the suspension housing opening once your old hub pops off the axle. Be sure to also clean up the axle spline with a soft wire brush. And be sure to scrape around the flat surface where your new hub with meet against the suspension housing. Image

7. Install new hub in the reverse order. Put a little grease on the rear and tip of axle spline. Guide axle spline right into new hub. If you cleaned it well, it should slide right on. Retighten 17mm bolts on rear of suspension housing. Install 14mm bolt to front of wheel bearing/hub assembly to snug up axle spline inside hub assembly, and re-check 17mm bolts in rear. Image

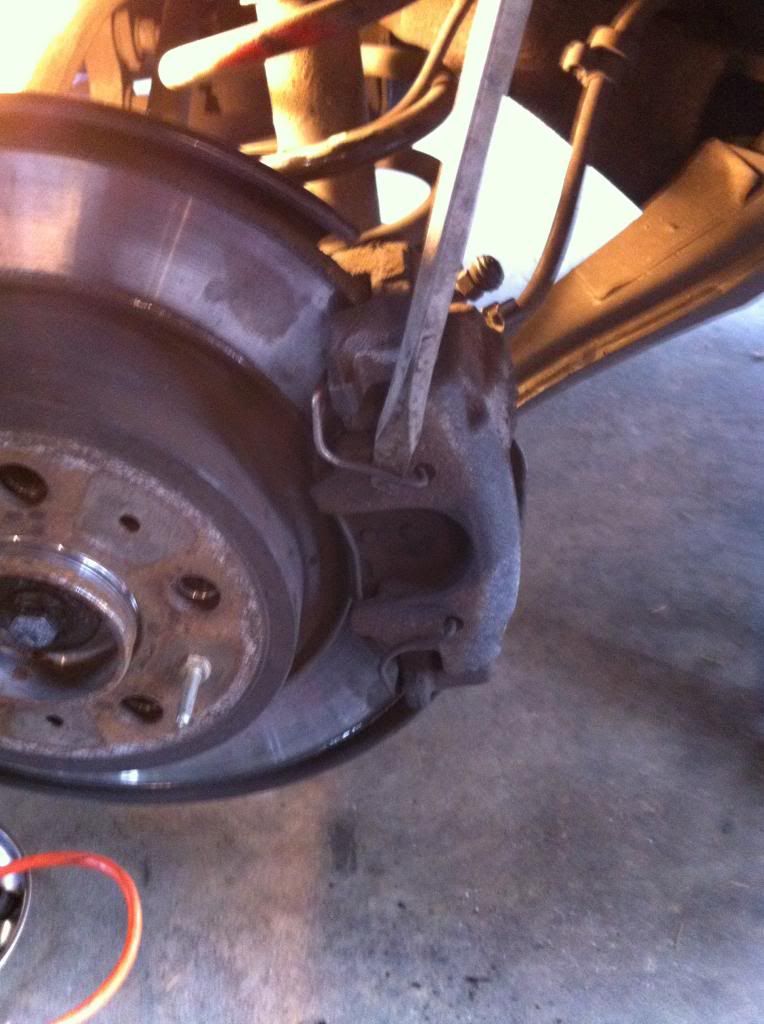
8. Re-install brakes: which makes it a great opportunity to replace, pads and rotor if needed.

9. Attach wheel, remove jack stand, lower car and road test!

Tonyx
Posts: 157
Joined: 13 November 2011
Year and Model: 2001 XC70
Location: Michigan
Has thanked: 3 times
Been thanked: 8 times

Post by Tonyx »

Nicely done. Thanks for the photos and the write up!
2003 XC70 230K and counting..,

User avatar
matthew1
Site Admin
Posts: 14460
Joined: 14 September 2002
Year and Model: 850 T5, 1997
Location: Denver, Colorado, US
Has thanked: 2650 times
Been thanked: 1240 times
Contact:

Post by matthew1 »

Zachary, this is outstanding. Scheduled for inclusion in the Repair Database. I made your account Contributor status.

Tip of the hat to DGM!
Help keep MVS on the web -> click sponsors' links here on MVS when you buy from them.

Also -> Amazon link
. Click that when you go to buy something on Amazon and MVS gets a cut!

1998 V70, no dash lights on

1997 850 T5 [gone] w/ MSD ignition coil, Hallman manual boost controller, injectors, R bumper, OMP strut brace

2004 V70 R [gone]

How to Thank someone for their post

Image

Reedsram
Posts: 12
Joined: 18 December 2011
Year and Model: 2002 S60 2006XC70
Location: Massachusetts

Post by Reedsram »

Great job! Good post, Step by step that's just how you get-r-done.

riff
Posts: 1
Joined: 28 May 2013
Year and Model: 2002 XC70
Location: United States

Post by riff »

i had to create an account to say thanks for this. you saved me about $800. i have an 02 XC70 and this helped me get it done WITHOUT a hub puller in under an hour. the only headache was that forth bolt on the assembly. slow going getting it off a quarter inch at a time with a wrench. they dont give you much room. a couple of light whacks with a rubber mallet and the hub assembly pulled right off.

Mcmancha
Posts: 1
Joined: 23 June 2013
Year and Model: 2004
Location: USA

Post by Mcmancha »

I have a 2004 xc90 2.5 awd, I can't seem to be able to get the proper torque specs for the rear wheel Bearing. Would appreciate if you could help me out.

User avatar
matthew1
Site Admin
Posts: 14460
Joined: 14 September 2002
Year and Model: 850 T5, 1997
Location: Denver, Colorado, US
Has thanked: 2650 times
Been thanked: 1240 times
Contact:

Post by matthew1 »

riff wrote:i had to create an account to say thanks for this. you saved me about $800.
Image
Help keep MVS on the web -> click sponsors' links here on MVS when you buy from them.

Also -> Amazon link
. Click that when you go to buy something on Amazon and MVS gets a cut!

1998 V70, no dash lights on

1997 850 T5 [gone] w/ MSD ignition coil, Hallman manual boost controller, injectors, R bumper, OMP strut brace

2004 V70 R [gone]

How to Thank someone for their post

Image

goldsbar
Posts: 4
Joined: 17 November 2013
Year and Model: XC70 2007
Location: NJ

Post by goldsbar »

Just wanted to say many thanks for this. You saved me a ton of time and money. My only prior experience was with brakes and oil changes. I'd rate this as medium difficulty. It's all just unscrewing bolts. The real "difficulty" is you have to take a bunch of stuff off (wheel, caliper, rotor, hub) and something is bound to be stuck on.

A couple of tips:
*I had no problem getting a standard box end wrench on the "hard" lower rear hub bolt. IIRC, it was a 15mm and not 17mm (2007 XC70). It's a bit tedious to get the wrench in, reset the position, and make 1/8 turns at a time, but after a full turn or so I could hand loosen it. No way any socket was going in there unless you jack up the control arm (an option in another writeup).

*My brake dust shield and parking brake were gone (long story), so I was able to use a pry bar on the nub and hub to get the hub off. You may be able to put a piece of wood on the nub and use a pry bar even with the parking brake attached. MAYBE. YMMV, etc. Otherwise, that thing was stuck. Tried a rubber mallet with no success.

xHeart
Posts: 3306
Joined: 3 December 2011
Year and Model: 2.0/3.2
Location: Great Lakes - USA
Has thanked: 113 times
Been thanked: 115 times

Post by xHeart »

Replaced both, passenger and driver rear wheel hub assembly.
The procedure worked. Found little more room for 17mm-12pt wrench after raising the rear control arm to ride-height on a bottle jack. Replacement flange screws were 15mm, finger tightening then just little more, torque by mallet over wrench - cn90 style.
Volvo hub assembly
Volvo hub assembly
a side by side view
a side by side view
--
Golden-German Shepherd | 2021 XC90 T6 INSCRIPTION (Nexa) | 2020 V60CC (Frska) | 2013A XC90 (Lktra)
Past: Golden Retriever | 2001 V70XC | 1997 Volvo 854 | 1989 Volvo 740 GL | 1979 Volvo 240

Dwhitt74
Posts: 2
Joined: 28 April 2016
Year and Model: 2007 XC90 V8 Sport A
Location: Denver

Post by Dwhitt74 »

Sorry to revive this, but I'm getting ready to replace both rear wheel hub assemblies, and I can't seem to find a definitive answer on whether to remove the white retainer tab thing on the backside of the new hub assembly. I have seen this YouTube video:


That says definitely leave it on. Then, I've read posts on this forum and others that said remove it. Then, others don't mention it at all...

If you can chime in with an answer and explain why, I would greatly appreciate it, and I'm sure others would as well. Thanks!

Post Reply
  • Similar Topics
    Replies
    Views
    Last post