


'98 S70 Axle stuck in hub <Update>
-
abscate

- MVS Moderator
- Posts: 35294
- Joined: 17 February 2013
- Year and Model: 99: V70s S70s,05 V70
- Location: Port Jefferson Long Island NY
- Has thanked: 1504 times
- Been thanked: 3817 times
Re: '98 S70 Axle stuck in hub
Don't let any striking force get transmitted to the transaxle side CV joint. I did this and I broke the CV joint cage.
Empty Nester
A Captain in a Sea of Estrogen
1999-V70-T5M56 2005-V70-M56 1999-S70 VW T4 XC90-in-Red
Link to Maintenance record thread
A Captain in a Sea of Estrogen
1999-V70-T5M56 2005-V70-M56 1999-S70 VW T4 XC90-in-Red
Link to Maintenance record thread
-
dosbricks

- Posts: 1116
- Joined: 30 December 2004
- Year and Model: '96 855, '98 S70
- Location: South Texas
- Been thanked: 2 times
Uh oh. I'll be inspecting it closely when I take the boot off. Now I remember your pics. That wasn't that long ago. I'll be lucky if mine isn't wasted.abscate wrote:Don't let any striking force get transmitted to the transaxle side CV joint. I did this and I broke the CV joint cage.
I took my wife out to dinner tonight to soften her up before I told her I may be making her daily driver into a parts car.
'98 S70, 230k, purchased new in '98
'96 855 GLT, 163k, purchased lightly used in '99
Onceuponatime RIP '69 Shelby GT500 w/7.0 liter
'96 855 GLT, 163k, purchased lightly used in '99
Onceuponatime RIP '69 Shelby GT500 w/7.0 liter
-
dosbricks
- Posts: 1116
- Joined: 30 December 2004
- Year and Model: '96 855, '98 S70
- Location: South Texas
- Been thanked: 2 times
Axle is out! I did as you guys advised and all went as it should. Many thanks! The only delay was having to go to the auto parts store to purchase a tie-rod/ball-joint fork to free the outer tie rod end. For only $10, I highly recommend having this tool on hand before starting this kind of repair.
I did not remove the strut-to-steering-knuckle bolts, but did loosen the 3 top strut bolts just a bit to allow the unit to move around freely without stressing the spring seat.
Both CV joints seem to articulate smoothly. I'll know if the inner one is OK when I R&R the boots on Monday (yes, I'm retired and only do gorilla car work mornings 6 days per week). I rate today a one Ibuprofen morning.
I got the SKF transaxle/output shaft seals from FCP because of the high mileage on this car. Do you guys usually replace these on a high miler? If anyone has a good tip or tool suggestion for removal of the original seals without scratching the case mating surface, I would appreciate your sharing. Thanks again.
dos
'98 S70, 230k, purchased new in '98
'96 855 GLT, 163k, purchased lightly used in '99
Onceuponatime RIP '69 Shelby GT500 w/7.0 liter
'96 855 GLT, 163k, purchased lightly used in '99
Onceuponatime RIP '69 Shelby GT500 w/7.0 liter
-
cn90
- Posts: 8257
- Joined: 31 March 2010
- Year and Model: 2004 V70 2.5T
- Location: Omaha NE
- Has thanked: 4 times
- Been thanked: 471 times
Trans Seals:
- To remove, install sheet metal screws. Be very careful the screws stay centered. Have a look at the new seal and you will know where to insert the screw. Drill a tiny pilot hole if you wish.
- To install, look at new seal and find some PVC coupler (home plumbing items at Home Depot etc.). The coupler needs to be a tiny bit smaller than the O.D. of the new seal. Or if you have a big enough socket then it is OK too.
2004 V70 2.5T 100K+
2005 XC90 2.5T 110K+
2005 XC90 2.5T 110K+
-
FLXC90

- Posts: 1132
- Joined: 18 August 2014
- Year and Model: 98 V70 T5
- Location: Florida Panhandle
- Has thanked: 16 times
- Been thanked: 45 times
Glad you're making progress.  Remember:
dosbricks wrote:
Greetings gear gurus,
...
I'm thinking to remove a control arm, pull an axle and replace boots--then install those components, and finish up that side by replacing the inner and outer tie rod. Then move to other side. Does that sound like the most orderly sequence?
Like you said, control arm, then axle, then tie-rods. Makes it easiest. If you are changing out the control arm, and the ball joint boot is not an issue, remove the pinch bolt, side a lever, like the pipe you used to cheat the axle nut, in and lever down on the control arm to free it from the steering knuckle, then remove the inner bolts.(On the other axle!) With the control arm off, you have a lot of freedom to move the hub, but mind your brake hose if you didn't remove the caliper.
Current Volvos:
1998 V70 T5, 112k sat 5 years, still in mechanical coma (finally at the top of the pile )
2004 XC90 T6 AWD: 186k, 60 on transaxle ( traded in )
1998 POS70 N/A: DD/training aid, 236k but really about 240k, I think...ABS module( passed on to son who sold it)
1998 V70 T5, 112k sat 5 years, still in mechanical coma (finally at the top of the pile )
2004 XC90 T6 AWD: 186k, 60 on transaxle ( traded in )
1998 POS70 N/A: DD/training aid, 236k but really about 240k, I think...ABS module( passed on to son who sold it)
-
erikv11

- Posts: 11800
- Joined: 25 July 2009
- Year and Model: 850, V70, S60R, XC70
- Location: Iowa
- Has thanked: 292 times
- Been thanked: 765 times
Yes, I like to replace the axle seal the first time I pull any axle. It's cheap, it's easy, it's an opportune time, then I know the vintage going forward.
For installing the axle seal, the two best tools I know of, in order:
(1) a hockey puck
(2) a rectangular piece of wood, like a smooth 1/2 inch plywood, about the same outside dimensions
In either case, you start the seal by hand, place the tool over the seal, then hit the surface with a 3-5 lb. hammer. Because the surface of the "tool" (e.g. the wood) extends beyond the edges of the seal, when you are done tapping all around it you will have a perfectly flush (and even) install. This is a seal you really do *not* want to go in crooked, so that it is too far in on one side. It is not easy to get it back out and try again, without ruining the seal.
'95 854 T-5R, Motronic 4.4, 185k
'98 V70, T5 tune-injectors-turbo, LPT engine, 304k, daily driver
'06 S60 R, 197k
'07 XC70, black, 205k
'07 XC70, willow green, 212k
'99 Camry V6 153k
153k
gone: '96 NA 850 210k, '98 NA V70 182k, '98 S70 NA 225k, '96 855 NA 169k
'98 V70, T5 tune-injectors-turbo, LPT engine, 304k, daily driver
'06 S60 R, 197k
'07 XC70, black, 205k
'07 XC70, willow green, 212k
'99 Camry V6
gone: '96 NA 850 210k, '98 NA V70 182k, '98 S70 NA 225k, '96 855 NA 169k
-
dosbricks
- Posts: 1116
- Joined: 30 December 2004
- Year and Model: '96 855, '98 S70
- Location: South Texas
- Been thanked: 2 times
Thanks, erik. I have previously used a PCV fitting to tap in cam seals and had some trouble inserting them straight and recessed 1mm. They ended up about 2mm deep, but that was not a problem.
The original trans seals seem flush, and I was already thinking a piece of soft flat wood would work well to set them. As you say, I think the trick is to get them going straight first maybe 80% of the way with gentle tapping before setting.
The access is not very good for drilling and driving a screw to pull the originals, but I have some extra length drill bits and can give it a try. I was just wondering if anyone just levered them out with a smooth-end tool like a small box-end wrench with a little cheater pipe on it?
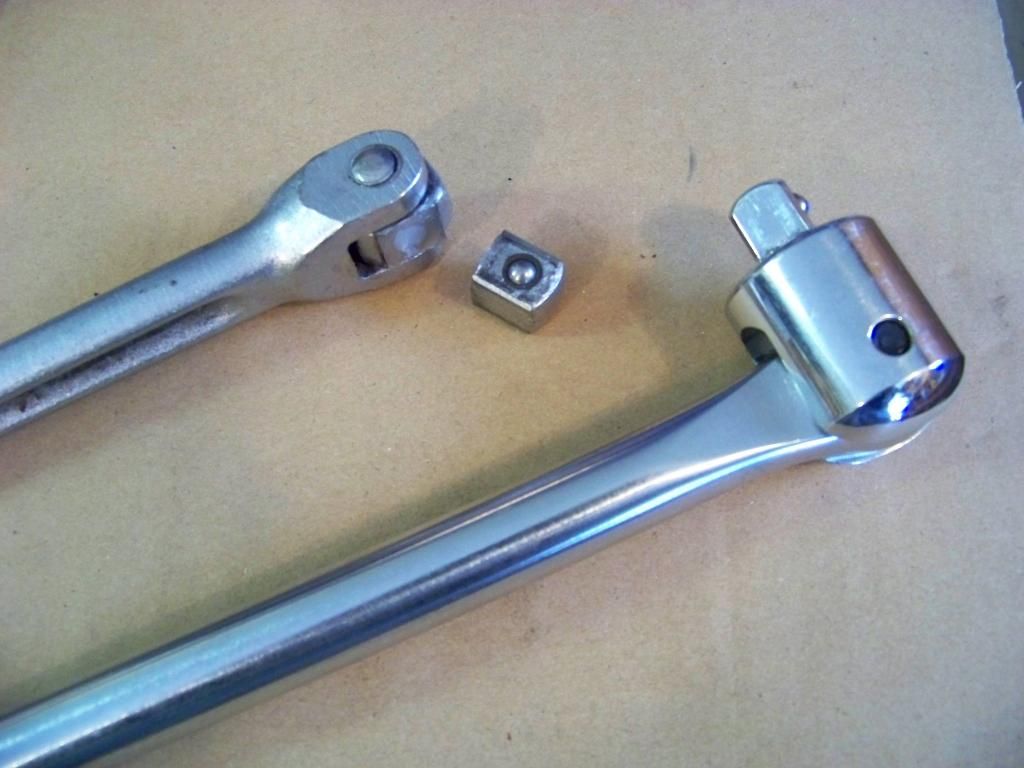
Some images from the day. To apply a gentle outward pull while I tapped the axle free, I used an old strut bolt and tied it off to my nearby workbench leg.

Axle free of hub--feeling good!

The beast in repose.

The Craftsman breaker with which I started on the 36mm axle nut. Better to start with the old geezer's friend--the $12.99 Harbor Freight 24" breaker bar also with lifetime guarantee.
The original trans seals seem flush, and I was already thinking a piece of soft flat wood would work well to set them. As you say, I think the trick is to get them going straight first maybe 80% of the way with gentle tapping before setting.
The access is not very good for drilling and driving a screw to pull the originals, but I have some extra length drill bits and can give it a try. I was just wondering if anyone just levered them out with a smooth-end tool like a small box-end wrench with a little cheater pipe on it?
Some images from the day. To apply a gentle outward pull while I tapped the axle free, I used an old strut bolt and tied it off to my nearby workbench leg.

Axle free of hub--feeling good!

The beast in repose.

The Craftsman breaker with which I started on the 36mm axle nut. Better to start with the old geezer's friend--the $12.99 Harbor Freight 24" breaker bar also with lifetime guarantee.

Last edited by dosbricks on 22 Nov 2014, 18:47, edited 1 time in total.
'98 S70, 230k, purchased new in '98
'96 855 GLT, 163k, purchased lightly used in '99
Onceuponatime RIP '69 Shelby GT500 w/7.0 liter
'96 855 GLT, 163k, purchased lightly used in '99
Onceuponatime RIP '69 Shelby GT500 w/7.0 liter
-
erikv11
- Posts: 11800
- Joined: 25 July 2009
- Year and Model: 850, V70, S60R, XC70
- Location: Iowa
- Has thanked: 292 times
- Been thanked: 765 times
Lookin' good.
Somewhere the last couple days I read about someone using a right angle pick to pluck out an axle seal, made it sound like it came out fine. Sorry I don't remember where or I would link it ...
Somewhere the last couple days I read about someone using a right angle pick to pluck out an axle seal, made it sound like it came out fine. Sorry I don't remember where or I would link it ...
'95 854 T-5R, Motronic 4.4, 185k
'98 V70, T5 tune-injectors-turbo, LPT engine, 304k, daily driver
'06 S60 R, 197k
'07 XC70, black, 205k
'07 XC70, willow green, 212k
'99 Camry V6 153k
gone: '96 NA 850 210k, '98 NA V70 182k, '98 S70 NA 225k, '96 855 NA 169k
'98 V70, T5 tune-injectors-turbo, LPT engine, 304k, daily driver
'06 S60 R, 197k
'07 XC70, black, 205k
'07 XC70, willow green, 212k
'99 Camry V6
gone: '96 NA 850 210k, '98 NA V70 182k, '98 S70 NA 225k, '96 855 NA 169k
-
dosbricks
- Posts: 1116
- Joined: 30 December 2004
- Year and Model: '96 855, '98 S70
- Location: South Texas
- Been thanked: 2 times
I have a similar tool for freeing up stuck radiator hoses. It has a wooden handle for a nice grip. Bet I could pluck those seals right out if I'm careful about not inserting too far behind them.
'98 S70, 230k, purchased new in '98
'96 855 GLT, 163k, purchased lightly used in '99
Onceuponatime RIP '69 Shelby GT500 w/7.0 liter
'96 855 GLT, 163k, purchased lightly used in '99
Onceuponatime RIP '69 Shelby GT500 w/7.0 liter
-
dosbricks
- Posts: 1116
- Joined: 30 December 2004
- Year and Model: '96 855, '98 S70
- Location: South Texas
- Been thanked: 2 times
I'm reviving this thread again, because I now know that my axle was stuck in the hub and that it was not being driven against the transaxle unit, but against the hub bearing, when I pounded on it with a BFH and a wooden block. I also figured out why it was so stuck as to be immovable. But this is a long explanation, so don't read further unless you are interested in the causation.
I used cn90's DIY because it was straightforward with good pics and write up.
https://www.matthewsvolvosite.com/forums ... =1&t=29716
But there is a problem, because I followed this sequence of steps and photos from the page one:
"UPDATE Oct 09, 2001 or 3y/22K miles later on "Rein" CV Boots.
5. Now loosen wheel lugs, jack the car up and place jackstand as shown.
- Now remove wheel and set under the car as added safety.
- Loosen the 36-mm nut until it is flushed with the axle, then hammer the axle inward with the Rubber Hammer (or block of wood and regular hammer). I did this CV Boot job a few years ago and applied antiseize at the time, so it was a breeze to come out. If yours is stuck, spray with WD-40 etc., you may have to use the gear puller.
6. Disconnect the Control Arm as shown, then release Axle from steering knuckle.
Hold the Axle Haft and yank it out of the Trans. If it does not come out, pry the area between the Trans and the Inner CV Joint area. It will come out. It is held by only a circlip.
Warning: whatever you do, do NOT let any dirt enter the Transmission. Dirt is #1 enemy of any Auto Trans!" (bold added by me)
Here's why this won't work if the hub wasn't pre-anti-seized the way cn90's was. So I'm assigning no blame whatsoever, but just trying to save someone else my frustration.
If one tries to knock the axle spline slightly loose from the bearing hub before the control arm is unbolted, the spline is bound up because the suspension is hanging at full extension and that binds the shaft splines due to the axle CV joints being at max articulation.
Here's how I know. In reassembly, I snugged up the axle nut in the reverse of the above steps--that is with the control arm reattached--and it bound up the axle and I could not raise the suspension to return it to ride height to torque the control arm-to-frame bolts. As soon as I backed off the axle nut it released (because it was clean and now had anti-seize on it). Also in disassembly, when the control arm was loosed, the axle easily tapped loose from the hub even with remnants of factory adhesive and some rust in there.
So....the correct order of axle removal is as you guys advised--loosen the control arm first and then tap the axle back a bit before removing the nut and pulling it out.
It would be possible to do this as the cn90 DIY says, if the suspension is somehow supported and not allowed to hang free--which is sometimes advised per elsewhere on the web.
So I'm suggesting to cn90 that the DIY be amended to read, "After the lower control arm is separated from the frame or spindle, then tap the axle loose from the hub," or something of that nature. This is the way the Chilton's manual lays out the steps.
Finally, lets face it, these DIYs of complicated repairs are not easy to do and require considerable effort. Cn90 has contributed lots of them with great photos and write up. As a first timer at doing this job, I was burdened by inexperience, but I learned there is a correct sequence and it can't be deviated from. That's all I'm trying to share here. Peace, brother.
dos
Last edited by dosbricks on 01 Dec 2014, 20:32, edited 2 times in total.
'98 S70, 230k, purchased new in '98
'96 855 GLT, 163k, purchased lightly used in '99
Onceuponatime RIP '69 Shelby GT500 w/7.0 liter
'96 855 GLT, 163k, purchased lightly used in '99
Onceuponatime RIP '69 Shelby GT500 w/7.0 liter
-
- Similar Topics
- Replies
- Views
- Last post
-
- 4 Replies
- 461 Views
-
Last post by Blacklab467
-
- 0 Replies
- 3427 Views
-
Last post by thudson