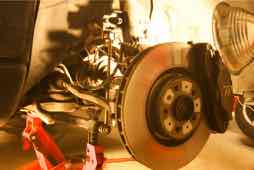
Let's get to this Rear Wheel Hub Replacement
An excellent how-to for replacing a rear wheel hub on a P2 V70.
V70 T5, rear wheel bearing replacement (front wheel drive)
Changed passenger side rear wheel bearing hub assembly after premature tire wear on that wheel only and then noted could shake wheel perimeter in and out noticeably when car jacked up. Bought a rebuilt bearing hub assembly on Internet from Axel of Dearborn for under $50, all in, shipping included. Also replaced park brake shoe ($25/set for both rear wheels from O’Reilly’s)
Start by removing and safely suspending the brake caliper, then remove the caliper bracket, and finally remove the disc (may require some effort and patience). Initially, I used Liquid Wrench after cleaning grime build up at center of disc where it mates with hub, then beat the rusted disc off carefully by using a protective block of wood, and heavy hammer pounding inwards at disc periphery while rotating frequently. If the park brake shoes are OK, then leave in place, as you don’t need to remove them to replace the bearing hub. Consider, also whether you need new brake pads and disc. I loosened the ABS sensor wire from its metal bracket (WD 40) and kept it protected and clear of the bolt removal process. The four rusted bolt tips are readily evident (looking inside the brake shoes) that hold the bearing hub assembly to the knuckle. More Liquid Wrench appropriate on these bolt tips plus the bolt heads on inside of knuckle. Getting these 17mm bolt heads loose was a challenge, especially the lower back bolt. I jacked the strut up with a second smaller jack in order to get an offset box wrench on that particular bolt head. Pounding the wrench shaft with a hammer loosened the bolts sufficient to then remove with a smaller socket wrench. Be careful using a wrench with the torque required to loosen these bolts while you are under the car, as the car may be pulled off the jack stand on to you.
Removing the old hub assembly from the knuckle may require some pounding from behind or the same method as employed with the disc, taking care to not damage the ABS sensor located at the 12 o’clock position. If the old bearing assembly falls off but leaves the inner bearing cap, then either tap it out or punch a whole in it’s lower half and pry out out. Clean the knuckle where the new bearing will mate with it. If you replace the park brake shoes (mine were toast), then remove the retaining springs on top and bottom by pushing while also sliding the brake shoes backwards or forwards. The spring hooks in a horizontal slot and does not rotate, but rather slides forward (at least did on the passenger side). You might try sliding a screwdriver in behind the brake shoe and teasing the spring hooks out. As a last resort, simply rip them out and later reconfigure them back to original length. As long as they don’t fall out, they serve their function to prevent shoe rattling.
Replacement with new bearing is straightforward. Make sure your new hub assembly is the proper match for your old one. You might wire brush clean the bolt threads and very very lightly grease the tips, then finger thread from inside the knuckle. Cross tighten with your box wrench and perhaps tapping with a hammer on the wrench handle if you don’t trust your own forearm strength (I could not find any torque rating for these bolts, and welcome any such input in a reply post). Replace the brake components and make sure the ABS sensor wire is properly restored to its original location and not binding, etc.
After you replace the wheel, you may hear grinding from the park brake shoes. It will eventually clear once the car is running. Alternately, you can “break in” the park brake shoes by carefully attempting to stop the car repeatedly a few times while at highway speeds using only the hand brake (keep the button pushed in to prevent lock up). Before you drop the car off the jack, turn the wheel, and give it a good shaking in all directions to assure that you have everything properly aligned and bolts tight. Remember to check your lug bolts in a few days, to assure properly tight. Many shops over tighten these, and ideally, you should torque them yourself, so you have any chance getting them loose on some dark cold night when you have a flat.
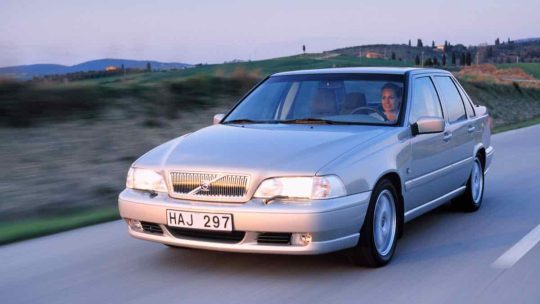
The Volvo V70
Late in 1996, Volvo introduced a new estate car to the market, the V70.
The Volvo V70 was developed from the concept of the successful 850 Estate which had then been on the market since February 1993.
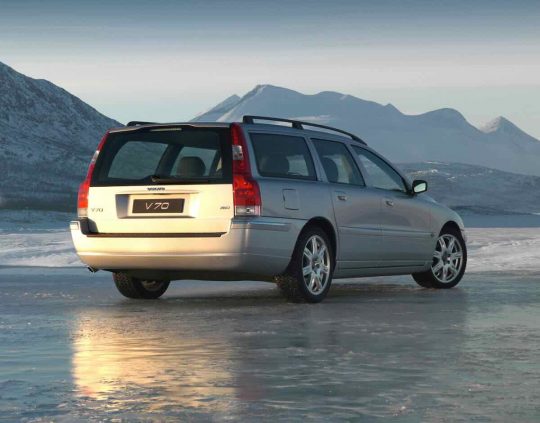
The exterior of the new V70 showed softer styling than its predecessor, but still carried a strong Volvo identity including the typical almost vertical rear end. Inside the car, the dashboard was new, as was most of the interior. As regards safety, a number of important improvements were also made.
An interesting and successful addition to the V70 models was the all-wheel drive XC 70 models.
The Volvo V70 was produced until 2000, when it was replaced by the second-generation V70.
Subscribe to the MVS Newsletter
The MVS Volvo Newsletter is a once-a-month email delivered to your email. It’s simple to unsubscribe at any time if you change your mind.
Visit The Official Volvo Cars Website
Last Updated on March 3, 2021