1994 940 – How to replace auxiliary belts and alternator bushings. A very clear write up with photographs.
writer100 » For some time I had been noticing that one or more of my drive belts was squeaking. Not the loud squeal of a loose belt, but more of a chirping sound, like a talkative squirrel. Whenever I was picking up my car from valet parking (in this city, you have to valet nearly everywhere) I could always tell by the chirp-chirp when my car was coming being brought around. Upon examining my alternator pulley, I noticed that it was slightly out of plane with the crankshaft pulley. The alternator bushings appeared to be crushed due to age and heat. At 70,000 miles since last change, my belts were due as well.
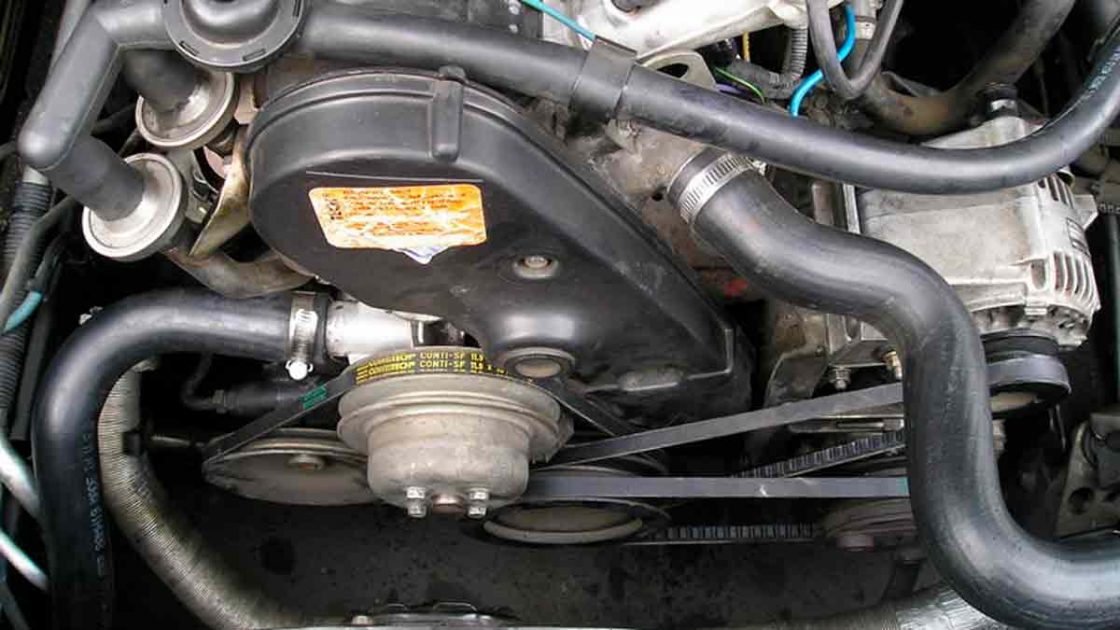
The car is equipped with three drive belts: one for the air conditioner, one for the alternator, and one for power steering and the water pump. I ordered three new Continental belts from the Autohaus for $35.43. My local Volvo dealer, Galpin Volvo, was happy to provide me with new alternator bushings for the sum of $27.33.
This is a pretty straightforward job. The 940 is equipped with belt tensioners which make the job easier. (My old 240 was not, which required using a pry bar in one hand, while tightening with a socket in the other.) Here’s the steps I followed:
1. Spray all bolts the night before with PB Blaster.
2. Make a diagram of the belt order, size, and orientation.
3. Use six point sockets to avoid rounding off nuts and bolts. Each of the accessories has three different kinds of fasteners: mounting nuts and bolts (12 and 13 mm), which holds the accessory in place, fixing bolts (13 mm), which anchors the accessory at the correct tension, and tensioner bolts (10 mm), which allows tension to be applied and released.
4. The only challenging nut to get at is the rear fixing nut for the air conditioner compressor. I used a universal extension to reach it. For each of the three accessories, once the fixing nut was loose, I turned the tensioner bolt counterclockwise several turns. This released tension from belt. I grabbed the belt and move the accessory inboard to create more slack.
5. It is neither possible nor necessary to completely slacken the belts. Just get them reasonably loose. Then use a 25 mm socket on a breaker bar to turn the engine over, while pulling the belt off the pulley. (Watch your fingers.)
6. With all the belts removed, I slid out the alternator bushings. Just as I suspected, the bushings were completely trashed. The new bushings are a pressure fit. I used silicone spray to lubricate them. (Careful not to overspray this in the engine compartment.) All but one could be installed by hand; for the other, I used a set of channel locks.
7. Put the new belts on by turning the engine over with one hand while using a pry bar with the other.
8. Add tension to the belts by turning the tensioner bolts clockwise. I tensioned them to roughly 1/2″ of deflection. Then tighten the fixing nut.
9. Finally, turn the tensioner bolts counterclockwise a turn or so to unload them. The fixing bolt should carry the load — not the fragile tensioner bolt.
With the installation of the new bushings, the alternator pulley appeared to be correctly aligned with the crankshaft pulley. This conclusion was confirmed by the disappearance of the chirping sound of the belt. The tools I used
Alternator mount with bushings removed
General belt orientation
Last Updated on April 19, 2023