

erikv11 »
The symptom is a door that pops and creaks when opened and closed. If you look where the door strap connects to the pillar you can see movement on the body side of the strap, because the two spot welds have broken.
There are dozens of posts about this problem over the years. Here is a good one from 2011. You can fix it either by removing the door and fender and re-welding or by drilling a couple holes and finagling some fasteners in there. This post is about the drilling option which is pretty easy, a couple hours if you work slowly. My motivation for this DIY post is because it actually seems needed. The go-to post on this repair from the mid-2000s has for several years been only available on the wayback machine
(https://web.archive.org/web/20091018191 … y_fix.html). Thought I would update with more/better pics and deposit them here at MVS.
I did this on a 95 850 but the repair should be the same for all P80 cars.
Here are all the tools and hardware I used:
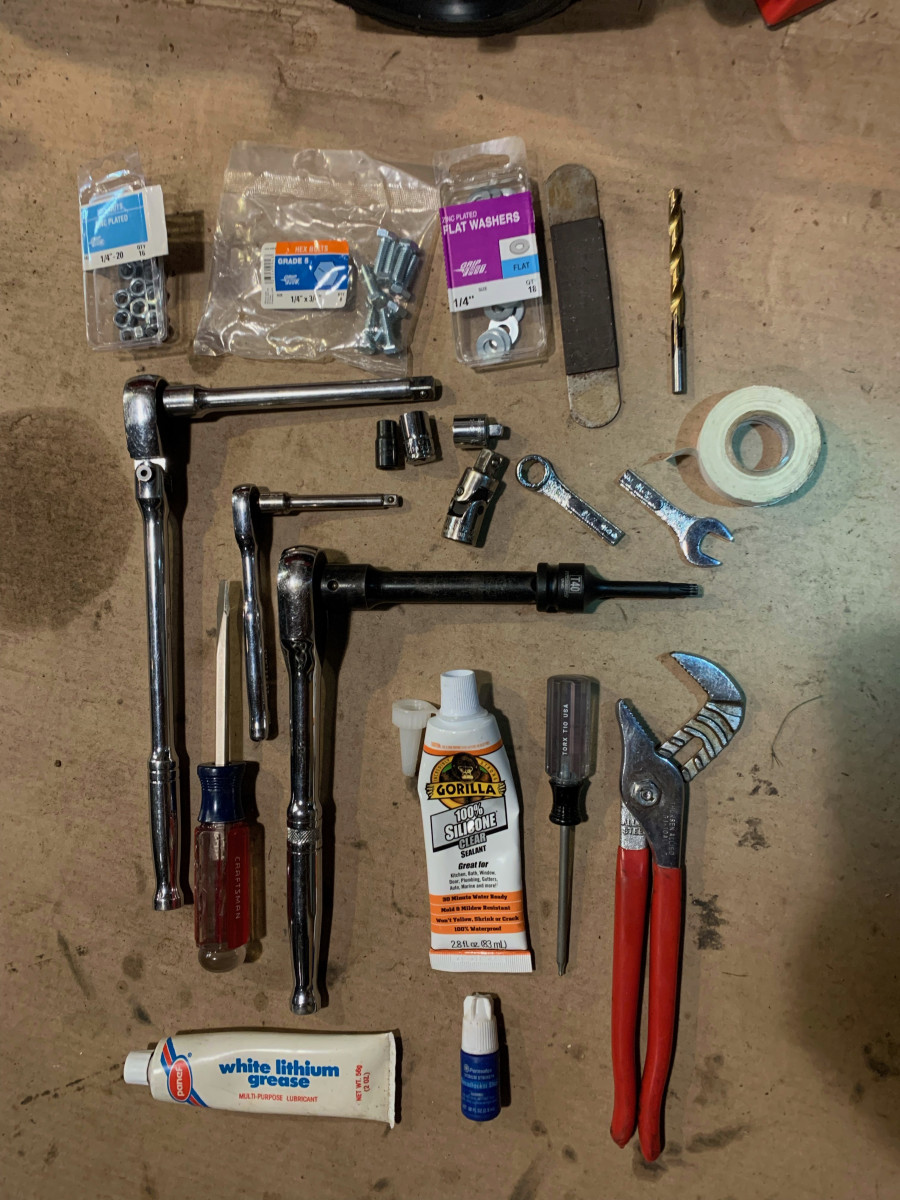
Notice the cheap 7/16 box wrench has been cut in half with an angle grinder. You can also break them in a vise. If you don’t have a spare box wrench to ruin I suggest a local pawn shop, they usually have a huge box of junk wrenches.
1. First step is roll down the window and open the door all the way, then turn off the car. You can disconnect the negative battery lead but I didn’t this time.
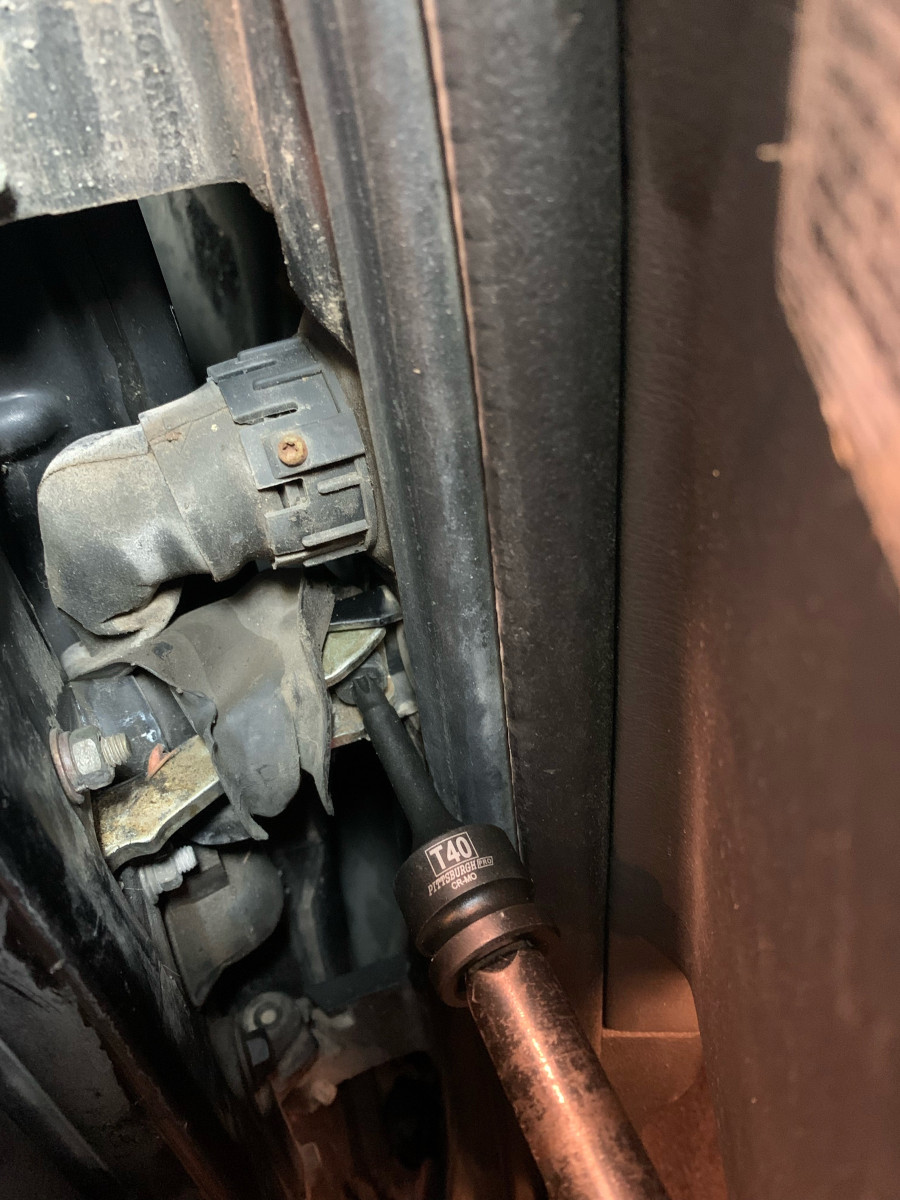
2. Next unscrew the T40 torx screw that holds the door check strap to the frame.
3. Remove the two door pins, one on each hinge. They are E8 torx but apparently you can use a 1/4 socket too.


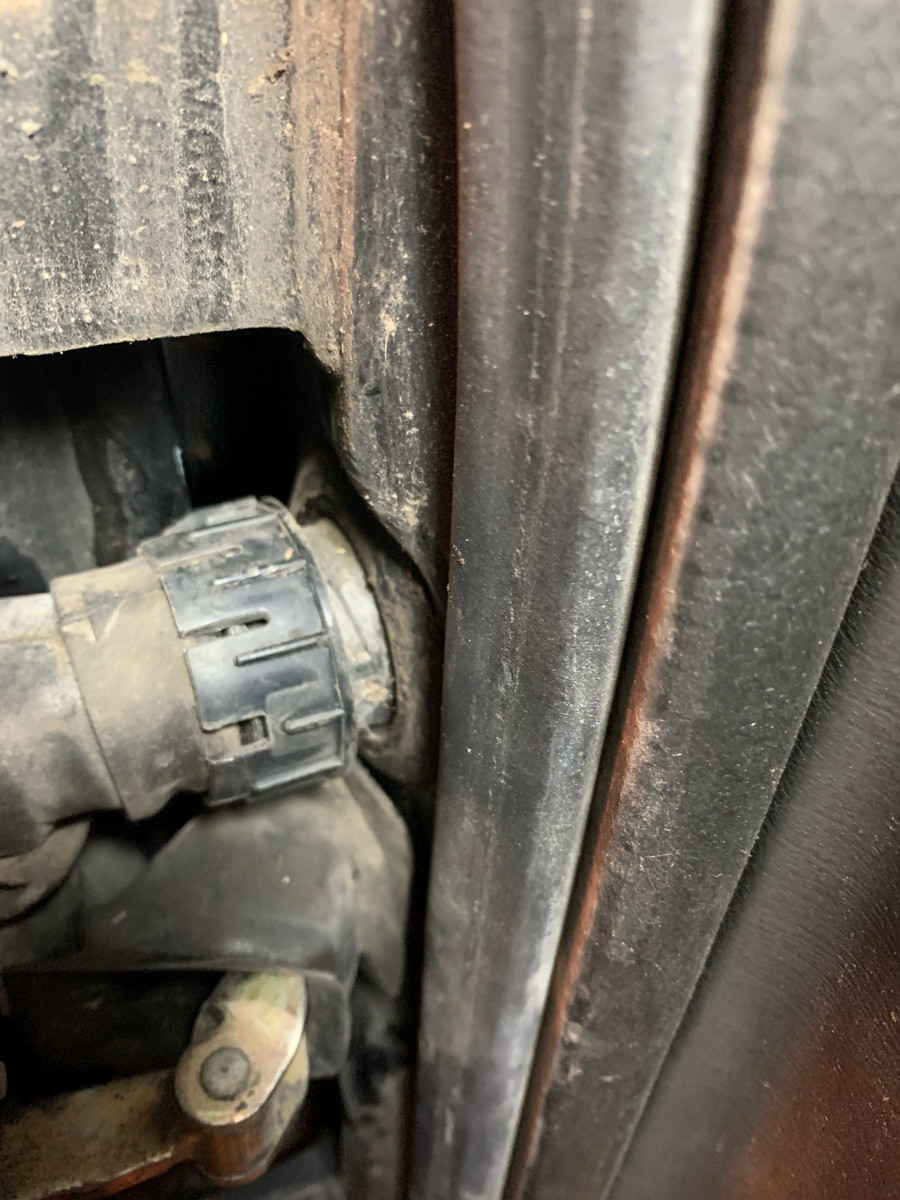
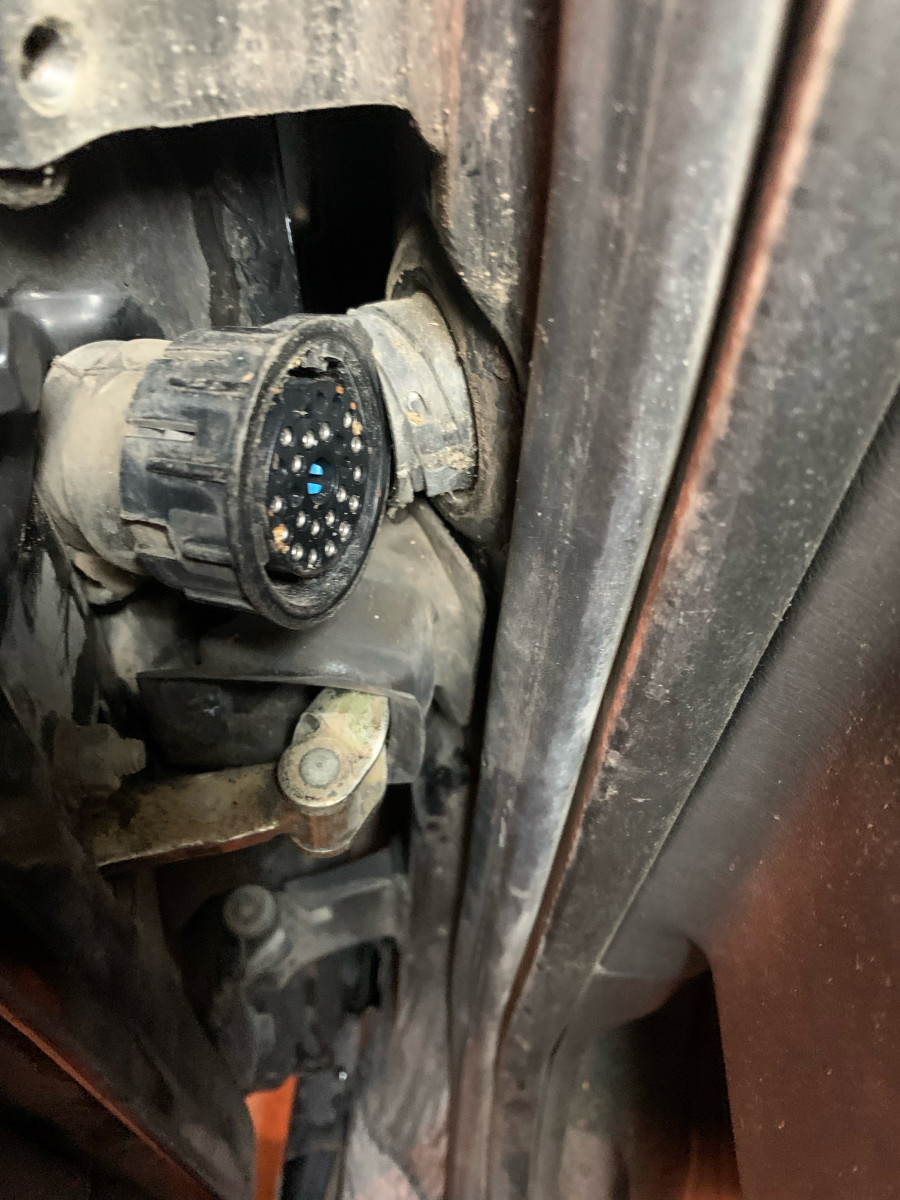
4. Unscrew the T10 on the electrical connector, carefully rotate the connector sleeve counterclockwise about 30 degrees (don’t squish it!) until the screw hole moves past the the triangle on the cable sheath (see pic), then gently pull out the connector.


5. Lift off the door. It’s pretty heavy. I put my arms through the open window hole up near the mirror/hinge end of the door, slightly rocked it while gently pulling straight up. When you get the angle right it will budge, then just lift the door straight up off the hinges. Set is aside on a big cloth or foam etc. so it doesn’t get scratched or dented. It’s ok to stand it up and lean it on something.
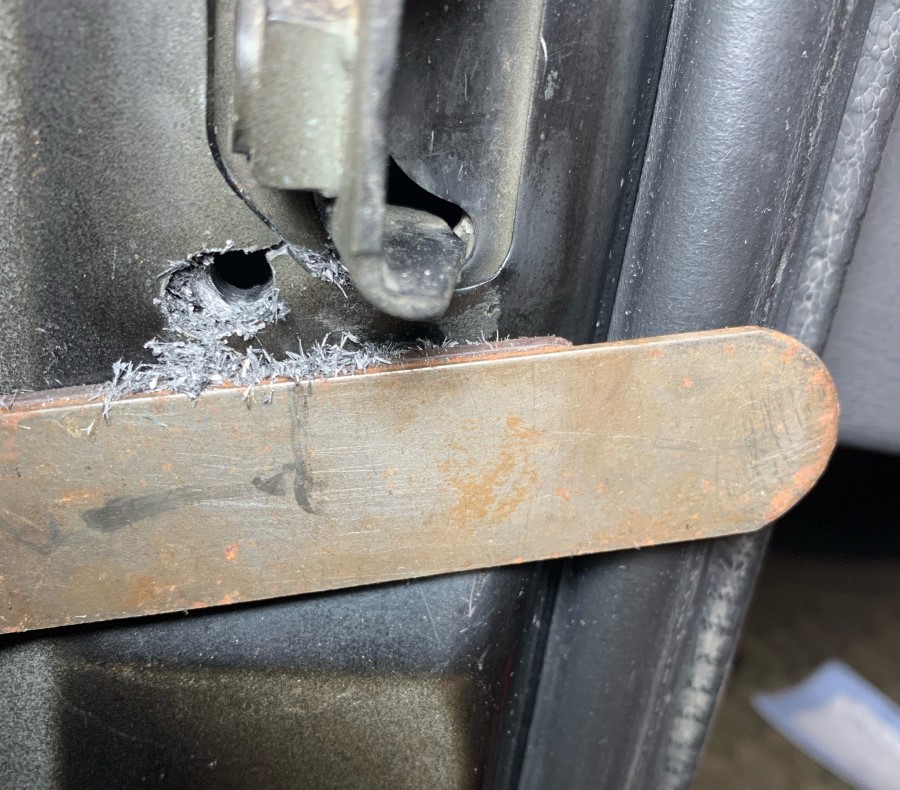
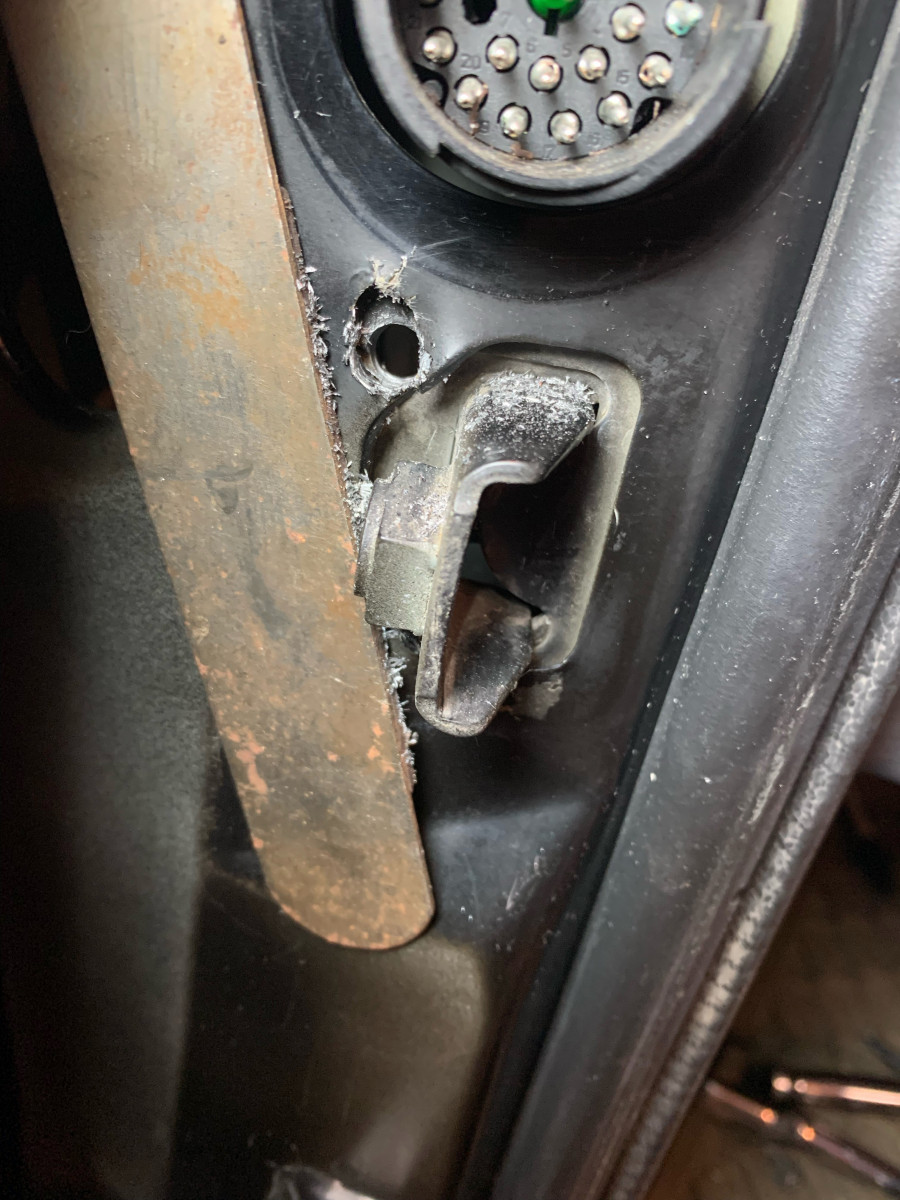
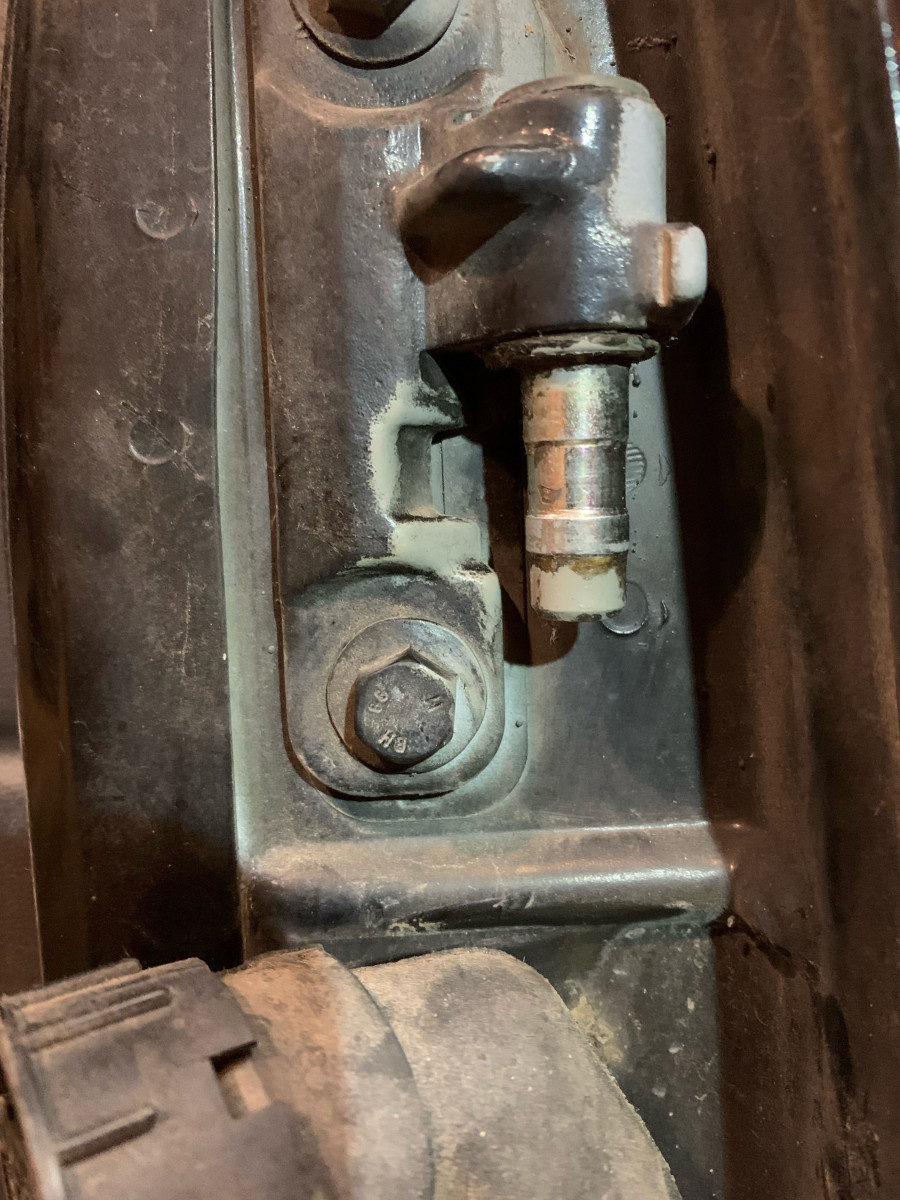
Here’s a shot of the door pillar showing, clockwise from left: the grommet that allows finger access behind the broken welds, the male connecter end and the door strap anchor. You can see the broken spot welds to the left of the anchor, the top one is clearly visible the bottom one partly.
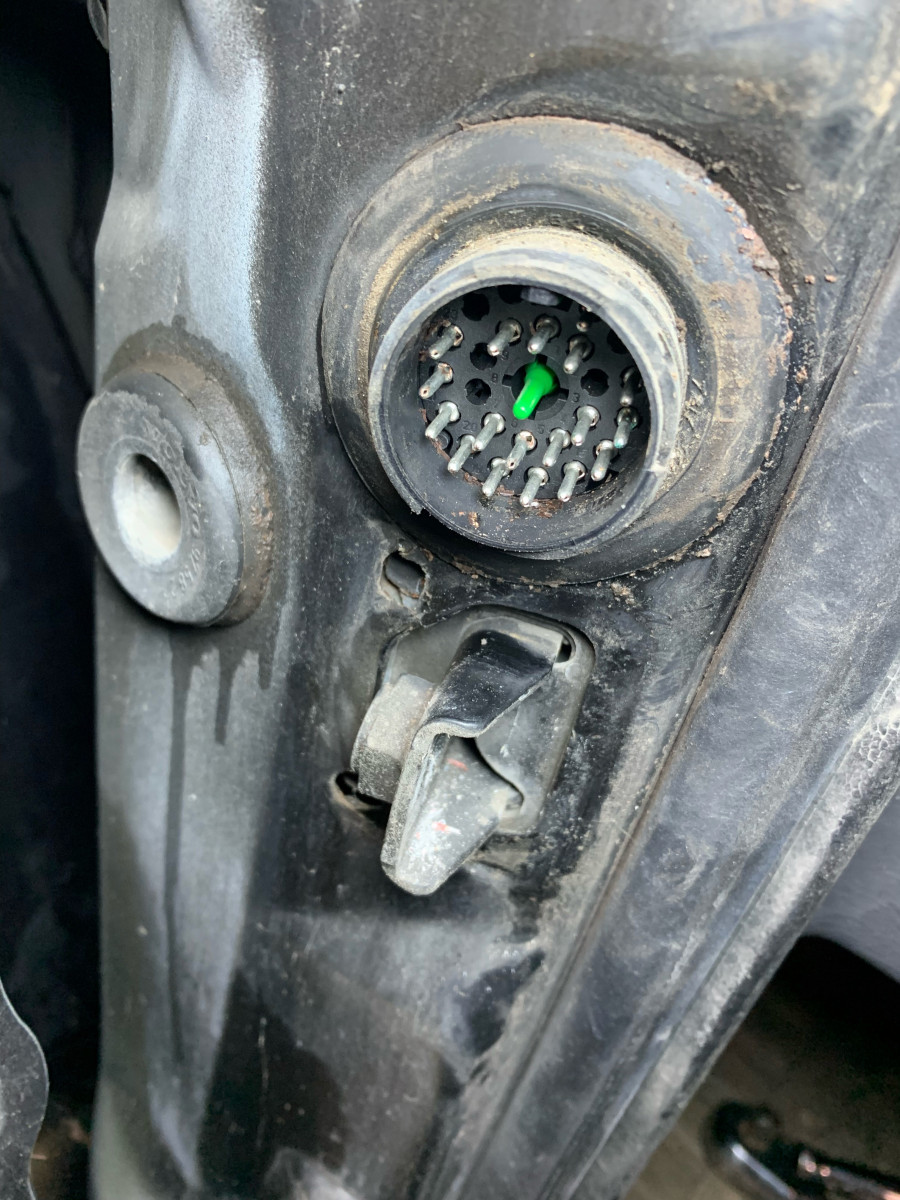
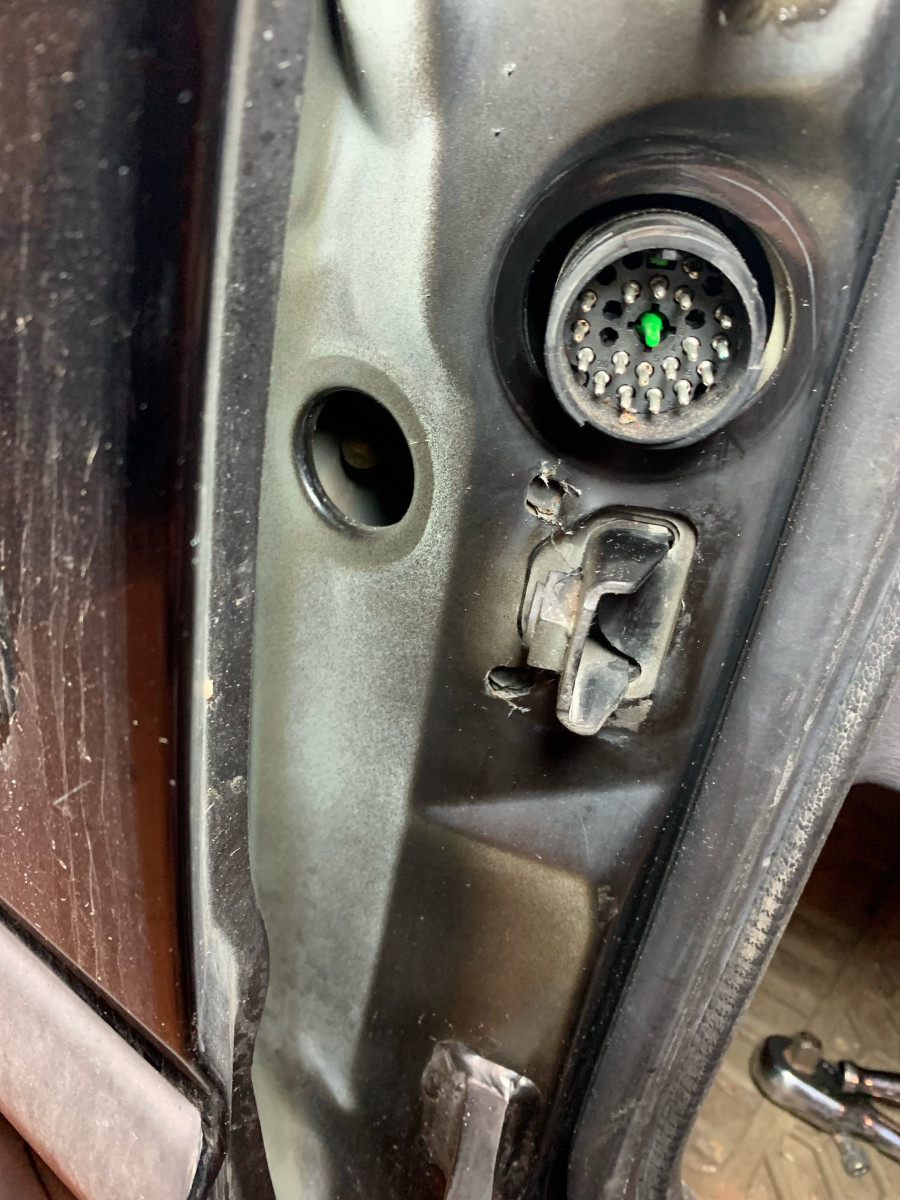
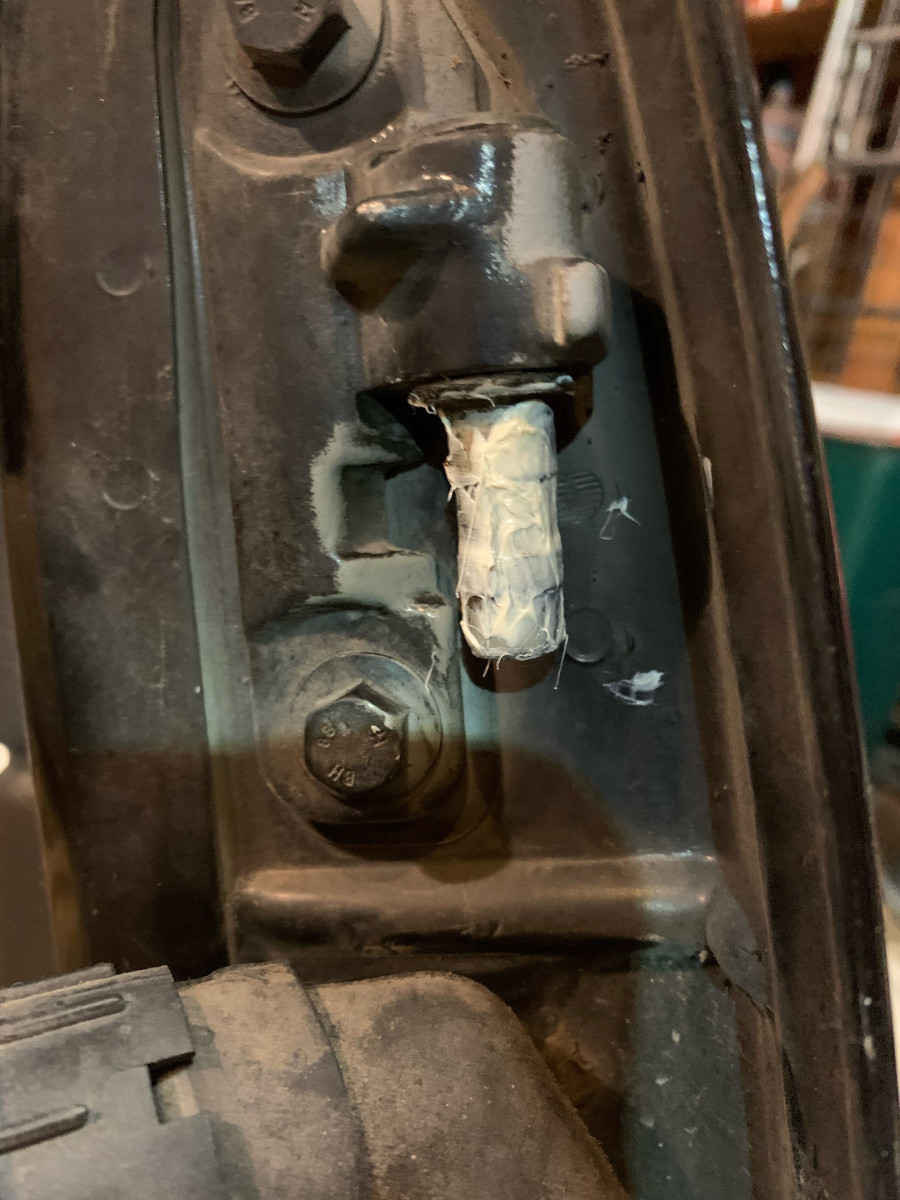
6. Clean up and check out the work area. Another pic after cleaning it up and removing the rubber grommet and plug. You can see cracks around the two broken spot welds. That’s where you drill and install fasteners. Reach your finger into the hole and feel around the work area from the back so you know what kind of edges are back there on the plate near the broken welds.
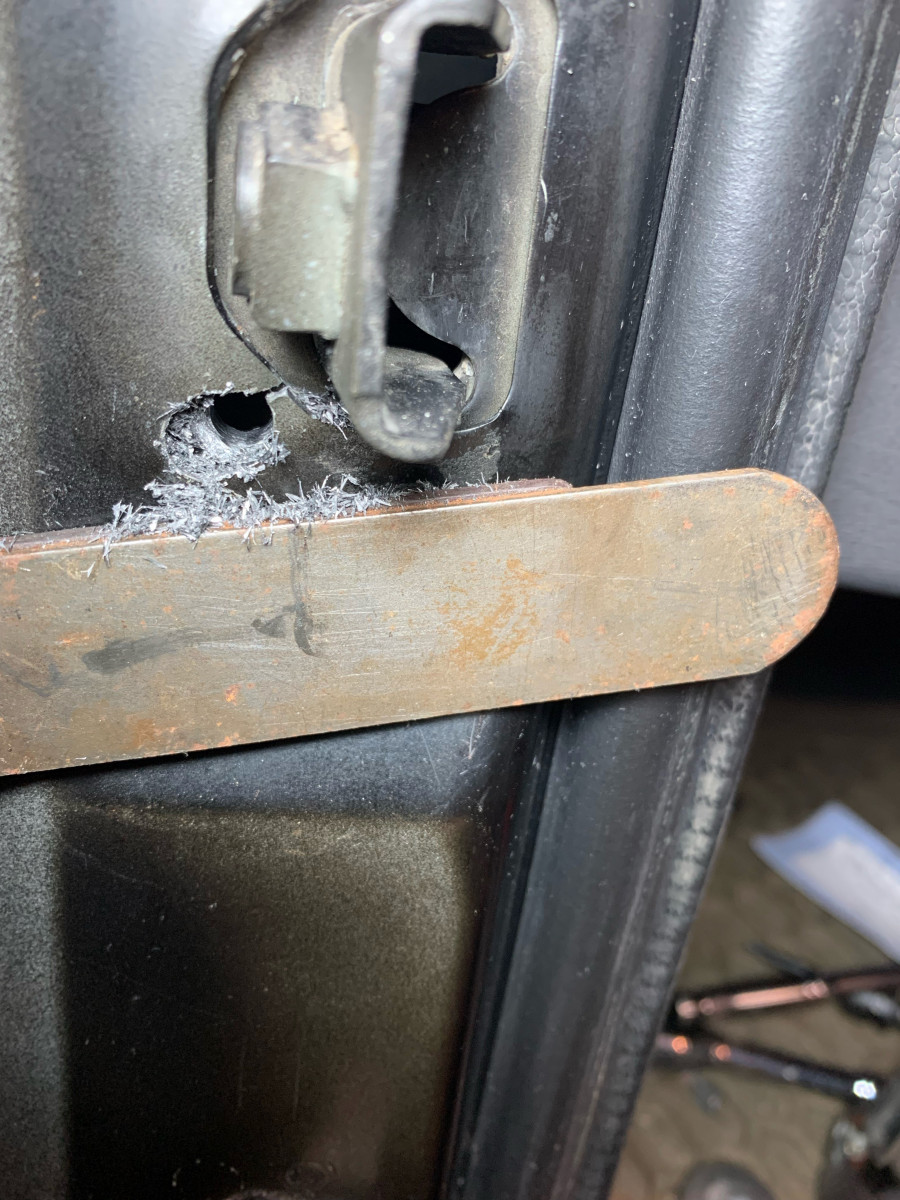
7. Drill holes. I used a 1/4 drill bit for the 1/4 bolts I had on hand. Check the hole size by drilling a hole in a piece of wood and make sure the bolt slides in easily. Drill the holes slightly offset from the corners of the broken welds, so that bent plate edges in the back don’t get in the way. For the same reason I also angled the drill tip slight above horizontal for the bottom hole and slightly below horizontal for the top hole. The rusty strap in the pic is a magnet to contain the swarf. Vacuum it up between and after drill jobs, to keep the chips out of your skin.
8. Practice so you are ready for step 9. With the holes in place it is time to repair the spot welds. Put a bolt in each hole and practice reaching around to find the bolt end with your finger tip. Access is better if you remove the fender but I didn’t want to remove it. Practice for both holes.
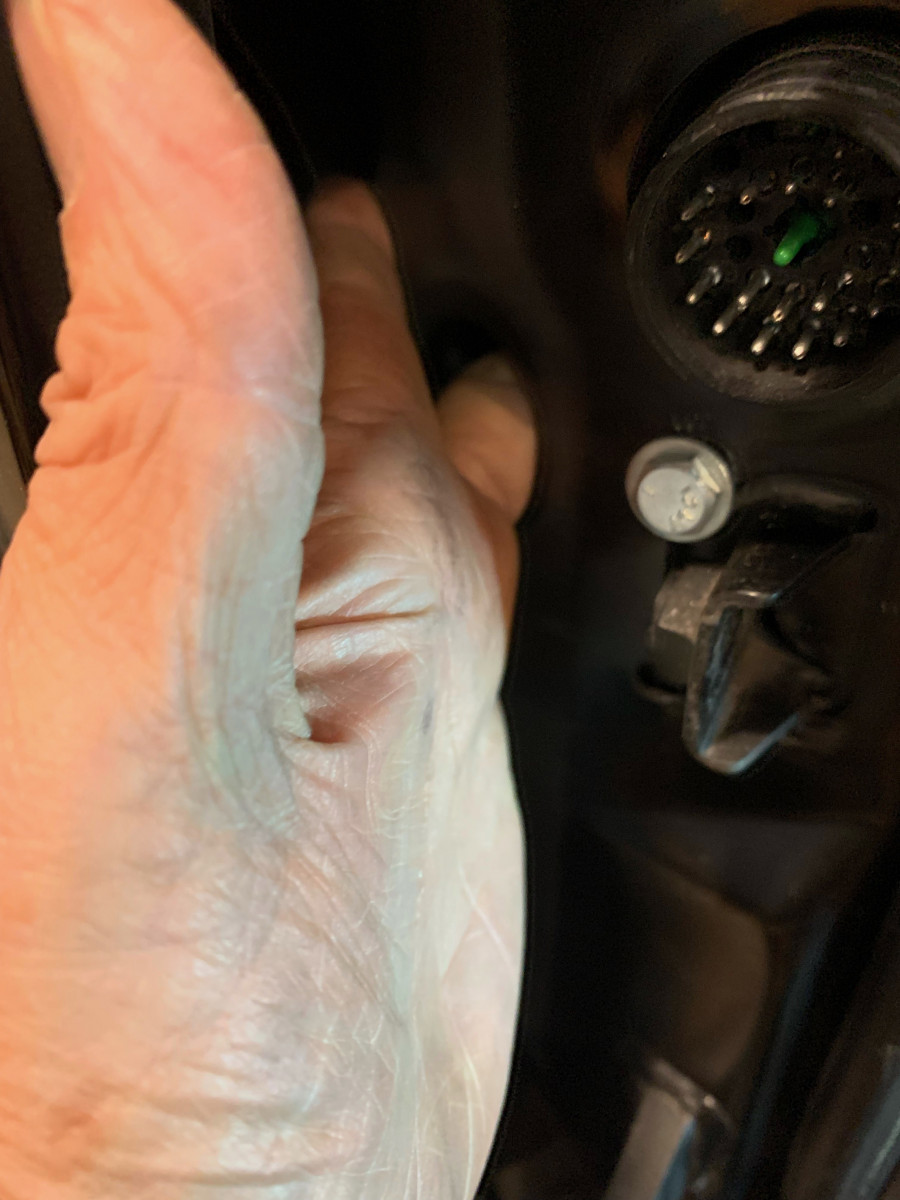
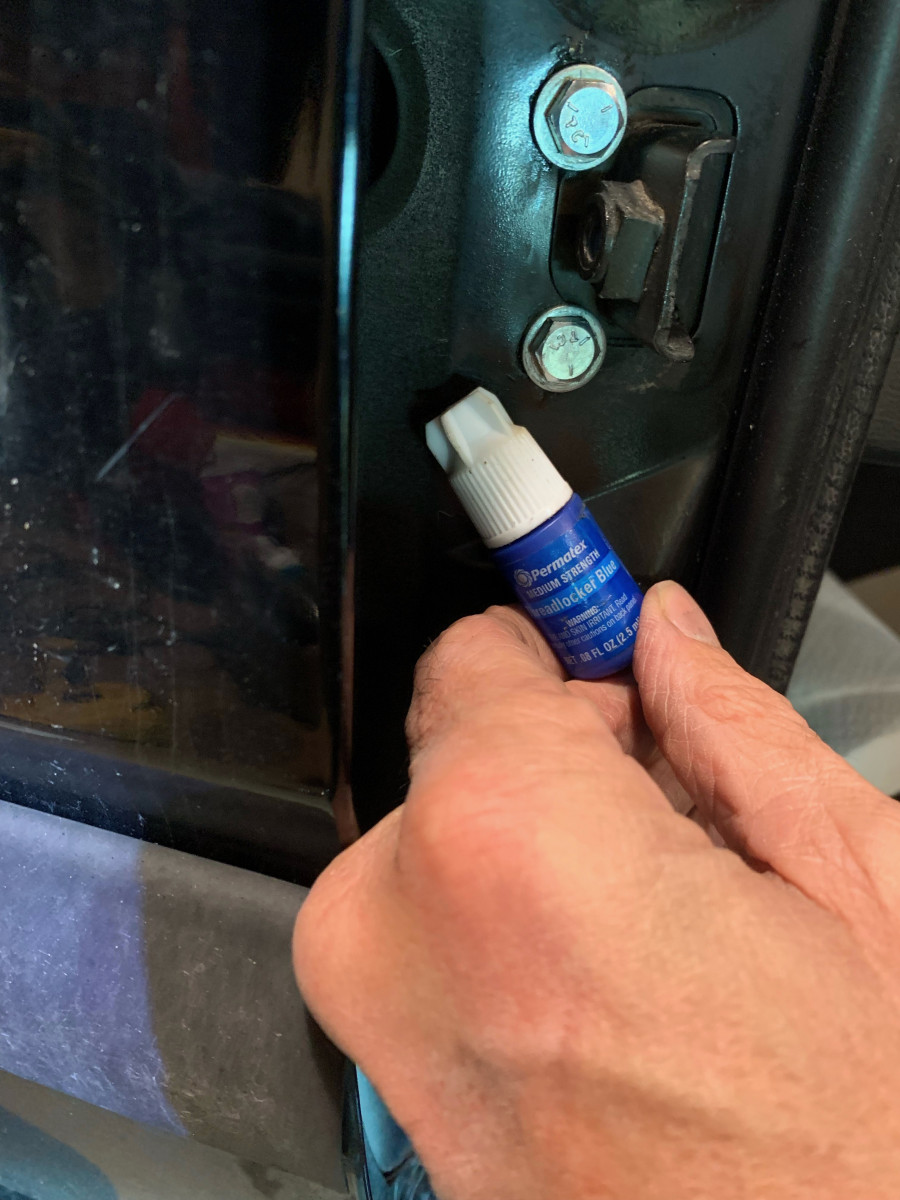
9. Install the nuts and bolts. Put a washer on the bolt, I did the top one first, put some blue Loctite on the bolt threads near the tip, then put the bolt in the hole.
With just a smidge of silicone stick the washer to your fingertip so you can reach back inside the pillar and get it on the bolt end. Then do the same with the nut and screw the bolt into it, finger (haha!) tight. I was able to get the top bolt fastened without dropping anything but lost two washers into the fender when working on the bottom.

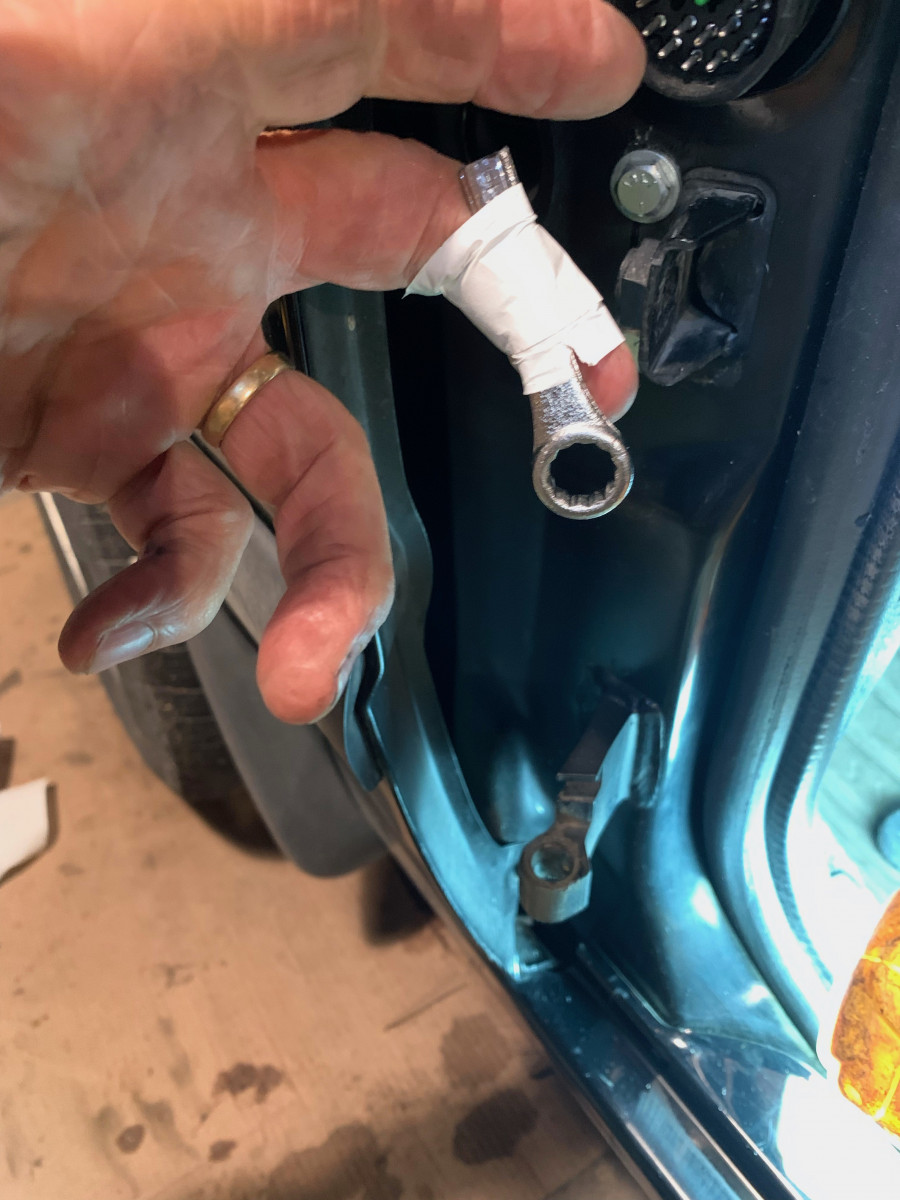
Now before the Loctite dries, set up the cut off wrench to reach the nuts in the back. You need to tape it to your finger so you can reach it into the hole and curl it up to hold the nut. Others also use a piece of string on the wrench here too as a leash, but I didn’t. Not a bad idea however. Here’s the angles I ended up using for grabbing the upper nut (I could have cut the box end a little shorter):
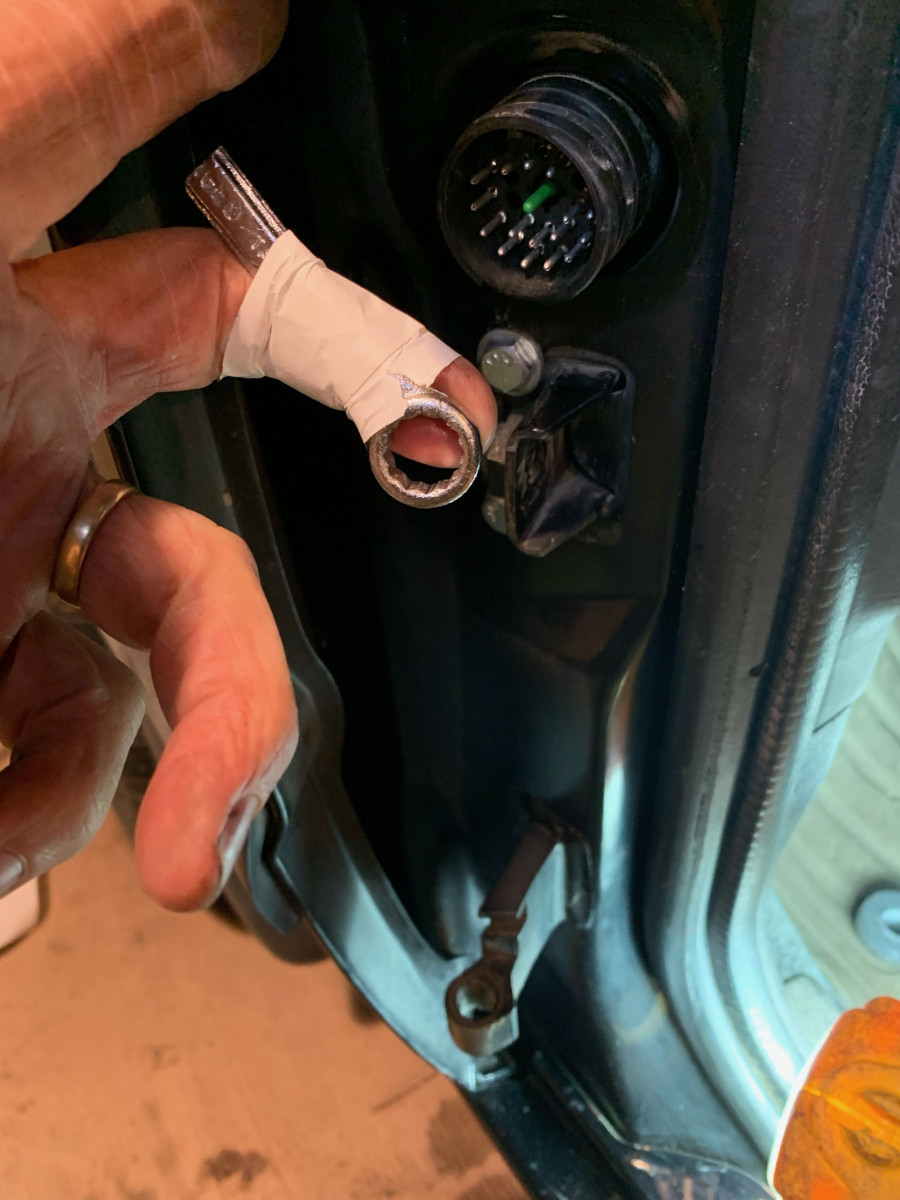
and for the lower nut:
Tighten up each fastener with a socket on the bolt head while holing the nut. Get it tight but don’t get hurt! OK, all tightened up! Let the Loctite dry.
9. Put the rubber pieces back in place and prepare to reassemble. I actually had to move the door strap rubber jacket over to the door side for installation.

10. Reassembly. Here you reverse order of steps 1-5 except for greasing the pins so:
Lightly grease the door hinge pins and then put door on. The grease is just for installation and removal, the door doesn’t rotate on those surfaces.
Ease the door straight down into the hinges.
Install electrical connector, rotate the sheath clockwise until the hole lines up, insert and tighten the little T10 set screw.
Install and tighten E8 hinge pins – I didn’t use any thread locker here.
Attach door check strap to its anchor with T40 bolt.
I noticed the door strap rubber jacket doesn’t fit very well now due to the bolt heads in the way, oh well.
Open and close the door, it will be smooth a quiet again. Done!


