MVS member Auburn T5 goes bananas on fixing up a 1998 Volvo S70 T5. Stage 0, new transmission, new struts, shocks and springs, you name it. Documented with photos too.
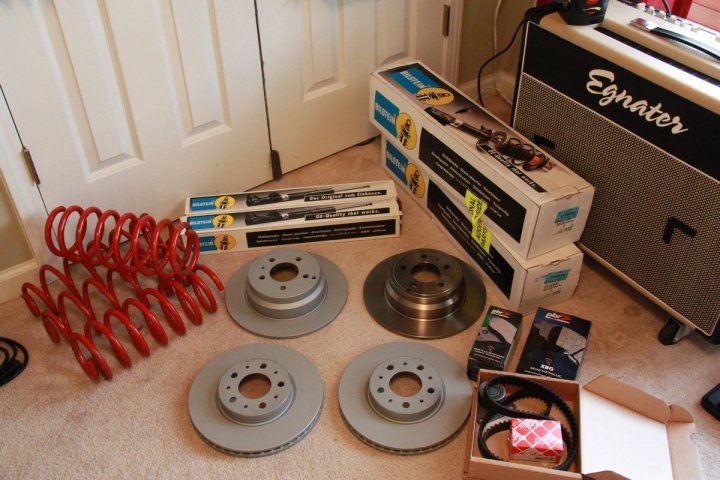
Auburn T5 » Did a lot of stage zero work – inspected vacuum lines, changed oil filter, fuel filter, top motor mount, k&N panel filter, timing belt, water pump, spark plugs) and enjoyed trouble free driving for 60k miles. We replaced the stock worn out suspension with Bilstein touring shocks and struts as well as lowered it a little on B&G S2 sport springs. It gave the car a better stance and the ride was easily as comfortable as stock but much less body roll and less bouncy/floaty on bumps and stuff. Tighter overall but yet more comfortable at the same time. We also replaced the brake pads and slightly warped rotors with bits from IPD and Samco intercooler hoses.
At 150k miles, the transmission took a dump with an error code revealing failed shift solenoids. Car would sluggishly move through the first 3 gears and then go into neutral instead of overdrive.
Consulted local transmission shop deemed worthy by my mechanic to work on european cars and they wanted $2200 to rebuild. I found a replacement on ebay with 90k miles for $500 shipped. Done. Mechanic made the swap for $400.
Back story
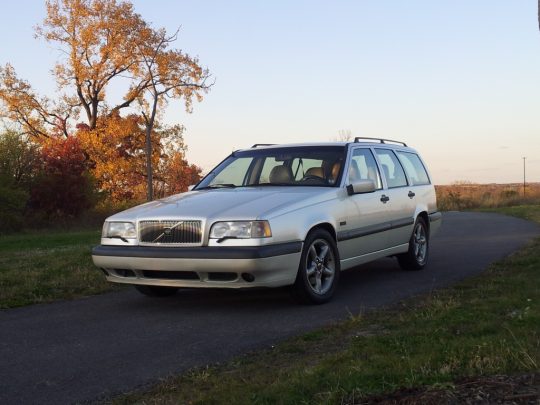
– Wife retired her old 240DL wagon, inherited her granddad’s 740GL sedan, got hit and totalled. Found a mint 99 S70 T5 in early 2005. 1 owner, impeccable maintenance record, well taken care of, etc.
Mis-matched wheels and All
We also replaced a rattling exhaust with the full OBX turboback exhaust. This was back when the whole thing was $300 shipped. Great quality for the money. I took the down pipe to our local performance exhaust shop and had them weld in an extra o2 sensor bung (temporarily antiseized & plugged) in the event that I would want to run wideband in the future. I also cut the mid pipe and slipped on a high flow Catco converter held with a couple stainless steel band clamps.


At 150k miles, the transmission took a dump with an error code revealing failed shift solenoids. Car would sluggishly move through the first 3 gears and then go into neutral instead of overdrive.
Consulted local transmission shop deemed worthy by my mechanic to work on european cars and they wanted $2200 to rebuild. I found a replacement on ebay with 90k miles for $500 shipped. Done. Mechanic made the swap for $400.
Wife at this point was shaken by the fact that something else to go wrong may be just around the corner and with so much commuting she does, she didn’t want to risk getting stranded in the middle of nowhere so we retired the T5 to the garage and she got a 2010 Audi A4. It was bittersweet parting but she loved the A4 after test driving it and it’s a very pretty car

And there the T5 sat for nearly a year and a half… kicked to the curb for time to forget. I would occasionally crank the car and let it run but never bothered to actually drive it. Turns out, I would have been mad if I did. There were issues brewing.
I eventually got around to driving the car basically after pulling it out of the garage one day to do some cleaning. The idle was really nasty, check engine light was on and the car was not making ANY power. In fact, when I planted the accelerator, the car would misfire, backfire and sound like it was all choked up and sputter. Zero acceleration. It was ok under light driving though but something was bad wrong and I feared the worst. Also the steering felt strange and stiff which I assumed was from low power steering fluid.
I got a code scanner to see what the deal was and discovered codes for both o2 sensors, boost control solenoid, MAF, evap leak and VVT solenoid… great.
After google led me here for the evap leak code, I discovered this split vac hose at the evap canister.

Done

I had sprayed the MAF sensor not too long before and that didn’t fix the MAF code so I just bought a new one from FCP and got it over with.
I also discovered while I was under the car looking for the evap canister leak what was causing the rear 02 sensor code. The OBX exhaust/cat necessitated extending the wires of the rear o2 sensor. It worked but there was excess wire I had originally bundled/zip tied and I suspect when the mechanic dropped the trans to replace it, he didn’t get the wires re-connected and zip tied the way they needed to be (I’m assuming) because the excess wire somehow got wrapped up and tangled in the steering column and subsequently wires torn from the plug going into the wiring harness. Well that explained the stiff steering sensation
It also revealed several other things. The wires weren’t cleanly torn from the plug. there were bare parts of the wire still attached to the wiring harness plug that were resting on the bare metal frame. When I saw this, I almost certainly knew there was a fuse that was blown. Sure enough. Fuse 14 is blown. Discovered it’s tied to the o2 sensors, emissions controls and boost solenoid!
I replaced the fuse, unplugged what was left of the rear o2 sensor wire plug so the wires weren’t there any more and pulled out of the driveway. INSTANT POWER. I was pleasantly surprised that there was nothing major wrong. The boost didn’t feel 100% or consistent though so back to the garage.
I decided now was as good a time as any to change spark plugs and finally do away with all of the vacuum lines under the hood. I ordered 5 feet of silicone vacuum hose from boostcontroller.com in size 4mm, 6mm and 8mm as these are the main sizes used.
I discovered when changing the spark plugs (I used NGK BRK7E Plugs gapped between .026~.027″) that a couple of the coil packs were falling apart. No good. I’m sure they’re still ok to use but the IPD coil packs are inexpensive and would give me a bit more piece of mind so in they went.
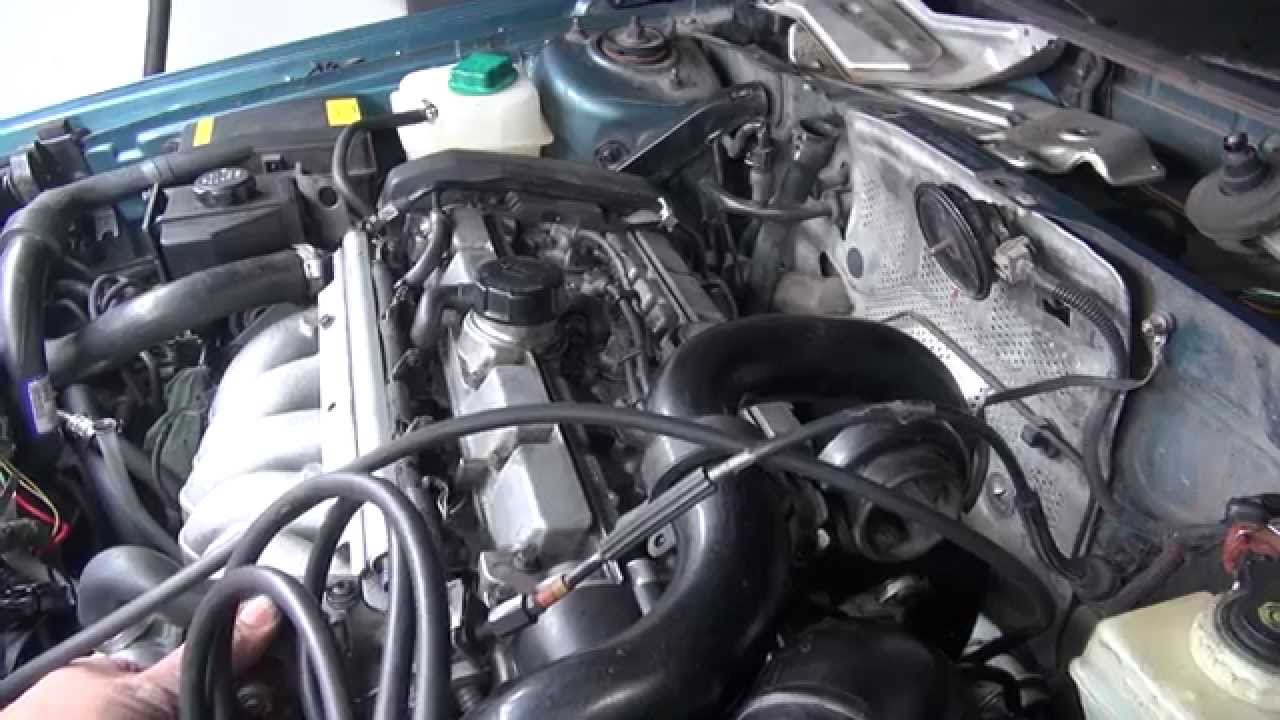
The fun begins

What a mess!

While I had everything apart, I took the liberty of wiping down as much as I could with simple green and some old rags. The area around the turbo/wastegate was filthy and as I was removing the old vacuum lines, they were LITERALLY disintegrating in my hands
I also decided that now was as good a time as any to ditch the old boost solenoid and replace it with a more durable/reliable unit from ARD.

To ensure the car was running at proper boost levels, I also got an Autometer ultralite II mechanical boost gauge from boostcontroller.com and a Lotek gauge pod from Lotek.
http://www.gaugepods.com/volvo.html

The vacuum lines weren’t too hard to install. There was just 1 in particular that was a real pain and that was the one on the compressor housing. There are 2 metal 90* elbows and hoses RIGHT under the turbo that prohibited me from easily slipping the tighter fitting silicone line on there. I tried a 4mm hose at first since that’s what the rest of the turbo vac lines are but it kept splitting when I tried to slip it on. Not even a little graphite grease could help so I used 6mm hose instead and it went on much easier and was nice and snug even before putting the little metal clamp on.
Installation was pretty simple for the gauge. It included a t-barb for tapping into the vacuum line that goes to the intake manifold.

Vovo added a convinient rubber plug on the firewall to route the vacuum line to the gauge which ends up coming out above the pedals under the dash.


And up out from the side of the dash

For the wiring, I tapped into the headlamp control switch and used a volt meter to test which wires were ground and which one received power on ignition. This way the gauge will illuminate once the car is cranked and the gauge won’t stay on all the time to drain the battery and will be illuminated whether the lights are on or off. I think it was these 2 wires but I’m not 100% sure

Everything all buttoned back up. Valve cover still off as I’m waiting on some new wire loom to re-cover all the wires. I also still need to replace the oil cap gasket and clean up the oil and giblets of plastic wire loom that’s disintegrated over the years.

Gauge/pod installed. (Protip: the mounting screw they provide is too long.) It will hit the A pillar before going all the way in so take the screw to home depot and find a shorter one with the same diameter/thread for a perfect fit. This shows the default screw not taking the pod perfectly flush with the pillar. looks good enough for now but I’ll be getting a shorter screw this weekend to fix it. I also used some double sided 3M automotive badge adhesive tape (SUPER strong) on the lower part of the pod to ensure it stays put. I also used a dremel and cutting disk to chop off about half an inch of one of the screws on the back of the gauge. It was hitting the inside of the pod preventing it from being pushed completely flush into the pod and rotating straight.

So how does it drive?
After taking it for a test drive, the car now pulls HARD. Spins the tires a little in the upper RPM’s in 1st gear and with TCS off will straight up roast them if too much throttle is applied in turns/bends.
Boost builds perfectly and holds steady at 12~13 psi in 2nd/3rd gear all the way to redline. Dare I say it drives better than it did when we bought the car!
Satisfied with the way the car ran, I decided to turn my attention to the exterior. I have always loved the way jewel headlamps looked on these cars but could never justify dropping over $500 for the headlamps. I found a set of off brand Jewels
http://www.autolightsbulbs.com/2003-200 … 17177.aspx
And clear corners from Nalley Volvo. (don’t have the links but the part numbers are 9467896 and 9467897)
I also wanted an XC grille but didn’t want to spend $100 just yet so I decided to see what the stock grille would look like if I blacked out the center “waterfall”. Wasn’t disappointed and cost me a few bucks for a can of spraypaint and painters tape.

I also got a new lower grille insert that we lost a couple years ago to a piece of retread on the interstate (could have been a LOT worse!)
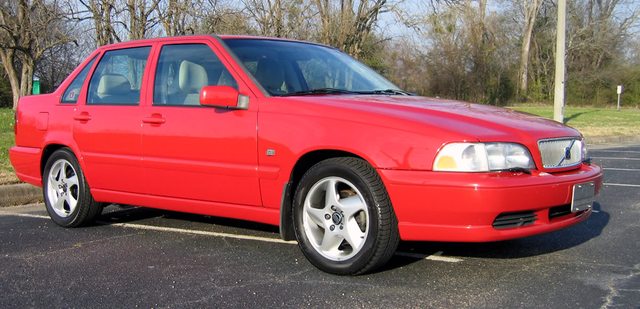
The end result of the face lift is pretty great.

Side shot (crap cell phone pic)

Lastly (for now) the stock radio had to go. I found a kenwood mp3 player for dirt cheap as well as the wire harness adapter and dash mounting kit. YAY no more burning disks!

I’m 100% happy with the car and how it’s turned out. We tried selling it several times but never could get a buyer due to the check engine light. We considered ditching it for scrap yard money but I never wanted to do that because I knew it was still a perfectly good car and I was of course right. I’m just glad I didn’t have to pay an arm and a leg to get it revived.
The car is actually respectably quick for what it is.
I raced my brother from a 20mph roll in his 2006 330i bmw and had him by about half a car length when we let up just shy of 100mph.
The S70 started pulling away when it hit 3rd gear and was only drawing out that lead as we kept going.
I’m now using it as a daily driver a few days out of the week to keep the miles off my mustang. Future mods are fairly small as I want to keep the car a reliable daily driver. I’ve talked with Lucky at ARD about getting the “green” tune so that’s on the list as well as the Snabb intake pipe. Luck says the snabb pipe even without the tune is probably worth around 10hp due to the stock pipe’s restrictive nature.
I’m also trying to hunt down a set of 17″ comet wheels. Pegs are also an option but I had them on my 98 and it seems like everyone’s got pegs and I really like the way the comets look. I’m just having a hard time finding someone wiling to sell a set of the 17″ version. I absolutely cannot bring myself to pay $1300 for a NEW set of them from volvo when I can get 17″ pegs and tire for half that.
I may also install an IPD front swaybar but that was a pain in the butt when I installed it on my 98 and I’m not 100% sure I HAVE to have it on this.
I also want to drop in a set of HID’s. I’ve got retrosolutions HID’s in my mustang and they’re outstanding though more expensive than the DDM’s I used to have in this 99. The jewels are a different bulb so I’d have to buy new bulbs if I wanted to use them but I also would want to drop down to 35 watts instead of 55watts to ensure no unwanted glare meaning I’d have to buy a whole new kit. If anything, I could re-use the 55w ballasts and buy fog light bulbs and use them there. We’ll see.
The thread will remain a work in progress as I continue to update the car.
Thanks for sticking through the whole post!
TL;DR – I fixed a T5 left for dead.