Need a Step Timing Belt Replacement Tutorial?
MVS Forums member (now Contributor) deepsouth turns the DIY knob to Maximum and shows us how to do a timing belt in 33 steps. As well as each step, he lists tools used, photos and his deepest timing belt thoughts. And if you have any deep timing belt thoughts or questions, please ask!
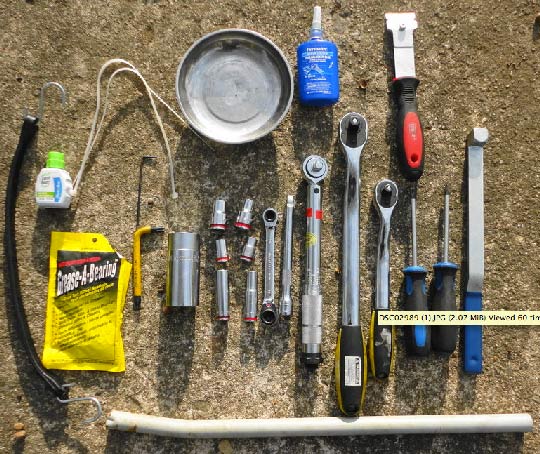
While you’re gathering the parts and tools you’ll need, please see this important post about the timing belt tensioner.
1998 V70 AWD 33 Step Timing Belt Replacement with Photos
- Remove spark plug cover and metal fuel line holder (T25 and T30).
- Remove two bolts from upper timing cover (10 mm).
- Remove coolant reservoir and level sensor and set on top of motor.
- Use serp belt tool to lock belt tensioner in place with hex wrench and remove serp belt.
- Set belt, tensioner and two bolts aside.
- Keep upper cover in place.
- Take off front right wheel and clip back fender skirt (10mm bolt), exposing crank pulley and hydraulic tensioner.
- Remove timing belt guard behind crank pulley (two 10mm bolts).
- Locate timing tick marks on intake and exhaust cams (I used white out to enhance the marks).
- Will take up to two revolutions for them to line up.
- Once my intake and exhaust cams were aligned the crank markings were perfect.
- After everything is lined up remove upper timing cover and mark position of old belt with whiteout at the top of exhaust and intake cam (this helps when installing the new belt–see photos).
- Remove top bolt of hydraulic tensioner (12mm bolt).
- Remove bottom bolt of tensioner (12 mm) and remove old tensioner.
- Cut old timing belt off.
- Remove tensioner pulley (T45 with jack handle cheater pipe).
- Remove idler pulley (two 12mm bolts).
- Remove 7 water pump bolts (10 mm) and remove water pump.
- In order to get it perfectly clean I had to clean from below and above.
- Use wheel bearing grease to coat both sides of new water pump gasket and hold in place.
- Torque to 25Nm.
- Install new idler (12mm and 20 Nm) and tensioner pulley (T45 and 40Nm).
- This was the most difficult step for me and took about 5 to 10 minutes to get it past the rubber bumper
- My exhaust cam had turned about 20 degrees and had to be rotated back.
- Using bungee pull timing tensioner up in order to keep tension while snaking new belt.
- Snake belt around idler pulley, over intake cam (use ziptie to hold in place), over exhaust cam (again using another zip tie to hold in place), around water pump and up over tensioner (still held taught by bungee).
- Remove bungee.
- If they don’t match, investigate further.
- If everything checks out pull pin on tensioner and cut off zip ties.
- Wait two or three minutes and rotate crank two full revolutions to make sure all three timing marks line up.
- Reinstall timing guard (two 10mm bolts), upper and lower timing cover (10mm bolt), spark plug cover (T30), serp belt tensioner (12mm) and serp belt.
- Reconnect coolant level sensor and replace tank.
- Fire her up!
Click on the Read More link below to see the whole enchilada!
1998 V70 AWD 33 Step Timing Belt Replacement with Photos