[Have a newer Volvo? See this S80, S60 and V70 2001+ Oil Change DIY forum topic.]
cn90 »
DIY: 1998 Volvo Engine Oil Change (& ATF Drain/Refill) made sweet and simple!
I wrote a short and sweet DIY for Oil Change using wood ramps and no need to jack the car up. Basically as sweet and simple as possible! You can do this for under 30 minutes.
NOTE: Best is to do this with warm engine, so after a trip somewhere, park it at home and let it cool down for 30 minutes or so. I change my oil twice a year, or about 5K-6K miles. I don’t want to get into a debate about change interval (Maintenance minder, 5K, 7.5K, 10K, and so on). This is what I do and is what I believe in: every 5-6K miles or so.
* WINTER: 5W30 Synthetic Oil for easier cold start.
* SUMMER: 10W30 Synthetic Oil (Standard Oil is fine too).
NAPA Synthetic is made by Valvoline, on sales for $3.39/qt a few times a year. If you keep watching for the sales, you will see that local autoparts store has Synthetic Oil on sales a few times a year. BEST is to buy in bulk quantity, about one year supply for your cars at home.
1. Gather your tools: 17-mm wrench, rubber hammer (because it is tough to fit a torque wrench with limited ground clearance at home); 6 qts of engine oil; drain pan; rubber gloves; funnel (a plumbing screen is useful to catch debris if you do this outside under the trees!) and oil filter…..read on:
* Early models of 850, S/V70 (1993-1998) use “spin-on canister” filter. OEM is Mann W917 (Bosch 72138 is basically Mann). Good alternatives are Bosch 3323, Mahle OC-204, NAPA Gold, Wix oil filters. Stay away from Fram at all cost!
* Later models (1999-2010 etc.) use Filter Cartridge (not spin-on type!). You need the proper removal tool to remove the Plastic Cap to avoid damage to it. So if you have 1999-later models, watch this Video by IPD USA (lots of good tips):
2. Front of Car on wood ramps. Dimension of wood ramps are in picture. You can ask Home Depot to cut the wood for you. Wood ramps are cheap and solid, lasting years and years.
The wood ramps you see here are 10 years old and going strong after hundreds of oil changes etc.
Put car in Park and apply Parking Brake.
3. Start the engine and run it for 30 seconds to mix up the oil and any contaminants (remember the engine is still warm from the previous trip!). Then shut the engine.
4. Use 17-mm wrench to open the drain bolt. To avoid engine oil splashing out, I use this trick: when the drain bolt is just about to come out: I hold the bolt against the oil pan and bevel the bolt about 45 degrees or so to allow oil to flow downward rather than shooting out.
5. The book says use a new washer but…..I have been fixing Volvo, BMW, and Honda for 20 years, unless the drain washer is bad, I have always re-used the washers with no problem at all for the last 20 years.
The trick: remember to look at the washer for proper orientation. When a drain bolt is tightened, it indents the washer a little bit so keep the same orientation, i.e., the indentation on the washer faces the drain bolt.
In the pictures, you can see my drain bolt and washer are still original from 1998 when I bought the car new! With proper use of tool, technique, the drain bolt and washer lasts forever.
6. Slightly open the Engine Oil FILLER Cap a bit to allow air to enter the engine. Do NOT remove the Engine Oil FILLER Cap completely at this stage to avoid debris falling inside the engine.
7. Sears Oil Filter Removal Tool helps remove a stubborn Oil Filter. It is a breeze with this tool. Then drain oil from old Oil Filter into Drain Pan.
8. Now clean the Oil Filter Housing area on the engine well. If any rubber gasket is left behind, you must remove it before installing new Oil Filter!
9. Prime the new Oil Filter to fill it up to 3/4 or so (about 1 inch below surface). Then smear a bit of oil on the rubber gasket. Now install it using rubber glove for good grip.
10. After hand-tightening, turn the Oil Filter with your hand (wear rubber gloves for good grip) until you can’t turn it any more. This is about another 1/2 turn after the rubber gasket hits the metal housing.
Do NOT ever use any hand tool (like a ratchet) to tighten the Oil Filter because it can cause damage to the Oil Filter causing leak later!
I marked the oil filter with sharpie to show you how you can tell it turns 1/2 way.
10. Once the oil has dripped completely from the oil sump.
– Re-install the drain bolt and washer (if re-use old washer, pay attention to the orientation I discussed above).
– Since this is at home (compared with the shop with the car up in the air), it is impossible to use a torque wrench with limited ground clearance. The torque for the drain bolt is approx. 30 ft-lb. I have never used a torque wrench for the drain bolts during my 20 years and here is what I do: hand-tighten the drain bolt until it stops.
– Viewing from the front of the car, I place the 17-mm wrench (use the box end) at approx. 6:00 o’clock position, and with a rubber hammer, I gently tap the wrench until it is at 4:30 o’clock position (about 45-degree turn).
– Anyway this trick works for me during the last 20 years (don’t ask me if this is right or wrong……LOL….).
11. Wipe off any oil at 1-drain plug area; 2-oil filter area just in case any oil appears there later, you know it is a leak (hope not!) and not from residual oil…LOL.
12. Add 6 qts of your favorite engine oil (well, some of that was already poured into the oil filter previously!) using a funnel (with metal screen if you are a meticulous person!), then close oil cap. You can see on a windy day, I spilled some oil LOL. Should have used the Funnel!
13. Start the engine, do NOT drive car off the ramps yet!
– Make sure Oil Pressure Light is OFF within 2-3 seconds.
– Check for leaks at Oil Filter and Oil Drain Bolt areas.
– There should be no leak!
– Back up car off ramps on a level surface.
– Shut Engine.
– Wait 1-2 minutes for oil to settle, then Check Oil Level at Dipstick.
14. My 1998 V70 Service Reminder in the dash requires a special tool to shut if off, so I placed a small piece of black electrical tape over it 10 years ago and have not missed this stupid light at all.
15. That is all boys and girls, congrats on a job well-done and go and drink some beer….LOL.
BONUS: ATF Drain/Refill
If you want to do a complete flush (which I did a few years back), search forum for info. There is a thread by “MadeinJapan” etc. for a complete flush (by disconnecting the hose at the Trans Cooler).
– This time I only do a Simple Drain/Refill every 20K miles or so.
– I use Mobil 1 ATF, for Simple Drain/Refill, you need about 2.5 qts or so (read on below)
– Use 24-mm wrench to remove drain plug.
Again, watch the washer orientation to re-use it.
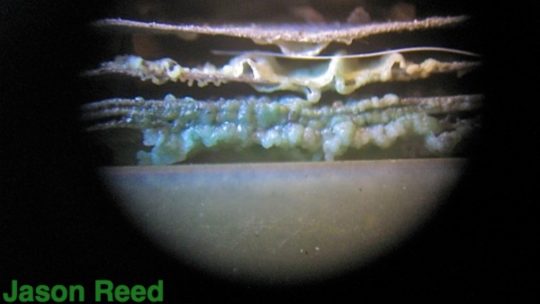
Note the gunk (metal shavings) after 20K miles. Clean the drain plug as shown.
– Re-install the drain plug. I just snug it and use the rubber hammer to turn it about 45 —> 60 degrees or so.
– Using a small funnel, fill ATF via dipstick housing. Dirt and Lint/Debris are #1 enemy of the Auto Trans, so use special precaution (metal screen with funnel) if you work under a tree! Also, rag, paper towel can gives off small lint etc. so pay attention to cleanliness!
– Add 2.5 qts of Mobil 1ATF, check dipstick, it should be at MAX (cold engine).
However, check the ATF dipstick with engine running and after you have shifted through the gears.
Do this after 3 minutes of engine running. See your owners manual!
You may need to add another 0.5 —> 1 qt!
– If you have not done so, it is time to install screw type clamps on the Upper and Lower Trans Cooler Connectors to prevent them from coming off (search forum for pictures)!
Don’t ask me how I know this LOL.
Drive the car around the blocks shifting into different gears, then bring it back home and check all fluid levels (engine oil and ATF) another time to be sure.
Time for another beer LOL.
Hope this helps.
PS: By laws, any place that sells oil is supposed to take dirty oil back for free. I bring my old oil to local “Valvoline Oil Change”, and they dispose the old oil for free.
DIY: 98 V70 Engine Oil Change (& ATF Change): the Easy Way!
Welcome to Matthews Volvo Site! Your one stop shop for all Volvo news, help and DIY fixes. We feature the Volvo Repair Database, the best Volvo Forum, and an awesome monthly Volvo newsletter. Joining is always free!
Subscribe to the MVS Newsletter
The MVS Volvo Newsletter is a once-a-month email delivered to your email. It’s simple to unsubscribe at any time if you change your mind.
Visit The Official Volvo Cars Websi
Last Updated on May 6, 2022