


precopster »
Hi there, some of you may recall this post a little while ago and I have been hoping to get this on much sooner but alas, time being the thief it is…. This post should apply to all 850s and gen 1 V70s/S70s. I chose to go with showing how the heater coupling is replaced in addition to the heater core as when I attempted to replace JUST the heater core I had leaking in the cockpit. This may have been in part my badly rusted IRON heater pipes, which I replaced with the newer aluminium ones from V70/later 850. As the inner seal kit is not available the only choice is to replace the entire coupling.
Tools & Materials Required
- Torx driver set
- New heater hose clamps
- Flat screwdriver
- Old towels
- Zip ties or wire
- New heater core part number 9144221 (Behr is OEM & the heater core of choice)
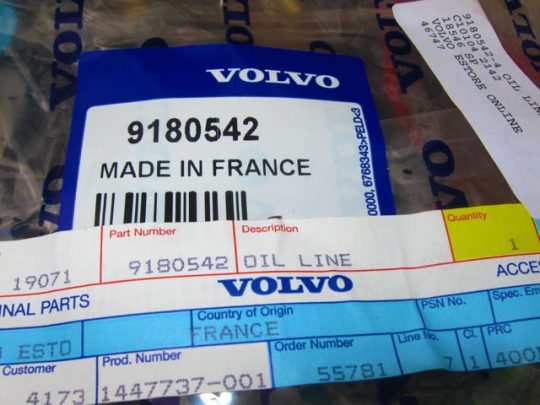
- Heater coupling part number 3522035 (comes with all seals and clips)
- Heater hoses to suit your vehicle (turbo hoses differ so I’ll let you all make your own choices) If you can remove them from the coupling easily and there is little corrosion you can opt to retain them
Procedure
Step 1
Undo the driver’s side kick panel and set aside (from memory 3 torx screws)
Step 2
Undo the black plastic console shield on the driver’s side (a torx screw closer to the handbrake) and peel the carpet right back
Step 3
Undo the horizontal torx screws on the heater box as in pic 1 (one on driver’s side and one on passenger’s side)Pic 1 Undo the horizontal torx screws (one on driver’s side and one on passenger side)
Step 4
Undo the vertical torx screws as is pic 2 (one on driver’s side and one on passenger’s side)Pic 2 Undo the vertical torx screws (one on driver’s side and one on passenger side)
Step 5
Place some old towels in the footwell to catch any POSSIBLY HOT coolant. Reach around to where the heater pipes clip into the coupling and while pulling back on the heater core press both clips. The heater pipes should unlatch after a couple of attempts.Pic 3 Heater pipe clips
Step 6
Before attempting to flip the heater core out of it’s sealing rubbers pull the a/c drain hose out of the floor and push it to one side
Step 7
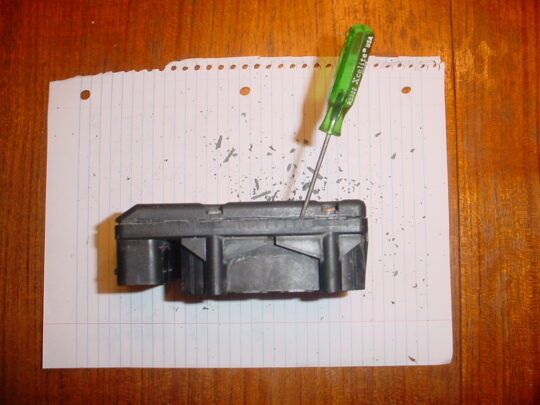
Again place some old towels in the footwell to catch any coolant that may spill and beware if it is hot!! Pull the heater core out and place it on the ground.Pic 4 The heater core removed and ready for disassembly
Step 8
Undo the four torx screws attaching the core to the outer heater box (refer pic 5)Pic 5 Undo the four torx screws to separate the core from the heater box
Step 9
Undo the large torx screw which attaches the pipes to the heater core (Pic 6)Pic 6 Undo the large torx screw
Step 10
Clean up the ends of the heater pipes if they have any corrosion and place new seals over the ends (Pic 7) These seals come with the new core. At this point you’ll notice that my pipes change from black to silver. This is because I replaced the iron pipes with some aluminium ones from a wrecking yard because the ends were badly corroded and I didn’t want to pull the heater core twice; once is enough!! If you are doing this be sure to ask the wrecking yard for the LONGER torx screw.Pic 7 Remove the old seals and place the new ones over the pipes
Step 11
Attach the new heater core to the lower heater box with the 4 torx srews
Step 12
Now for the fun bit!! In the engine bay push both heater hoses clips while pulling on the hoses to remove the heater hoses. Have a bucket under the car to catch the coolant or if your engine is dirty & you don’t want to contaminate the coolant just tie them up pointing up.
Step 13
In the engine bay loosen the 2 torx screws (In Pic 8) that hold the metal plate over the heater coupling and remove the plate by prying it off with a flat screwdriver. Push the coupling back through the firewall and while doing this rotate it 90 degrees (this is the key to getting it removed easily)Pic 8 Undo the retaining plate
Step 14
In the cabin, while holding the coupling firmly pull it out past the rubber floor backing (if you have rotated it 90 degrees it should clear with just a little effort)
Step 15
Remove the clips/seals from the inner side of the new heater coupling and place them on the ends of your heater pipes as in pic 9 belowPic 9 Place the clips/seals on the heater pipes
Step 16
Mark the top of the new heater coupling (refer to the pic of the coupling protruding from the firewall) Remove the clips and seals from the firewall side of the heater coupling to avoid bending/damaging them and pass the coupling from the cabin side tilted at 90 degrees then rotate it another 90 degrees so it faces correctly once it passes the rubber carpet backing.
Step 17
Install the metal holding plate; at this point centre the plate as much as possible and DONT tighten the screws all the way; give them some torque but not enough to budge easily. This gives the assembly some room to move as the heater pipes find their way to the coupling.
Step 18
Go and have a beverage: you’ve earned it!! Rotate the clips on the ends of the heater pipes so they will match the squared end of the cabin side coupling. Now time to place the heater core back in the car.
Pretty mich a reversal of the dismantle procedure; be sure to re-tighten the coupling plate on the engine bay side, refit your heater hoses and refill with appropriate coolant. Test for leaks, then replace the kick panels.
ENJOY THE WARM COMFORTING AIR IN THE KNOWLEDGE YOU SAVED YOURSELF SOME REAL DOLLARS AND DID A BETTER THAN DEALER-CLASS JOB

6 Comments
I just replaced my heater core, it went super easy and quick (I had the old core out of the car in 12 minutes?!)
My only issue was having to tighten the coolant lines with a ratchet due to leakage. Then realized…what’s that little bag of O-rings on my seat? But in 5 minutes and another half gallon of coolant it is all set now.
This was super easy in my 2000 V70 XC. You don’t need to spend huge dollars at a dealer to fix this!
IPD has a great video on youtube on this, just search “V70 heater core”
I am not a gear head, but I watched the tutorial (link below) and it took much less than an hour to complete. Use an OEM part, it is worth the couple extra dollars. What was most surprising was how well the panels went back together.
http://www.youtube.com/watch?v=cD7L9hzHtNo
There are also questions, on the web for removing the coolant built up on the inside of the windshield. Exterior windshield washer fluid is the only thing that works. Soak a paper towel and wiped clean with dry towel, takes a couple times to get all residue.
Im having an issue getting the heater core from the black sleeve. I have a volvo v70 xc 2001. I have pulled both pins on the aluminum tubes, but there is a little black relay that is attached to my brake pedal that is preventing the heater from just being pulled straight out, I have the car inoperative at the moment till I can figure out how to remove the heater core, any advice would be greatly appreciated. Thank you
I have a 2000 volvo s70 non turbo.The heater core went bad and the pipes where rusty .got new pipes and heater core and also got a new connectors because when I was removing the old pipes I broke the connections at the firewall.I putting that new piece in but I dont know where way it installs (the piece that attaches to the firewall)It has a little straight place on the part I dont know if that goes up or down and that is where I am stuck…yes I am dumb