

Ever thought of using a saw to fix your glove box? Read on.
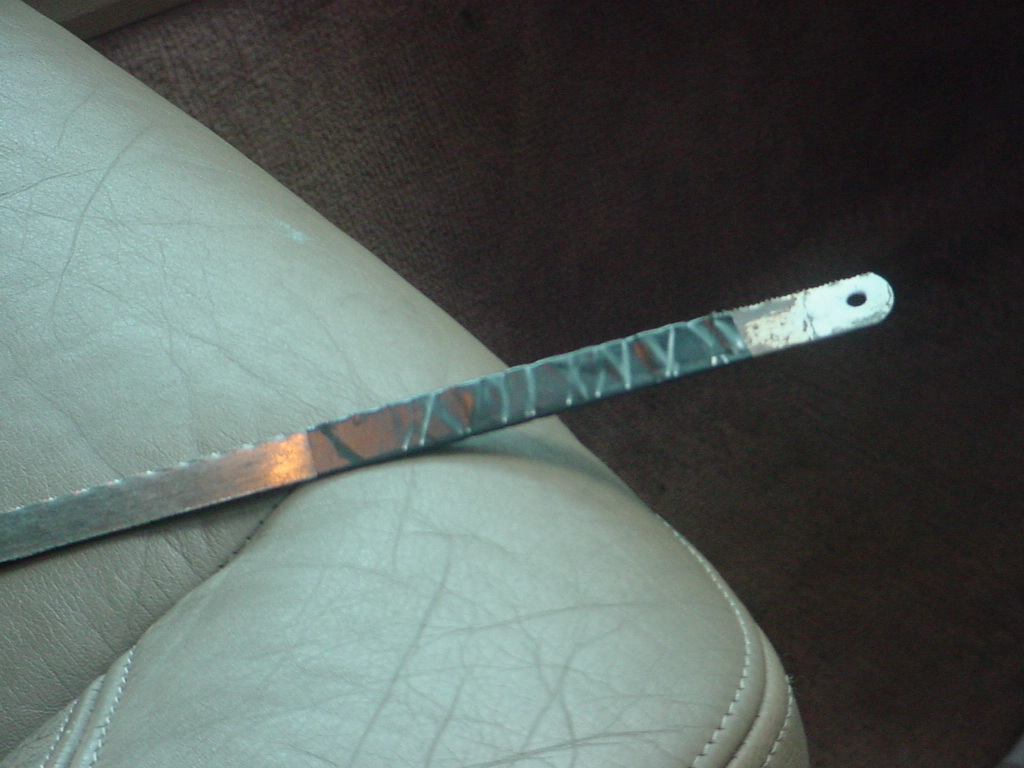
Ozark Lee » Based on all of the good information on this site I set out to repair my faulty glove box latch on a ’94 850. The hardest part of the job is sawing through the catch hoop or, as Volvo calls it, the brace. I used a largish screwdriver to pry the glove box door lid out “as far as was comfortable” so as to give as much room as possible to saw the hoop. As has been noted you should tape off all but about 1” of the blade so as to not tear up the vinyl on the glove box lid or the air bag cover directly above it.
The taped off hack saw blade.
Once you saw through both sides of the hoop (brace) the door magically opens and reveals an archive into the previous owner’s life, he/she couldn’t open it either.
The next step is to remove the six torx head screws that hold in the interior of the glove box. They use a T-25 torx bit and the ones behind the door arms are a little tough to get to since they are directly behind the arms. I gently moved the arms aside with the socket extension so as to get a bite on the screw.
Removing the torx head screws.
The next step is to release the door arms from the door. On the right side of each arm is a small hole, gently press a small screwdriver into the hole which will release the catch. Once it releases from the door lift it up and release the other arm in the same manner. When both arms are released the door will fall slightly.
Removing the torx head screws.
The next step is to release the door arms from the door. On the right side of each arm is a small hole, gently press a small screwdriver into the hole which will release the catch. Once it releases from the door lift it up and release the other arm in the same manner. When both arms are released the door will fall slightly.Releasing the door arms.
You are now ready to remove the inner portion of the glove box. In my case there were sharp portions of the hoop (brace) exposed so I had to pull the center of the upper portion of the box down so as to begin to extract it. Pull it out a little bit and then feed the arms back through the inner glove box slots. Once both arms are clear of the inner glove box you can complete the removal of the inner glove box.
The next step is to remove the 4 torx head screws that hold the lower hinges on the glove box door. They to take a T-25 bit. Once the 4 screws are removed you can take to door to a more comfortable place and fix a cocktail.
At this point you still have the other end of the sawed off hoop (brace) protruding from the glove box door. If your “more comfortable place” is, perhaps, your dining room table, now is a good time to remove the sharp sawed off portion of the hoop by pushing the catch upward with straight slot screwdriver. This will help to not scratch anything that shouldn’t be scratched.
On the interior portion of the door there are 7 phillips head screws that affix the door front to the rear section which houses the mechanical parts of the latch. Remove the screws and separate the two halves of the door assembly.The guts of the glove box door after the cover is removed.
I purchased the replacement latch and hoop (brace) from the dealer. All said they were US $59.00, about $10.00 over the internet replacements but there was no freight – I figure it was a wash. My kit came with the latch handle, the connecting rod, and the latch assembly. I noticed 2 things right away, the latch assembly has been completely redesigned and the entire assembly is made in France. I’m glad it has been redesigned.
Since I had a new handle I decided to install it, usually it is not bad so it really isn’t necessary. The new handle comes without a lock so it is necessary to remove your old lock from your original handle assembly and insert it into your new handle assembly. To remove the lock, gently pry out the two locking tabs at the very top of the white plastic lock slider. The lock will release from the old handle. I wasn’t paying a lot of attention when I removed the lock but it appears that there is a possibility that the lock may come apart at this step. Be careful.A bad picture but at the very top of the white lock lever are the two tabs that hold the lock in place.
Insert the lock into the new handle assembly and test that the lock slide move back and forth with the key.Handle in the locked position, make sure the upper portion of the lock lever moves from side to side with the key.
At this point remove the old handle assembly by removing the three “Cross Head” screws. They look like a phillips head but they are flat at the bottom and a phillips screwdriver won’t work. I used a small straight slot screwdriver to remove and replace them.
Replace the handle assembly in the reverse manner as it was removed.
I next replaced the “extension rod” by removing it and replacing it in the same manner as it came out. The return spring will pull it out of its final position but that gets dealt with in the next step.
The next step is to replace the latch assembly by removing the three “Cross Head” screws with a small straight blade screwdriver. The only trick here is to make sure that the flange on the extension rod is on the latch assembly side of the plastic guide that the rod rides in.
Test the entire assembly to make sure it works correctly by taking your sawed off hoop and seeing if it releases with the lever after you insert it into the latch.
Reassemble the two halves of the door by replacing the seven screws that were removed in the disassembly process.
At this point you will need to replace the remnants of the catch hoop (brace) below the airbag that was sawed off in step 1. Remove the two phillips head screws and replace it with a new part.
The next step is to re-install the door assembly by replacing the four torx head screws into the lower portion of the dash.
From here on replacement process is the opposite of the removal process. The only real trick is to feed the door arms through the interior glove box as it goes back into its original space. The arms will “click” into the door with a gentle press. Then replace the six torx head screws that hold the interior glove box into the dash.
Adjustment
My door closed a little tough so I did the pliers adjustment on the hoop (brace) by bending it up and down a little bit until the door closed smoothly. My next step is to invent a tool to release the latch without sawing off the hoop!
Hope this helps.
Glove Box Latch Repair Version 3
Last Updated on May 6, 2022


1 Comment
I just had to use the hack saw blade method to cut the “brace” in the glove box on a 850 GLT after the latch unexpectedly failed. To fix the latch and the brace is a major deal. Here is a simpler way if you don’t need to lock your glove box but want it to close nicely. Just cut about 6 small squares of self-sticking velcro and place them strategically around the inside of the box and door and BAM you are done.